
DIY photo album: scrapbooking to preserve memories. Master class on creating a photo album
Nice creative process creating something new creates positive emotions in our minds. And if you work with photographs, newspaper clippings, which by their nature embody vivid memorable moments of life, then it is logical to assume that emotions double, taking us into best moments years lived. Creating a photo album with your own hands is called scrapbooking.
The Origins of Scrapbooking
Based on your knowledge of English, you must have already guessed from the name that this type creativity came to us from Foggy Albion, whose local residents, conservative by nature, are accustomed to paying special meaning their origin, honor long-standing traditions and leave unique information albums for posterity as a long-lasting memory of themselves.
The first ancient album using the scrapbooking technique appeared in 1598 in England; its author collected diverse information that was significant to him, and then he did not know that his hobby would become the beginning of a new branch of art. In 1880, when the camera became available to the population, photos were added to scrapbooking, and this type of creativity, in the wake of the popularity of photography, spread not only to Europe, but also began to actively develop beyond its borders.
DIY photo album: scrapbooking
Modern craftsmen, when creating their own “scrapbook”, often devote it to important life events. This could be a photo album for a newborn, wedding album family album or anniversary album, made in the style of scrapbooking with your own hands. 
A distinctive feature of a scrapbook from an ordinary photo album is its original design. It can be created in any shape in any style using folding pages and even 3D pages. The main thing in this matter is the breadth of scope of the author’s creative thought.
Scrapbooking for Beginners: Photo Album
A novice scrapbooker, first of all, needs to decide on the topic that he will present on the pages of his photo album. Then you should close your eyes and try to mentally imagine the finished album. Now thoughts appeared. 
Taking a pencil, try to recreate in detail the image that flashed in your head on a sheet of paper. Particular attention should be paid color scheme, forms and design features. If problems arise, don’t worry, many ideas will come to you as you work.
To create any photo album you need material. Let's look at, for example, a traveler's album in scrapbooking style. It should include high-quality photographs in unforgettable places, receipts from a restaurant, a metro map, a bracelet from a water park. In general, everything that makes you smile when mentioned. 
So, armed with 10 sheets of paper measuring 30x30 or 20x20, a cardboard base for them, nail scissors or a breadboard knife, a multifunctional hole punch, a roller cutter and a set of curly scissors, we get to work. Yes, don't forget to buy paints, double-sided tape and a pencil for gluing the paper together.
How to make a photo album in scrapbooking style?
Remember that when decorating an album with your own hands for the first time, you should gain experience and knowledge, so first create a few pages with maximum diligence and inspiration. The first page, like all subsequent ones, begins with the correct composition. Composition in scrapbooking is the basis. She is responsible for the aesthetic arrangement of elements on the page and for the correct disclosure of the core of the topic. In terms of composition, there are 5 elements on a page: background, title, description, background, and decor. 
- The background is the first element that is applied to the page, and its color will be the main one. The background must be ideally selected to maintain color balance, because other elements that differ in color are applied to it.
- Title - a word or phrase that reveals the essence of the composition.
- Description – text located on the page, describing what is happening in the photo, aimed at awakening the feelings experienced at that moment.
- The backing is a geometric figure cut out, usually in the same tone as the background, to match the photograph.
- Decor – a set of page decorations.
 The main task of a newbie scrapbooker is to create a complete harmonious composition, the correct arrangement of elements in accordance with semantic, compositional and geometric centers. Next, you should strictly follow the written plan, do not be afraid to experiment and do not forget about the rules of composition. You can also use the master class tips from the video:
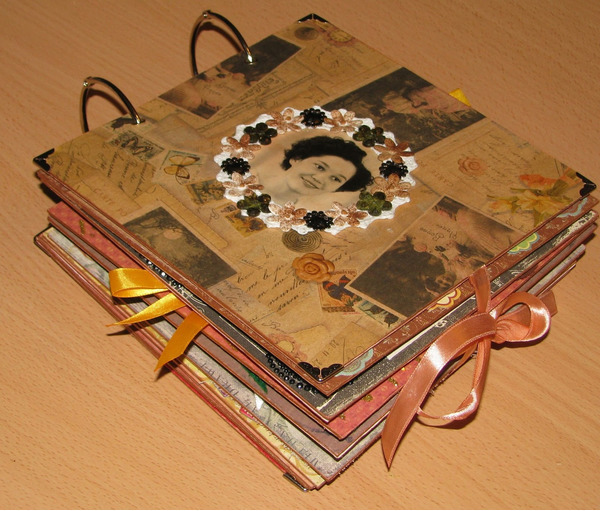
DIY vintage style photo album
Vintage style remains one of the most popular in scrapbooking. Its peculiarity is to give the photo album an artificial antiquity with the help of yellowed newspaper clippings, previously fashionable colors, as well as beads, lace and other decor typical of that era.
It should be noted that photos must also be taken in accordance with the time chosen. To achieve maximum realism special attention It is worth paying attention to the production of the cover, and the asymmetry of the composition in this style will look logical and special. Just remember to balance the compositional axis.
Each of us is obliged to value time, to enjoy every minute we live, because it is the love of life that gives us harmony in the heart, which we call happiness. And the old scrapbooking album teaches this to our loved ones.
Children's photo album using scrapbooking technique
The very type of needlework appeared thanks to imagination and skill, as well as the need to make monotonous photo albums unique. Gradually, craftswomen found unusual solutions for decorating photo albums, later they moved to, and now can be found in the most and in decoration personal diaries and in the design of love confessions.

There are several established styles, which are quite easy to distinguish from each other:
- « clean and simple "involves a minimum of decoration. The space must be organized so that emptiness becomes an element of the work. Calibrated lines and unusual solutions are the secret of this style;
- « vintage" Things made in this style will help you immerse yourself in ancient times and enjoy the decorations of Victorian England;
- « European" This style does not like a lot of decor; all attention should be focused on the photograph. Therefore, the photo is cropped in the form of a certain object or the edge is decorated in an unusual way;
- « shabby chic" Not to be confused with vintage items. Shabby chic welcomes ribbons and bows, lace and, of course, fraying.
- « American" This is where you can safely use jewelry. Decor in this style is the main part of the work. Numerous elements must necessarily form a single composition.

Also for beginners need to decide on techniques which they will use during their work. And there are many of them. We will list the most popular and suitable for a beginning needlewoman.
Among them are:
- stamping(involves the use of special applicators and stamps with various patterns);
- cropping(photos are cropped so that only the most important remains);
- decoupage(using special pictures and applying them to paper or other surfaces);
- distress(a special method of aging paper using ink);
- journaling(an inscription describing the photo or a similar tag should be placed on a small piece of paper).
But the list of techniques is not limited to this. Scrapbooking allows you to use almost any materials: from colored paper to dried flowers. It all depends solely on your imagination and the chosen topic.

What will you need for work?
First of all, you cannot do without a special scrap paper. For beginners, special kits are ideal, where different types papers are sorted and arranged. Thus, at first you don’t have to spend a lot of time selecting perfect combination, but focus on creating a composition.
- You will also need various types scissors. These include regular medium-sized straight scissors, small manicure scissors, rounded scissors and, of course, curly scissors.
- Glue and tape. You can't do without these things. But remember that everyone has their own purpose. Glue is used to work with background paper, as well as with small parts. Scotch tape will not be useful to you in these cases. But you can create additional volume only with the help of double-sided tape.
- Hole puncher. The simplest hole punch will help you fasten several parts or even pages. But curly ones can completely transform the entire composition.
- Stamps. Another way to decorate your work. Various patterns are easy to apply and do not require special skill. But if you first think through the whole image, and only then put a stamp - you won’t be able to remove it.
- Ruler and stationery knife. It is better, of course, to use a special cutter, but for a “newbie” such a purchase is unlikely to be justified. Therefore, at first you can trim paper and photographs using a knife and ruler.
- Cutting mat. If you do not want to damage your desktop, then take care of a suitable backing. Special mat - great option. But at first it can be replaced by thick cardboard, a stack of magazines or a piece of linoleum.
- Decorative elements. You can find them in any theme store or in your own craft chest. Unusual buttons, pendants and beads, rhinestones and ribbons, lace and pieces of fabric - all this will come in handy.

Scrapbooking kits
To create a small photo album, take a sheet of special thick paper. It's needed draw into 12 identical squares. To do this you will need a ruler and a simple pencil. The photo below shows an example with three rows of 4 squares each.

Carefully cut the sheet so that the rows are separated from each other. At the same time one square on each side should be undercut. You can see the technique in detail in the photo.

The arrows indicate the areas that need to be glued together. This way you can get one long ribbon of squares.
All the result the tape needs to be folded like an accordion. After this, carefully assemble the future album. You will need washi tape or plain paper (not too thin).

To prevent the album from breaking up into separate pages, it needs to be glued. Cut the ribbon or strip of paper to the right size and glue to the first and last page, forming a “spine”. All other pages should also be well glued.
After that, you can proceed to the most exciting part - album finishing. We advise you to think in advance about what photographs and decorative elements you will use. Experienced craftsmen first make sketches, and only then start working.

Use stamps, curly scissors, pieces of fabric and thread, buttons and rhinestones - whatever you want. Just don't forget that large number voluminous elements are not suitable for a small album. The appearance of the product when closed is also very important.
Tie the album with ribbon or unusual thread to highlight its individuality. You can also write the owner's name on the album cover.

Scrapbooking- a type of handicraft art that consists of decorating photo albums, postcards, envelopes, notepads and other accessories. Translated from English it is referred to as scrapbook . Today we will look at why the cutting technique is used, how to do it correctly and get real pleasure from practicing this art.
The main thing in the article
What is scrapbooking technique and what is it used for?
- The scrap technique is to convey information through a visual image. For example, using this technique, the author can talk about memorable day or arrange in this way information about a much larger period of time in your life.
- Initially, scrap was used to decorate personal and family photo albums. Nowadays, scrap masters use the technique to design notebooks, postcards, boxes and other things.
- The scrap technique is very interesting and addictive. Products made in scrapbooking style - quite expensive pleasure. But young craftsmen are cleverly coming up with alternatives to expensive accessories.
- Currently, scrap can be used everywhere, not only in the design of albums and notebooks, but also in the workplace and in the room in general. The main thing is that the fantasy works well.
Scrapbooking for beginners: what do you need?

For beginners and those who do not intend to make money from this type of art or generally work in this area for many years, you will need:
- Cutting mat that can be made from thick linoleum
- Stationery knife with spare blades
- Ruler
- Glue "MOMENT CRYSTAL"
- Decorative tape
- Cardboard or scrap paper
- Beer cardboard
- Multi-colored pens
- Ribbons
- Buttons
- Hole puncher
- Scissors
- Hook or creasing stick
- Decorative elements
- Stamps, brads and chipboards - optional.
Paper and cardboard for scrapbooking: how to choose and make it yourself?

- Available for scrap special paper, it has a high density, which is necessary for long-term storage and operation. Such paper can be purchased at any specialized store or ordered online on a website that distributes these products.
- The range of paper for scrap is very diverse. There are plain and colored samples; most often the paper is produced in collections that cover a specific theme. This is very convenient for designing albums, since you do not need to select separate sheets according to color scheme. But you can also purchase individual sheets if you do not need a collectible series.
- Special paper has designs on both sides and one, the difference is in price and method of application.
- You can also use cardboard for handicrafts; it also has good density. There is single-sided and double-sided cardboard.
- Paper sizes vary depending on what you want to use it for. Eat 10×10, 20×20 And 30×30.
- You can make paper yourself by choosing pictures of the appropriate size and printing them on a printer. The only thing is that you need to use thick paper. The thickness of paper directly depends on the purpose of its use. On average it should be from 200 gr to 350 gr.
- In many cases, you can replace scrap paper with wallpaper that matches the print and texture. You can go and alternative way by making paper as in the video.
- When choosing paper for decorating albums and other things that should last a long time, pay attention to the density and integrity of the cover. But don't forget about appearance, such paper should convey everything that you want to capture on it.
How to use brads, chipboards and stamps in scrapbooking?
- Brads- a decorative element that is shaped like a carnation with a beautiful head. You can use it to attach photos and other paper and fabric elements, or use it for DIY decoration. They come with arrows to hold the sheets.
- Chipboards- a voluminous decoration element that has many motifs and shapes. Used to convey the mood, meaning and nature of the page information.
- Stamps- elements used with ink create various effects. These can be inscriptions, images, portraits or other fantasy effects.
How to make a postcard using scrapbooking technique: step-by-step photo master class

For such a postcard you need to prepare:
- scrap paper;
- wavy scissors;
- stationery knife;
- decorations;
- glue;
- threads with a needle.

How to make a scrapbooking photo album with your own hands: video master class
- The work of making an album is quite labor-intensive and takes a lot of time. Get ready for the fact that this will take more than one hour; to create a good album you will need to set aside a whole day, maybe more than one.
- It should also be taken into account that filling the album with a new stream of photos will affect the design and the allocation of time for this. But at the end of the work, you will be proud of yourself and your work. And the most important plus is that no one in the whole world will have such an album, because your soul, imagination and work are invested in it.
DIY flowers and butterflies for scrapbooking: master class with photos
Flowers and butterflies are used in scrap for decoration in most crafts. Butterflies can be made flat or voluminous by bending their wings. Materials for production butterflies:
- wallpaper;
- paper;
- cardboard;
- napkins;
- boxes;
- magazines;
- old postcards.
Flowers made from different materials and using different methods: 
- knitted;
- made of lace, ribbons and beads;
- paper;
- lace;
- umbrella flowers;
- flowers-bags;
- disc flowers;
- pictorial.
DIY wedding cards scrapbooking: ideas for creativity with photos
Ideas for creating wedding cards are endless, as each craftswoman finds her own source of inspiration. Cards can be simple but elegant, discreet but romantic, creative but heartwarming.


DIY scrapbooking wedding invitations: video
- Before there was a demand for ready-made wedding invitations, they were handwritten for each guest. And rich families ordered from printing factories. With the advent of mass production, the tradition of issuing invitations has ceased to be relevant for the majority of the population.
- But with scrapbooking coming into fashion, even invitations began to be designed individually for each couple. You can make them yourself or order them from a craftswoman. It should be noted that the more invitees, the more time it will take to work.
DIY notepad using scrapbooking technique

You will need:
- sheets;
- clamps;
- glue;
- cardboard;
- decorations;
- ruler;
- lavsan sliding threads and needle;
- fabric tape;
- stationery knife.
Algorithm of actions:
- Measure the required number of format pages A4. Remember that you will get twice as many since they are folded in half. If necessary, you can line each sheet manually or print ready-made ones.
- Fold the sheets in half like a book, iron the fold line, secure with clamps and place under the press in the form of a pile of books.
- After pressing, align and fasten the clamps vertically.
- Measure the spine and divide into equal parts, then cut.
- Sew the binding of each stack and connect them together with fabric tape.
- Then apply a large amount of glue or silicone sealant, squeeze with clamps and leave to dry.
- Cut out three pieces of cardboard: one for the spine, the other two for the endpaper and backdrop. Cut 0.5 cm more of the glued sheets.
- Lay out the cover unfolded as you would like it to look. Then glue using fabric and glue.
- You can make the cover soft or hard by covering the cardboard with paper or fabric.
- Glue the first sheet to the inside of the endpaper and the last to the back.
- Decorate your notebook however you like using decorative elements.
DIY money envelope scrapbooking: how to make it yourself?

Prepare:
- paper:
- stationery knife;
- curly scissors with a wave;
- ruler;
- pencil;
- decorations.
Algorithm:
- Cut the envelope according to the presented dimensions of the unfolded bills.
- Lower and top part cut with curly scissors in a wave so that when combined it is a single sheet.
- Place ribbon in the center and decorate the front of the envelope.
More original ideas for making envelopes for all occasions with your own hands look in .
DIY passport cover using scrapbooking technique

You need:
- cardboard;
- textile;
- machine and thread;
- glue;
- scissors;
- pencil;
- ruler;
- cards for decoration;
- Velcro or button.
Procedure:
- Mark the dimensions of the passport on the cardboard and cut it out.
- Place on fabric and mark borders.
- Make a strap for closing.
- Place all the cards on the right side of the fabric and sew.
- Sew the second part of the snap or Velcro closure to the outside of the endpaper.
- Align the fabric with the cardboard and stitch so that the tab coincides with the closing point, and there are areas on the inside of the cover for the passport to fit into.
- Next, design the front cover to your liking in a distinctive style.
DIY calendar using scrapbooking technique

Prepare:
- paper;
- slicing;
- decorations;
- creasing stick;
- binding rings;
- hole punch;
- glue;
- typewriter;
- threads;
- printed names of months;
- stationery knife.
Algorithm:
- Bend large leaf scrap paper in half and create a composition on one front side.
- Glue all the cards, then sew.
- Arrange all the months in order and punch the cards with a hole punch, and make holes on the calendar itself.
- Secure the month cards with rings.
- Decorate your calendar with decorative elements.
How to decorate a box in scrapbooking style?

You will need:
- box;
- light weight paper;
- stationery knife;
- pencil;
- ruler;
- glue;
- decorations.
Process progress:
- Measure the box and transfer the dimensions onto paper.
- Cut out the measurements and tape the box.
- Decorate with decorative elements: flowers and butterflies made of paper and fabric, buttons, beads.
- You can use the decoupage technique to decorate the box, like -.
DIY scrapbooking photo frame: instructions with photos
You need:
- cardboard;
- paper;
- textile;
- glue;
- scissors;
- brads;
- machine and thread;
- padding polyester
Creation process:

DIY document holder in scrapbooking style

Materials:
- beer cardboard;
- textile;
- stationery knife;
- glue;
- scissors;
- machine and thread;
- decorative elastic band;
- decorations.
Process:
- Cut 4 rectangles from cardboard 12×20 cm. Glue the first to the second, and the third to the fourth.
- Place two crusts on the fabric so that there is approximately 2 cm of space left for the spine. Glue the fabric and then stitch.
- Make pockets for documents from fabric inside the holder and sew them on.
- Sew an elastic band to the back cover to hold it in place.
- Decorate the endpaper with appropriate decorative elements.
DIY school album scrapbooking

You will need:
- beer cardboard;
- paper;
- glue;
- scissors;
- hole punch;
- eyelets;
- stationery knife;
- scissors;
- decorations.
Procedure:
- Cut out blanks for future sheets from cardboard, and each subsequent sheet should be a couple of centimeters larger than the previous one.
- Cover each page with marking paper, then use a hole punch to make holes on equal distance. Insert the grommets.
- Secure the pages with ribbons.
- Decorate the endpaper and other pages of your school yearbook.
DIY scrapbooking cuttings

- Cuttings for scrapbooking are needed as an inscription, decoration or simply a design element. In general, they are made using special figured hole punches. They can be in the form of figures of people, animals, birds, clothing or everyday objects. Cuttings come in the form of frames or inscriptions, different colors and textures.


- To make the cutting yourself, you can either purchase a special hole punch, or buy a stencil, or use a stationery sharp knife cut out a simple shape. True, to do this, you need to put in a lot of effort and patience.
Stencils and templates for scrapbooking

- Stencils and templates are used to decorate album pages, postcards, notepads and other items made in scrapbook style.
- They can be used for outlining using colored pens or paints. Place it on the desired location and outline it.
- Using stencils and templates, you can make cuttings, although the process will be very labor-intensive and painstaking. You need to trace the template, and then cut it out with a knife.
- They are also in good demand for embossing - technique of applying a convex image. For this technique, a special powder is used, which is heated with a hairdryer for embossing. After heating, the image applied with powder becomes voluminous.
Scrapbooking for newborns: photo album ideas for boys and girls
The birth of a child is so wonderful and unforgettable, so you need to create an equally wonderful place to store these memories. An album for a newborn can contain not only memorable photographs, but also the first tags, notes, curls and other things that parents will want to carry through many years of their baby’s life.


DIY New Year's scrapbooking: ideas with photos
New Year's scrap is the most magical, since there are no borders or limits for decoration. Breathe magic into each of your creations.


DIY postcard for a loved one using scrapbooking technique: video
The art of scrap smoothly moved from a hobby and entertainment into profitable business. Although there are few people who value handmade work, their number is growing. Even if scrapbooking is not the first place in your life, you can do something nice for yourself and your family while having a good rest. Give your loved ones a piece of your soul in a product of your own composition and handiwork. Such a gift will not only be creative, but also one of a kind.
Taking photographs is a unique activity that is not only popular these days, but also helps a person to open up and show himself. Modern technologies make it possible not only to take high-quality photographs, but also to invent and improve modern technologies, but also share them instantly.
Every day, every second person shares their personal or other people’s photos on social networks, by mail. However, it is much more pleasant to sit back and look through the album. Especially if it is decorated with clippings, quotes and interesting thoughts. Undoubtedly, you won’t find a second one like it.
Quite a few articles have been written about how to make a photo album with your own hands, and a lot of videos with master classes have been filmed. It is quite difficult to make a choice. However, there is basic knowledge and invaluable tips to learn as you get started.
Choosing the theme of the future album
Of course, the idea of creating a unique photo album with your own hands does not just arise. Perhaps a person is driven by the thought of making money on such things. However, most often the decision comes suddenly, after a significant event in the desire to preserve every bright moment.
Creating an ordinary classical album will not be difficult. It is enough to have a few hours of free time and a rich imagination. You can decorate an ordinary photo album, or you can create your own album from scratch.
The most frequently requested photo albums are:
- Wedding theme. A wedding is a wonderful moment for a new beginning. family life. The mass of events on this day exhausts the newlyweds, depriving them of the opportunity to enjoy this day and simply contemplate each other. Having a professional photographer at a wedding is no longer a new thing. Beautiful photographs that convey every emotion of this day simply must be framed accordingly.
- Photo album for the birth of a baby. The arrival of a child in a family is an important stage. And every parent strives to remember everything and display it in a photo. However, even the most attentive mother is not able to remember every important point, because there are so many of them. A photo album with quotes will help you remember the most important things even after many years.
- Album with a school, educational plot. First day of kindergarten, first grade, graduation party, Institute of stages of growing up, which are accompanied by wonderful memories.
- Capturing a bright moment in life. This is not only a vacation or a trip. You can also create an album as a gift, for example, for an anniversary, or for a memorable date. Thematic albums for loved ones are popular.
The reason for creating a photo album can be anything. The main thing is creative inclinations and the availability of tools.
Tools and materials needed to create a photo album
Original album self made- quite an expensive thing. Its cost will include not only the price of the materials used, but also the dignity of handmade work. But this does not make such a photo album inaccessible. On the contrary, everyone can make it with their own hands, using their talent and imagination.
In order to make a photo album yourself at home you need to have:
Required tool:
- miniature scissors;
- simple hole punch;
- knife-cutter;
- pencils;
- paints;
- markers;
- glue stick;
- curly scissors;
- figured hole punch;
- double sided tape.
Required materials:
- paper. It should be quite dense. You will also need paper for supporting photographs; its density should be lower than the density of the main sheet;
- thick cardboard (2 sheets). It is needed to create the cover. You can use old unnecessary cardboard boxes;
- the material with which the cover will be wrapped. For this you can absolutely use different material. Old pieces of fabric, jeans, decorative colored paper, to create a soft cover you will need thin paralon;
- decorative material (depending on the overall idea: fur, leather, wood, iron, beads, buttons, ribbons and other decor). You can make small decorative details yourself: knit, sew, mold, dry.
You can find interesting details for your creation both at home and in a scrap booking store.
Making an album cover
When all materials and tools are prepared, you can begin to work. When making a photo album with your own hands, you often start with the cover.
There are two options for creating a cover:
- Use a ready-made one: buy a new one, or remove it from an old album. This method is the easiest. All that is required from the master is to decorate it beautifully using decorative material. You can cover such a cover with any fabric (depending on your idea), use colored paper, various decor. Often this option does not require gluing the inside.
- Create a new one. This option is already more complex. Because it requires certain knowledge. In order to make a cover, you need to decide what shape the future album will be and how many photos to fit on 1 page. Having decided, we need to cut out a page from cardboard to the size we need. It’s worth doing the same with the second sheet of cardboard. Next, you need to draw 2 lines on each sheet (2.5 and 3.5 cm from the left edge of the sheet). After this, cut with scissors along 2 lines.
To decorate the top of the cover with colored paper you need:
- take a sheet of colored paper, 4 cm larger than a cardboard sheet on all sides;
- place the album sheet in the middle and circle it with a pencil;
- coat a sheet of colored paper or both parts of the cover sheet well with glue;
- place the cut sheet of cover in a drawn square on a colored sheet of paper so that its edges clearly coincide with the drawn lines;
- Fold the remaining edges of the colored paper over the cover, gluing them tightly. It is important to try to do this carefully so that the waters come out as smooth and beautiful as possible;
- The same must be done with the finishing of the inside of the cover. You can cover unsuccessfully glued corners with colored paper.
When making your first albums, you should pay attention to ready-made covers. Creating new ones from scratch can be a bit challenging.
To work less on the cover design, you can use designer cardboard rather than ordinary cardboard.
Useful page design tips: how to fill out the page correctly
It will be easier to fill out the pages of the album if it is disassembled. Having completed each sheet, you can begin assembling the album.
Album design - a whole science. Therefore, when filling out the page, you should adhere to certain rules:
- Initially, you should determine the semantic center of the page.
- Pick up matching colors, which will complement the photo without straying from the overall color scheme.
- Choose decor for the pages that will match in color and meaning.
- Choose captions for photos that will definitely match general sense. These could be quotes famous people, aphorisms, or your own thoughts. You need to write down words in the album based on the harmony of color.
- Large and small details should be placed on the page based on balanced proportions.
- Each page of the album should have a bright accent. However, you should make sure that the page is not reloaded. It's hard to watch an album like this.
- Each page should visually resemble a triangle “photo - title - signature”.
It's good if there is an odd number of details on the page.
In order for the page to be balanced, you should try to follow the rule: a large item - several small ones. For example, in the upper corner you can place a large volumetric part, and in the opposite corner below there are several small ones.

Family Album Ideas
Creation family album Quite a fun project that can be a great project for the whole family.
A family album is not only a collection family photos in one book. With this album it is important to convey the history of the family, its spirit, collecting all the memorable moments in one photo album.
A family album can consist of named pages:
- Little dad with grandpa or little mom with grandma and vice versa. This interesting idea, which will help determine the similarities between all generations.
- Birth new family or a wedding. Here you can also host not only the wedding of mom and dad, but also grandparents. Scanned documents, their clippings, newspaper clippings made in vintage style look original.
- The birth of a baby in a family. How to design this page is up to each mother to decide individually. After all, everyone has their own ideas about the importance of this or that moment in a child’s life. However, experience shows that a couple of pages are not enough for this event. Sometimes one album is not enough. The creation of mini photo albums made in the style of diaries looks original. This could be a whole series from birth to the right moment. Such an album is filled not only with photographs, but also with important notes.
- First year of life.
- First time in first grade and beyond.
The pages that are intended for the baby can be supplemented with envelopes that will help preserve the child’s first curl, a tag from the maternity hospital, or the child’s first lost tooth.

A mother can add her own thoughts and memories to a children's album. Appeals to your child, which he will be happy to read when he grows up. You can write everything here memorable dates: first sound, laughter, first word, first step, first tooth. Such records will be an excellent addition to the corresponding photographs.
Another great family album idea is to create a family tree.


When choosing a style for creating a family album (any other one too), it is important to maintain this style in the smallest detail. So old photographs, children's pictures will go perfectly with retro and vintage style. The decor for such an album can be found in grandma's things.
Original ideas for decorating a photo album with your own hands
Before you start work, you need to sketch it. On a regular sheet of paper, outline everything up to the smallest details. This way you can not only visually evaluate the final result, but also not forget anything. It is worth doing this with each sheet. Their number, by the way, must be calculated in advance at the rate of 1-2 photographs per sheet.
A photo album page must have 5 elements:
- photo title;
- caption for each photo: when and under what circumstances the photo was taken. Perhaps there is something important in the photo that you would not like to forget over time;
- page background;
- decorations;
- additions.
Blank pages of the album should be marked with a simple pencil, so after completing the design, it will not be difficult to erase the extra lines.
You need to fill out the page from top to bottom. The likelihood that paints and colored work will smudge will decrease to 0. First, it’s worth doing the work with a felt-tip pen and paints so that they have time to dry before gluing the photo.
Inscriptions and quotes are written in the album using ink, felt-tip pen or helium pen. The color of ink, font size and inclination of letters should also be thought out in advance. You can use newspaper clippings to lay out beautifully the right words. Only after this the album is decorated with flat decorations. They are glued and sewn. It is recommended to attach voluminous parts of the decor at the very end. This is done with glue, thread and needle, and nails.
It is better to glue the album parts using a special glue gun.

Regarding the decoration of the album cover, the cover design looks beautiful using small photographs collected in mini collages. These collages can be given a completely different form from the banal geometric shapes, to more artistic ones.
You can attach album pages in a variety of convenient ways:
- using massive rings. Then each sheet of the album must be processed with a hole punch, making a hole in the right place;
- Using the same hole punch, make holes on each page and fasten them together with beautiful ribbons. In this case you can use different techniques plexuses: from the simplest, all in to the more complex;
- album pages can be stitched;
- You can glue the album.
Today, in the world of digital technology, it is much easier to save your life in photographs. There is no need to sit for hours waiting for results. Just a second and the perfect shot is ready. Most people store their photos on gadgets and on the Internet. It’s much more pleasant to look at photos and touch them with your fingers. It’s even nicer if it’s an album with a unique decor, where there’s something to remember and touch. This album is captivating, and every detail evokes its own emotions.
If you have a great desire, but no imagination, you can use ready-made ideas, of which there are quite a lot on the Internet. Quite a few articles have been written about how to make a photo album with your own hands, and a lot of master classes with detailed instructions have been filmed.
IN modern world Most often, people take electronic photographs: selfies on phones, photographs on point-and-shoot cameras and professional cameras. They share them by sending them to each other or posting them on social networks.
But just a decade ago, photographs had to be printed from film in a studio and pasted into a photo album. But paper photo albums have not faded into the background, and their popularity is growing year after year.

And the point is not only in their popularity, but also in the fact that designing a photo album is a creative process, and its production unites all members of the family. Such an album will not only be a wonderful decoration for your living room, but also an excellent gift.

How to make a photo album?
Making a photo album is not so difficult if you stock up on the necessary tools and materials, and, of course, original idea. Here are examples of story topics:
- birth of a child;
- wedding or anniversary;
- vacation;
- graduation, etc.
There are many such reasons. So, having decided on the event that you want to display in your photo album, it’s time to think about the tools.

How to make a photo album with your own hands?
You will need:
- nail scissors;
- hole punch;
- stapler;
- stationery knife;
- glue;
- felt-tip pens and pencils;
- double-sided tape;
- paints.

Here are the main tools that are most often used when making a photo album. But this is not all that you may need - it all depends on your imagination.

In addition, you will need the following materials:
- paper;
- cardboard;
- self-adhesive;
- cover: it can be decorated with fabric, leather, fur, rhinestones, etc.
Step-by-step instructions for making a photo album
- We start production from the base. For this we need any pages in the cover. It could even be an ordinary student notebook or notepad;
- Let's decide on the number of photos. On average, there are 2-3 photos per page for a photo album. Based on this, we calculate the number of pages we need;
- We make a backing for each page from paper;
- glue the backing onto the sheets of cardboard;
- punch holes for fastening in the resulting squares;
- We decorate the cover of the photo album with prepared material (for beginners it is better to use a ready-made binding, having previously laid foam rubber or other soft fabric under it to give the cover softness and volume);
- we make holes in the binding, and then using lace or wire we attach the pages to the cover; the base is almost ready.

Photo album design ideas
Selecting photographs and making the basis of a photo album is not all. As a result, all the components of the photo album should merge together.

To do this you need:
- according to the meaning, select the center of the composition on the sheet;
- choose a palette of colors that should be combined with each other;
- choose decorative elements, and try not to “overdo” them (this could be paper, cloth, plastic, metal, etc. For decoration wedding photo album you can use lace, and children's photo album decorate with clippings from children's fairy tales, small toys);
- choose a place for photos and captions.

Photo album options as a gift
There are plenty of topics for creating a photo album in every family: “Farewell, school!”, “Our firstborn”, “The whole family is together”, “Crimea-2012”...

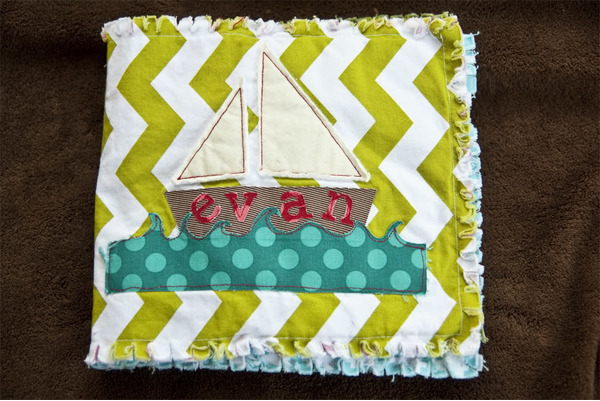
Let's look at the design options for a photo album using a specific example - “My grandfather is a sailor”:
- cut out the backing from colored paper or fabric sea wave, we also make the edges wavy;
- make a title at the top, for example, “Remember, captain!”;
- we decorate the name with fish cut out of colored paper or other material;
- place an old photograph in the center of the composition;
- glue an anchor in the lower left corner;
- opposite with glue is a sticker with a signature, indicating the fleet and years of service, for example: “Pacific Fleet, 1960-1963.”

The page is ready!
If this is your first experience of such work, we recommend making a photo album with no more than 20 pages.

Family photo album
Probably everyone remembers family gatherings, parents’ friends coming to visit, and many hours of looking through family photo albums, accompanied by constant exclamations a la “How cute!”, “Where are you?”, “How big Andryushka is.”

This trend has not lost its popularity even now. How to make a photo album that you wouldn’t be embarrassed to show to guests?

Let's look at a specific example that is gaining more and more popularity - mini-albums united by one storyline: a walk, some event, etc.
- take a sketchbook as a base;
- cuts off half or even three quarters of it;
- we make a book that will open like an accordion;
- On one page we place only one photograph, on the second page we place a signature, decoration, quote or something else.

Pay attention!

On the Internet and bookstores you will find a lot of tips and guides on how to design paper photo albums, and even training sessions are held.

But it’s best to use your imagination and make a unique photo album with your own hands!

DIY photo album photo


Pay attention!


Pay attention!


Related articles
 The best amulets against the evil eye and damage Amulet against the evil eye with hands for children
 How to read the Psalter correctly
 Delicious dishes with sausages
 A glimpse of Bella. Romantic chronicle. A glimpse of genius. Messerer about Akhmadulina Boris Messerer glimpse of Bella romantic chronicle
 I dreamed that I was sailing on a boat on the river
 How to cook beef entrecote in a frying pan
 About the company Foreign language courses at Moscow State University
 Which city and why became the main one in Ancient Mesopotamia?
 Why Bukhsoft Online is better than a regular accounting program!
 Which year is a leap year and how to calculate it