
Zup version 8 2. Documentation and educational materials
Step 1. Preparing the 1C ZUP 2.5 database for updating
You must first prepare the ZUP 2.5 database for transfer:
- Close the month in ZUP 2.5;
- Delete objects marked for deletion;
- Perform testing and correction of the ZUP 2.5 database;
- Do backup copy ZUP 2.5 database;
- Check the release of the ZUP 2.5 database and, if necessary, update the ZUP 2.5 database to the appropriate release, otherwise an error message will appear. The required release number can be found in the ZUP 3 assistant:
Step 2. Create an empty ZUP 3 infobase
To perform the transfer, you need to create an empty infobase with ZUP 3 configuration. Let's create an empty infobase from a template. To do this, in the 1C Enterprise launch window, you need to click on Add. In the window that appears, select Create a new infobase and click Next:

In the next window, select required template and continue:

In the next steps, specify the name and directory of the infobase and click Finish.
Step 3: Data Transfer Assistant
The process of updating 1C ZUP 2.5 to 3.0 is implemented through a special data transfer procedure using the transfer assistant and initial setup. A special step-by-step assistant can be called upon the first launch of the 1C ZUP 3 configuration information base through the Start page.
You can also find the transfer assistant on the desktop when you restart the infobase with the ZUP 3 configuration if the initial setup has not been completed.
When you first launch the infobase with the ZUP 3 configuration, the step-by-step transfer assistant that we already know is automatically called. In the first step, select Transfer data from the 1C Salary and Personnel Management program 8, edition 2.5 and click Next:

On next step:
- From the list of all information databases installed on the computer, select the ZUP 2.5 database whose data we want to transfer;
- Enter the parameters to authorize a user with full rights:

There are two transfer options:
- An option in which only balances on the start date of accounting are transferred to new program and data necessary to use new HR and accrual capabilities wages. This option is offered by the program by default and is recommended for use by 1C developers.
- An option that is conventionally called “Full transfer”. When choosing this option, the following are transferred from the previous program: the entire personnel history for employees, the results of accruals and deductions, all mutual settlements for the period, planned accruals and deductions, data for calculating average earnings, data on personal income tax and contributions. But there is a risk, along with the necessary and correct information, of transferring errors made during accounting to old program, as well as outdated data. It is not recommended to use this option.

When choosing the transfer option offered by default, Use new HR accounting and payroll capabilities, you must specify the month from which records will be kept in 1C 8.3 ZUP 3. The transfer can be performed in any month of the year:

If you need to transfer using the second option, then at this step you should change the option using the Settings link:

The second option specifies the period for which the data will be transferred. The period until which data is transferred is not limited:

Important! If data for future months has already been entered into 1C ZUP 2.5, then this data will also be transferred. It is recommended to delete the data of the unclosed month in ZUP 2.5 before transferring.
In the next step, click Load data. This directly starts the data transfer procedure, which can take several hours. The duration of this procedure depends on the amount of information transferred:

Errors may occur during the download process:

Reason, description and possible way Error resolution can be viewed in a special report, following the link Information about errors:

If the transfer is successful, the following message is displayed:


You can proceed to the answers to the initial setup assistant questions by clicking the Next button:

The most important differences between 1C ZUP rev.3 and ZUP 2.5 are discussed in our video lesson:
Repeated data transfer
Repeated transfer may be required, for example, if accounting for different organizations was kept in different 1C ZUP 2.5 databases and it was decided to keep records for all organizations in one 1C ZUP 3 database.
Important! If there is a need to run re-transfer from the same information base, then the regulatory, reference and accounting information will be compared with what is already in the database and the already transferred data will not be duplicated.
Repeated transfer is started from the Administration section using the link Transferring data from previous programs:

If the Finish setup button was not clicked:

Then the transfer and initial setup assistant will be available on the desktop when you restart the 1C ZUP 3 database:

In this article I will tell you how to update your existing configuration on the 1C 8.2 or 8.3 platform. For example, we will update the configuration of 1C Enterprise Accounting 8.2. The update is carried out in several ways: from the ITS disk, from the website users.v8.1c.ru, from the program itself. For the basic version of the configuration, only the second and third methods are possible. Let's look at them all.
Before updating the configuration, you must create a backup copy of the infobase! After you make a backup copy, you need to test and correct the information base and only then proceed with the update.
The configuration update files look like this:
Here we are interested in the setup.exe file, let's run it and install the update files:


Let's take a closer look at this installation step. The update files are installed in the 1C update templates directory. Only then are they used to update the configuration, i.e. By installing these files you will not update your database, this is a preliminary stage.
The default template directory is created in the Windows user folders, but I prefer to create this directory in the folder with the 1C program. I'll explain why. After updating the configuration, these files are no longer needed, and the easiest way is to remove them from there rather than delve into user folders.
This is a purely practical question, rational use free space on your disk. You can safely install updates to the default directory. If you do install in a different directory, then you need to know the following. You must make sure that the program sees your template directory; to do this, run 1C again:

Select the “Settings” menu

Here we can make sure that the directory you selected is present in the 1C settings. If everything is in order, click further in the installation process.

We are waiting for the installation to complete.

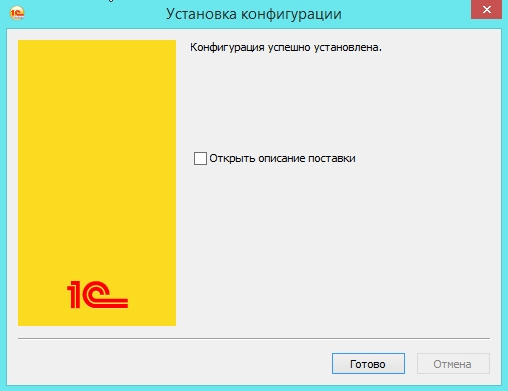
If you are not interested in the description of the 1C update, uncheck the box and click “Finish”. The update template is installed.
Let's launch the 1C program:

Select the configurator launch mode.

The configurator opens.

Let's find out our configuration release. To do this, select “About the program” from the “Help” menu.

Here we can see the following information of interest to us:
The version of the 1c Enterprise platform - in this case 8.2.16.352. It is written about how to update the platform.
The mode is file, it means that you have a normal file database, not the 1C Enterprise server.
And what we need is Configuration, namely the name and version of the release - in this case 2.0.37.8.
Now we know what configuration release we have. Let's continue.

To be able to update the 1C configuration from the configurator, you need to open the configuration for editing. Click “Open configuration”.

After the configuration has opened, you should pay attention to the lock next to the configuration name. If it is, then your configuration matches the supplier's configuration, i.e. typical 1C.
If there is no lock, your configuration has been partially or completely deprecated to allow changes to be made. The procedure for updating such configurations differs from what is described in this article. We will consider the option when you still have a lock.

Select “Update configuration” from the Configuration => Support menu


Here you need to remove the bottom checkbox, because it is designed to search for updates on the Internet and click the “Next” button.

Here we see a list of available updates from the template catalog. There are two updates on my list. Why? The fact is that you can update the configuration by skipping one or more releases, if possible.
There is a 2.0.37.14 milestone update in my template directory. We'll skip it. You need to select the top update highlighted in bold and the word update must be present.

Select the release we need and click “Finish”.

Here we see that you can update the configuration to 2.0.38.6 from 5 previous releases. Click “Continue update”.

We see from which release and to which the update will be made. Click “OK”.

The answer to the program question is “Yes”.

In this window we see which configuration objects have been added, changed, etc. Click “Accept”.

By opening the menu item Help => About the program after completing the operations, we can make sure that the release of our configuration has been updated.
Updating the configuration from the site users.v8.1c.ru.
To update the configuration from the site, you must have a valid ITS subscription. The basic version does not require an ITS subscription. Updating from the site occurs by downloading the update distribution and installing it.
So, we will assume that you have a login and password to access the site. If they don’t exist yet, see the article “Self-registration of users using a PIN code.” Open any browser you have and enter the name of the site in the address bar:

We go to the site, enter your username and password and click “Login”:

We find ourselves in the summary information section:

Scroll down and find the section “Enterprise Accounting, Edition 2.0 for Technology Platform 8.2”. Click on the name of the configuration. If you have a different configuration, look for it in the list.

A list of available releases opens. We are interested in the latest one, in this case 2.0.38.6. We also see that this release is an update to version 2.0.37.8. This means that it is not necessary to install intermediate releases. Click on the latest release number.

In the window that opens, we see that “The current version of the configuration is intended for use with a version of the 1C:Enterprise 8.2 system not lower than 8.2.15.319.” This means that if the version of your platform is lower than the one indicated, you need to update it. How to do this is written here. Click on “Update distribution”.


After downloading, we have an update file.

Unpack it to the directory you need:

Updating the basic configuration of 1C 8.2 or 8.3.
The basic configuration is updated from the program itself: menu Tools => Configuration Update. To update, you need a login and password from the site users.v8.1c.ru.
Before updating, the program automatically creates a backup copy of the database, but I recommend either immediately finding where it was made (By searching on disk system disk files with the extension dt) and move them to the folder with archived copies, or make a backup copy manually through the configurator.
Even though new version technology platform 1C - version 8.3, has been on the market for quite some time, many enterprises and private entrepreneurs, for a variety of reasons, still use previous versions, in particular 8.2. It would seem that 8.2 is just previous version, but information, for example, how to install an update for 1C 8.2, lately increasingly difficult to find. Such a request, by the way, is not entirely correct, and here’s why: the latest current release of the 8.2 platform was released at the beginning of 2013, as can be seen in the screenshot from the official 1C user support website.
A latest versions Old editions of 1C Accounting generally work only on the 8.3 platform, and updates for 1C 8.2 are not available.
Therefore, there is no point in telling how to update the 8.2 platform (due to the fact that there is no update history), and users, as a rule, have in mind the process of updating configurations on the 1C 8.2 platform, such as Accounting, Salary, Trade Management, etc. d.
Therefore, in this article we will look at updating the 1C database on platform 8.3 using the example of the Enterprise Accounting version 2.0 configuration. The editorial office is considered old, but is still supported by 1C due to its sufficient large number users.
So, first of all, to update the configuration, we need to understand which configuration release we have installed. To do this, we need to launch the configuration in any mode and select* in the main menu:

*Or press the button "i" at the top right side of the screen.
We will see a window with configuration information:

At the top of the window we see the version of the 1C platform on which our configuration is running. Below it is information about the configuration (name, edition, release number). It is the configuration release (indicated in parentheses) that we need. The fact is that each 1C configuration update is intended for specific releases.
Next, we need to understand which release we can update the configuration to. To do this, go to the 1C user support site (users.v8.1c.ru). We must have a login and password for the site. If not, then in the form for entering your login and password there is a “Register a new user” button.

Next, go to section 1C: Software updates – Download software updates – Typical 1C configurations for Russia – Enterprise accounting, edition 2.0. We will see a list of configuration releases available for download.

As we remember, we have Enterprise Accounting release 2.0.66.29. In the “Version Update” column we see configuration releases to which the update can be installed. We're lucky. Last on at the moment The configuration release is suitable for updating from our release. This means that we can update directly to it, bypassing intermediate versions.
Select the desired release and click on it. On the next page we see a list of materials available for download. We are interested in the “Update distribution” item.


We are interested in the Setup.exe file. We launch it by double-clicking and get into the configuration installation program.


In the next window we will be asked to select the location for installing the configuration templates. You can choose it at your discretion. The main thing is not to forget where you will install the templates.
The update template is installed, and we enter our database. It must be launched in configurator mode.
Having entered the database in configurator mode, the first thing we must do is unload the database. This must be done so that in case of errors when an update occurs, power outages or other emergency situations, we could restore the database from the archive.
To do this, in the main menu, select the item “Administration” - “Download infobase”.

The program will ask you to specify the download path. We specify the path*, after which the uploading process begins. It can take, depending on the power of the computer and the size of the database, from a minute to 7 – 10 minutes. The fact that the database is currently being unloaded is indicated by the inscription in the lower left corner:
After the upload is complete, the following window will appear:

As you can see, both during the upload process and in the message about its completion, the path that we specified is displayed. One nuance must be taken into account: during the unloading process, as well as during the updating process, no one should be in the database except us.
The preparations are complete, which means you can start directly updating the database configuration. Let's go to the main menu. We are interested in the submenu “Configuration” - “Open configuration”. A configuration window that looks like this opens:

Again go to the menu “Configuration” - “Support” - “Update configuration”.

The program will offer to find a template to update or specify its location manually.*
*In essence, they are no different, but searching for updates may take some time, depending on the volume hard drive, on which we installed the template. Therefore, we will specify the path to the templates manually.

Specify “Select update file” and click “Next”.

The program will prompt you to specify the path to the file containing the update. We indicate the path to the folder where the template was installed, and in the folder with the template, select the file “1cv8.cfu”. Click “Next”.

The next window will contain general information about the update. After reviewing, if necessary, proceed to “Continue updating”.

The program will provide brief information about which configuration is being updated, from which release and to which one. Click "OK".
As the update progresses, a percentage bar will appear in the lower left corner several times to indicate progress through certain update steps.
We wait until the following window appears:

Click “Yes” (otherwise, why would we even bother with the update?).
The program will display a window for reorganizing information. It displays information about changes/adding metadata objects during the update process.

We are waiting for the inscription to appear in the lower left corner:
It means that the update in configurator mode has been completed. Until this inscription appears, any manipulations with the database other than those described above will be impossible.
The update is complete and we are moving on to launching the database in enterprise mode. This action can be performed directly from the configurator by pressing the F5 key or the button in the upper left corner:
In Enterprise mode, the first window that will appear is:

Select “I confirm the legality of receiving the update in accordance with the above conditions” (otherwise the update will not be completed and the program will close) and click “Continue”.
We wait until the message “The infobase update was completed successfully” appears at the bottom of the service message window. This will mean the successful completion of the process. The program will display a window with a list of changes, which you can study or close immediately.

We're done and can start working on the updated database version 8.2.
Hello dear readers of the zup1c blog. On last week, namely June 23, 2014, was released latest release program 1C Salary and Personnel Management under number 2.5.82. This article will talk about the innovations that the developers of 1C have prepared for us. In addition to this, I will also consider release 2.5.81, since I did not do so a month ago at the time of its release (05/26/2014).
Briefly about the innovations of these two releases (there are not many of them):
- 2.5.81:
- A separate form has appeared for editing an employee’s length of service when preparing reports to the Pension Fund;
- Ability to print each document separately (as protection against freezing);
- In the workplace for preparing PFR information, a selection of SZV information or batches of Section 6 documents created directly in the document journal has been implemented;
- The Republic of Crimea and the city of Sevastopol have been added to the KLADR.
- 2.5.82:
- Preparation of reports to the Pension Fund: in the absence of income, the information is filled in with zero values;
- New regulated report “Declaration of Conformity of Working Conditions”;
- .
Let me remind you that all articles from this series of reviews about 1C ZUP updates can be found in the section. Also, for those who want to update the program themselves, the following articles may be useful:
Release 2.5.81
✅
✅
✅
Now in more detail and with pictures for each item.
A separate form has appeared for editing an employee’s length of service when preparing reports to the Pension Fund of Russia
In the workplace for preparing data for transfer to the Pension Fund, in the section that reflects the surname composition of the pack, a new button “Seniority” has appeared. It opens in a separate form information about the length of service of the current, selected employee and allows you to edit and save this information. I think this is a good decision by the 1C developers, which could have been implemented a long time ago. The accountants with whom I worked often complained that this information did not fit on their monitors and was generally displayed small and uninformative.
Possibility of printing separately each of the documents “Pack of documents of section 6 of the RSV-1 Calculation”
To the document “A bundle of documents from Section 6 of the RSV-1 Calculation” a printed form “Personalized accounting information” was added; pack No.__.”
If the computer still freezes when printing even 200 pieces of information, then it’s worth analyzing the volume RAM, processor and, in general, all characteristics that affect performance. For analysis, you can use the simple and free program CPU-Z, which does not even require installation.

In the workplace for preparing PFR information, a selection of SZV information or batches of documents of Section 6 created directly in the document journal has been implemented
✅ Seminar “Lifehacks for 1C ZUP 3.1”
Analysis of 15 life hacks for accounting in 1C ZUP 3.1:
✅ CHECKLIST for checking payroll calculations in 1C ZUP 3.1
VIDEO - monthly self-check of accounting:
✅ Payroll calculation in 1C ZUP 3.1
Step by step instructions for beginners:
The workstation for preparing information for transfer to the Pension Fund of Russia is intended to automate the formation of packs of information in Section 6 of the RSV-1 directly from the workstation. However, by opening the list of documents “Pack of documents of Section 6 of the RSV-1 Calculation”, you can create a stack directly from the form of this document. In order that this document could then be attached to RSV-1 and other kidneys created in the workplace, the “Selection” -> “Packs of Section 6 documents” button was added. You can also select packs SZV 6-4 and packs SZV 6-1, which were not created in the data preparation workplace for the Pension Fund. Although information in the SZV format is not currently used, it may be present as corrective information.

The Republic of Crimea and the city of Sevastopol were added to the KLADR
The KLADR was updated, which now includes new subjects of the Russian Federation: the Republic of Crimea and the city of Sevastopol. These subjects were included in the Russian Federation in accordance with the Federal constitutional law dated March 21, 2014 No. 6-FKZ and Decree of the President of the Russian Federation dated March 21, 2014 No. 168.

Release 2.5.82
Preparation of reports to the Pension Fund of the Russian Federation: in the absence of income, the information is filled in with zero values
In previous releases, when preparing information to the Pension Fund, if an employee had no income for the reporting period, then the income table for him was not filled out at all. Now, in accordance with the new procedure for generating this information, for such employees a line with zero income is filled in, but with the category of the insured person filled in.

New regulated report “Declaration of Conformity of Working Conditions”
The regulated reporting includes a new report intended for compiling information in the form approved by Order of the Ministry of Labor dated 02/07/2014 No. 80 n - “Declaration of Conformity of Working Conditions.” This report is available from the list of regulated reports, which can be accessed on the “Taxes” tab of the program desktop using the link "Regulated reports".


Automation of filling in the work experience information about working conditions for certain types of absence: MEDNETRUD and MONTH
✅ Seminar “Lifehacks for 1C ZUP 3.1”
Analysis of 15 life hacks for accounting in 1C ZUP 3.1:
✅ CHECKLIST for checking payroll calculations in 1C ZUP 3.1
VIDEO - monthly self-check of accounting:
✅ Payroll calculation in 1C ZUP 3.1
Step-by-step instructions for beginners:
Release 2.5.82 implements automatic completion of information about working conditions when generating records of experience for periods reflected in the DAM-1 as:
- “Transfer of a pregnant woman to “light” labor” (MEDNETRUD);
- “Translation according to production. necessity for a period of no more than one month from a job that gives the right to early retirement to another job that does not give this right” (MONTH).

Previously, information about working conditions was not filled out.
That's all for today! Soon there will be new interesting materials on.
To be the first to know about new publications, subscribe to my blog updates:
Let's take a closer look at the process of updating the 1C configuration via the Internet using the example of the 1C Accounting 8 program. If you are using version 1C 7.7 - .
Stage null:
This often happens when the configuration has not been updated for a long time and an update is needed large quantity releases. To determine the version and find out the current version, you need to go to the “Help - About the program” section in the main menu:

The configuration must have support installed (with a lock):

After that, select “Support - Update configuration” in the “Configuration” menu:

In the 1C window that appears, select “Search for available updates”, then check the box as in the screenshot:


Select a release in the list and click “Finish”.
That's all, yours 1C program has the latest release!
If it still doesn’t work out for you or you don’t have a standard configuration, you should under no circumstances try to update the database yourself - this is fraught with data loss. Refer to .
Related articles
 The best amulets against the evil eye and damage Amulet against the evil eye with hands for children
 How to read the Psalter correctly
 Delicious dishes with sausages
 A glimpse of Bella. Romantic chronicle. A glimpse of genius. Messerer about Akhmadulina Boris Messerer glimpse of Bella romantic chronicle
 I dreamed that I was sailing on a boat on the river
 How to cook beef entrecote in a frying pan
 About the company Foreign language courses at Moscow State University
 Which city and why became the main one in Ancient Mesopotamia?
 Why Bukhsoft Online is better than a regular accounting program!
 Which year is a leap year and how to calculate it