
Deus Ex walkthrough: fragment with Evidence in “Claim of Jurisdiction”. Deus Ex: Mankind Divided Guide: How to Make the Right Choice in the Game
The game offers 13 side quests, several of which are interconnected. Some tasks affect the main plot.
SM00: Neon Nights
Apartment number 22 in Zilin is used as a cache. It's two floors down from Jensen's apartment. You can get inside through the front door (code 0310) or climb through the ventilation. Considering that there is an armed guard in the apartment, the second option is better.

We need a computer, but it has third-level protection. If you haven't leveled up your hacking skills, pick up a Pocket Secretary with a password. We get a new address, so we go there by metro.
Behind our backs

We arrive at an elite residential complex and go up to the apartment. The door on the first floor is protected by a second level combination lock. We hack or sneak through windows (you need a remote hacking device). The apartment is a mess, there is a body on the second floor. You can search everything for supplies. The necessary pocket secretary is in the restroom, which is to the right of the entrance, on the bathtub, which is all littered with bags.
Party
The next place to search is a closed party for neon lovers. To enter you need a special card (not found yet) or you can get through the ventilation (if your hands are not pumped up, we shoot or explode). Also, the current on the floor will be an obstacle, but you can quickly get past it.

Once inside, go to the door with a lock, wait until the guests leave (or kill everyone, these are ordinary drug addicts). In the room we take the pocket secretary and go to the next address.
Door of Perception

We go to another residential complex, to another apartment. You can enter through ventilation or a secure door. Click on the spray bottle and open it secret room. If desired, we break the safe (fourth level) and take the secretary with the following address.
Where all colors come from

Entrance to the sewer near Jensen's house. We pass through the corridor and go down to the very bottom, to the secure door (to the right of the electric floor). Door code 0311. Turret inside! Behind it is another door with the same code.

Now we find ourselves in a complex where this very drug is being prepared. For stealth, it is best to go along the pipe to the left of the entrance, knock out the guard at the monitor (if the hacking level is third, you can turn off the cameras and the turret). We go further along the canopy and find ourselves in a room with a chemist. If you pumped up KASI, you can convince her to blow everything up or ruin production. Threats are also suitable. However, if talking doesn’t solve the problem, you’ll have to go to the tanks yourself and turn it off.
The quest is over, the consequences will be told in Elisa Kassan's final monologue.
SM01: Golden Ticket
The quest is available for completion upon your first visit to Prague.

While walking around Prekazka, in one of the places, Dragomir Konicki will stop you, sort of like a policeman. He will tell you that this is a checkpoint through which you can only pass with a pass. He gives the address where you can get this card.
The place is right behind Jensen's house. From a conversation with the manufacturer, it becomes clear that the pass can only be obtained for 35 thousand credits. Even if you agree, you will never have that kind of money. We refuse and move on to the next point.
Question the manufacturer

You need to get into the guarded yard and search the toy factory. Everyone knows how to walk straight ahead with music and noise, but to walk quietly you need to step back a little, to the scaffolding, climb onto it, and then get into the yard through the cornices and balconies. Two patrolmen are waiting for us.
If you have upgraded remote hacking, open the shutters of the distant building and climb through to the forger.
If not, then it is best to climb through the ventilation. The entrance is in one of the vaults in the blue annex, next to the building right at the entrance.

We speak with Milena and receive new tasks. If you agree, she will give you the code for the safe in the vault - 2489.
Deal with Dragomir

Dragomir can be removed in two ways: by yourself or by transferring the work to others. The name of the first option speaks for itself, so let’s go straight to the second. Not far from Konietzki's post there will be a policewoman who has been digging for a corrupt colleague for a long time. We talk to her and then watch the fight.
Talk to Edward and Irenka
Milena asked to take the passes to two people. Edward is in the market, not far from the metro. A bandit is just threatening him, so don’t hesitate on the spot. Irenka will be in an abandoned art gallery, not far from Jensen's house.
Activate passes
 |  |
Cards must be launched from the State Registration Office (next to the Monument metro station). The main entrance is under security, so it is best to climb through the ventilation on the other side of the building.
Use your computer to enable the registration console. Now there is a choice to be made.
Quest completed. The consequences will be presented on the third visit to Prague.
SM02: Cult of Personality
The quest is available for completion upon your first visit to Prague.
While exploring the Capek area, you may hear about a mysterious sect in the sewers. To start the walkthrough you need to talk to Viznik in the canals, under Jensen’s house.

Using his card we go through the door. In this room, Jensen's augmentations do not work properly, as shown by a yellow glow at the edges of the screen. Then a conversation with the person on the screen begins. He somehow influences Adam's mind, so the conversation will not end the way he wants.
Find a way to reveal Richard
 |  |
After the end of the dialogue, we search the premises. The posters on the walls are valuable. Near one of these (in the room under the screen) there will be a crumpled sign. We select it and go to the specified address.
Find Libero
There will be a store near the Palisade metro station, the owner of which is what we need. Libero talks about Richard and how to stop him. We return to the channels.
Install mufflers
 |  |  |
It is necessary to block the signal that allows Richard to control the augmented ones in his church. All three transmitters are located in the restricted area. We climb there along the stairs on the right side of the entrance, hide from the camera and install the first jammer. It is best to climb to the remaining ones from the other side, through the canopy, since the camera (first screen) constantly covers the corridor.
When all three are installed, go to the center of the room and use the microphone. For a peaceful solution, choose “Pity” or “Mitigation”. Now the door to Richard's room will be open, there is a lot of useful stuff there.
The quest is over.
SM03: Mysterious Augmentations
This quest becomes available upon your first visit to Prague, immediately after the quest, and will be supplemented throughout the game.
Talk to Sharif - Prague, first visit
We go home and use the TV remote to talk to our ex-boss.
Explore a scientist's apartment - Prague, second visit
When you return from Golem City, Sharif will contact you via communicator and give you a tip.
There are several ways to get into the apartment. The first is through the Rose Garden cafe - you need to go into the cafe, go out onto the roof and continue your way through the cornices and balconies.
If your hands are pumped up, you can simply come to the courtyard of your house and place the machines and containers near the windows.
In the apartment we search the corpse, take the key card, and break into the safe on the wall (3608).
Contact Sharif - Prague, third visit
We go to Jensen’s house for the final conversation with the ex-boss.
The quest is completed.
SM04: Calibrator
The quest starts immediately after.
Get Calibrator

To correct Jensen's augmentations, you need a calibrator, which is located at Otar Botkoveli. He will be in his casino, in the sewers. The entrance is through the courtyard between two shops (white mark).
Talking to Otar is optional, but then you won't get several achievements and a side quest in Golem City.
If you haven’t unlocked KASI, then choose:
- Honest
- Honest
- Honest
- Agree
If successful, Otar will offer a deal, a calibrator in exchange for a service in the future.
Steal the calibrator
If you refuse, you will have to steal the calibrator, but the achievement "We are united by honor" will be open. It is best to leave the casino and climb through the ventilation into the upper rooms. The calibrator will be in Batkoveli's office.
The calibrator will be used in.
The quest is over.
SM05: Samizdat
The quest is available for completion upon your first visit to Prague.
To start the quest you need to talk to Peter Chen. You can find him on the second floor of the OG-29 headquarters or he will approach you after the first meeting with Dr. Ozen, during.
Find the source of the hack

Chen says that someone tried to hack the servers of the front company OG-29. We go to the residential complex, which is not far from the headquarters. The door is protected by a lock; if the level of burglary is low, you can climb through the window. The target is a laptop in one of the rooms. Launch and go to the messenger. A person under the name K immediately writes to us. We talk to him and try to avoid direct mentions of Prague Davos; we need the interlocutor to come up with this topic himself. As a result, he will give the address and door code 5431.
Find Samizdat
 |  |
The lair of truth lovers and conspiracy theories is located underground, in the sewers. The descent there is located not far from the huge wall in the middle of the map. We go down and go through the grated passage. Then the road itself will lead us.

When you reach a large room, in order to go further you need to move the boxes against the wall (in the center of the screenshot). Next there will be a door with a combination lock, which we open with the combination given by K.
Talk to K

We remember that the purpose of the visit is to prevent Samizdat from publishing an article about Prague Davos. To prevent this from happening, you can simply interrupt everyone or talk to K. Don’t threaten him, and in the end he will offer a deal. If you open KASI, you can immediately convince him not to publish the article. But he will still ask for a favor, now with a different reward.
Go to Polyseid
This bank is very interesting place, I advise you to study it in detail. But we need to get into the offices on the third floor, and this is a closed area. First, we go down to the bottom floor and go to the elevator. Nearby there will be a closed office, in which, on the table, there will be a pass. Now we call the elevator, use the pass, and get to the third floor. Be careful, someone may notice you immediately after opening the doors, so take cover behind the wall.
We need to get into the upper office. From the elevator we turn left and wait in the shelter until the guards disperse (one completely, and the other on patrol). We make our way through the post, making sure that the camera doesn’t spot us. Next, the door is locked. The code can be found on the lower floors, but hacking is not a problem. Although there is a possibility of getting caught by the camera, so it is better to use an electronic master key.
Search the office
 |  |
There will be two desks in the office. You need one with two computers. We approach, and under it, on the shelf, we take the document. This is enough, but there is also compromising evidence.
There is a three column puzzle against the wall. Solution: lift-turn-lift-turn-turn-lift. When the secret one we examine the right wall, where there will be two paintings. There will be a safe hidden under the right one, which you need to open and pick up another folder.
Return to K

We give one or both folders to the hacker, he is very happy, and promises not to publish an article about Prague Davos (or simply promises not to interfere with Jensen, if convinced earlier).
Spread the word
To sow the truth, you need to activate the transmitter on one of the Prague antennas. We are looking for houses with red roofs and a store with a sign Autodily. Directly in front of him there will be a lift, which we activate with one KB and go to the top. We open the transmitter and pick it like a lock.
The quest is over. On your third visit to Prague will be available.
SM06: 01011000
SM07: Going dark
The quest is available to complete during your second visit to Prague.
During , after you finish with Miller's NPC, Dr. Delara Ozen will be in his office. She's worried about Agent Blake, who's working undercover and hasn't checked in on her in a while. The doctor asks to find out what happened to him.
Search Vincent Blake's office

The office is on the second floor, at the other end of the room where Peter Chen works. We sit down at the computer (the second level of hacking, if you haven’t leveled it up, the password can be found in the server room on the first floor).
Interrogate informant Blake

We go to the Red Queen, a strip club in the Red Light District. We go up the stairs to the very top and talk with the witness. You can play the role of Blake or tell her the whole truth. When she proposes, kiss her neck and arrange to meet somewhere else. Let's go to the subway.
Go to a meeting
Dobromila will be waiting in the backyard (where SM00 starts). If you didn't kiss her, then two bandits will come for her. We deal with them and talk.
The witness indicates the next place and 350 credits can be paid as payment.
Search Vlasta's warehouse
After the conversation, go to the inventory, to the plot items section, and study the Dobromila map (drawn on the back of the sales receipt). Let's go to the subway.
 |  |
The warehouse is located in the northern part of the city. The door is protected by a combination lock, but you already have the code. Inside, on the left on the wall, behind the picture, there will be a switch. We turn and open the secret door. We enter the corridor and find ourselves in a warehouse.
 |  |
There will be a girl named Olivi inside. We talk to her. Then the owner himself and two assistants come to the warehouse. To avoid the fight, you need to pretend to be Olivi's friend, and then, with the help of KASI, convince Vlasta. You can fight, and immediately after the conversation, knock out the smuggler with augmentations (kill or neutralize), and then take care of the assistants (if you have pumped up your reflexes and have a large supply of energy, you can simply run up and knock out like a boss). There will be two more outside, you can escape from them through the ventilation (behind Olivi). Or hide in a shelter and when everyone comes up, knock them out.
Find Vince's apartment

The agent lives near the Red Light District, in the basement of a building. We go down there and find Blake. Then Delara contacts us.
The quest is completed.
SM08: Fix
If you have completed this, Vaclav Koller will contact you during your second visit to Prague. He will offer to go to him and use the calibrator. As a result, all restrictions on the use of additional augmentations will be removed.
SM09: It's All in the Family
The quest is available if you agreed to a deal with Batkoveli
When you are in Golem City, Otar will contact you and demand that you fulfill your part of the deal. All you need is Louis Galois (you will meet him during). You don’t have to kill, but warn, then the merchant will lie low and Batkoveli will believe in completing the task. However, you can skip the meeting with Galois altogether.
Talk to Masa Kadlec

The actual start of the quest is just a conversation with the Red Queen's mistress. Kadlec will be on the second floor of his club, in the manager's office. We talk to her and take the task.
Kidnap Dominic

Dominic is located in the closed territory of Dvali, in another part of the city. The best way is to get into the yard and climb through the lift. There will be a lot of enemies inside and for greater convenience it is best to remove them. Kadler asked not to kill anyone (you are free not to listen to her), so we use a tranquilizer.
In the same courtyard where the lift is located, we take Dominic to an open storage room. We leave it inside and close the hinged door.
The quest is completed.
SM10: Reaper
The quest is available during your second visit to Prague.
When you are near your home in Prague (exit there or from Koller after SM08), Aria Agento will contact you and tell you about the murder, not far from the apartment.

The area will be cordoned off by police. We speak with the witness, Daria Myshka, and then with detective Karl Montag.
(Optional) Examine all clues
 |  |  |
 |  |  |
There are only seven pieces of evidence that are recommended to be examined before going to the suspect. “Marks”, “bruises” and “game” on the victim’s body, “augmentations” on the wall with a bloody trail, “EMP cartridge fragment”, “broken glasses” and “ID card” on the floor throughout the cordoned off area.
We talk with the detective again and get two tasks
Interrogate Johnny Gunn
We go to the main suspect for a conversation. If you have installed KASI, you can squeeze even more out of it, which will help in the investigation.
(Optional) Examine Smolinski's evidence
We go to the police station. The area is open, so we calmly enter the building. The archive is located in the basement, the entrance to which is protected by a lock. Hacking is prohibited, so we wait for the patrolman to come out. The lock is protected by the third level, and if your skill is not high enough, hack the computer first, it will contain the password.

In the archive, go to the name lockers and find the one with the surname Smolinski and hack it. In principle, others can also be opened.
In Deus Ex gameplay: Mankind Divided there are many gems that begin to play in the rays of gamer attention only if certain, quite simple conditions. Which, in turn, does not mean simpler gameplay, rather, quite the opposite. What did the Japanese say there? Something like “fast is slow, but without a break.” Yes, it seems so. In fact, any gamer who wants to have a blast in the company of Adam Jensen can take this saying to their shield.
Because in Deus Ex: Mankind Divided you can’t rush, go into a frontal attack too often and, of course, fuck... I wanted to say, be afraid. I am sure that the latter is not about you and me. This means that all that remains is to learn to enjoy the leisurely and intelligent gameplay, when the enemies last minute They don’t suspect that death is on their heels and rely on their computer power, not knowing that everything around has long been quiet - peacefully hacked and cracked.
Difficulty level - to the maximum!
Yes, let's not waste time on trifles. Mankind Divided truly shines only when it can bear down on the gamer with its full force. Of course, you can warm up a bit on medium difficulty settings. You even have to do this if you have never crossed paths with Adam Jensen in the vast gaming universe before. (as funny as it may seem, such people still really exist, I checked). But in all other cases, don’t be afraid to set the difficulty to maximum. I'm sure you'll enjoy the results in a couple of hours.
Always take a tranquilizer rifle
At the beginning of the first mission you will need to select a weapon based on your hand. Find the “non-lethal weapon” item in the dialogue, then the “ranged combat” option and you will be offered a tranquilizer vintar. This choice will not bring you advantages when it comes to the quality of weapons. Nor will it force you to choose a stealth approach, depriving you of the joy of shooting properly. A tranquilizer is needed primarily because later in the game this weapon is found relatively less often than other guns, so it makes sense to stock up on a rifle in advance so that, as they say, it does not “excruciately hurt.”

Hide and hide
Generally speaking, there are no rules of this kind in Deus Ex: Mankind Divided. No one is forcing you to choose a playing style against your will, but... Believe me, experience, and not only mine, shows that the gameplay of Mankind Divided is geared towards stealth. So sit back and indulge yourself in a spy detective story with explosive action elements. Hide, crawl, attack from the corner, use invisibility and hide the corpses of enemies well.
Which Augs should I take?

Early in the game, Jensen's system begins to malfunction. You have points to correct the situation. Let's assume that you took my side and decided to fight in stealth mode. Based on this assumption, we will begin the selection of Aug-improvements in order to add weighty arguments to the Adam system in the fight against enemies
Critical important Augs:
- Smart Vision
An important improvement, used always and everywhere. Using “smart vision” you search and find loot, hidden entrances and exits, cavities in the walls. It's useful to bind this enhancement to a specific movement or button on the controller.
- Glass-Shield Cloaking
Invisibility is a great quality that Jensen actively uses, regardless of how he is used to taking down enemies or hacking terminals. Aug greatly drains the battery while running, but “eats” almost nothing if the main character of the toy stands still. It's also a good idea to tie invisibility to the controller, because you'll be using this improvement all the time.
No less important are the augs, which allow Adam to penetrate closed rooms and areas.
- Hacking capture
Hacking ability needs to be developed from the first moments of gameplay. In some situations, this Aug will be the only one capable of getting you out of trouble. You need to reach the third or fourth level as quickly as possible, but it’s nice to have the fifth level in order to completely relax and have fun.
- Cybernetic Leg Prosthesis 1 (Jumping)
Cybernetic jumping prosthetics are very effective, especially when the situation goes in the wrong direction and Jensen has to make a move. Quickly jump onto the roof, “fly up” into the ventilation, get away from overly annoying and numerous enemies - for all this, prosthetics are just what the doctor ordered.
- Optimized Muscle
In principle, hitting through a wall is also necessary, but optimizing muscular effort is much more practical. This aug will allow you to lift and move any heavy stuff, which is important, since the gameplay of Deus Ex: Mankind Divided quite often offers secret rooms, the entrance to which is filled with all sorts of heavy crates and boxes. Without optimization, Jensen with his “smart vision” fully justifies the old proverb “the eye sees, but the teeth are numb.” You see secrets, but you can’t get close to them, which is annoying. Enhancing your muscles will solve this problem.
- Remote hacking
A critical improvement for players trying their hand at stealth. In Mankind Divided, there are often situations where you can’t fool the enemy with just a distraction. An entire battery of various tracking devices, including drones, as well as laser systems and barriers, remain vigilant. Hacking all this computer stuff from a distance very effectively solves the problem and makes it easier to get through especially difficult sections of the game.
One of the most important advantages of Deus Ex: Human Revolution- this is the presence of well-developed side tasks. Yes, there weren’t so many of these tasks if you compare the game with others role-playing games(a little more than a dozen tasks), but these tasks were quite exciting and interesting. Moreover, among these additional quests there were practically no banal tasks in the style of “kill and bring” - each side task was based on a fascinating and exciting story with an unpredictable ending.
Fortunately, the sequel follows in the footsteps of its predecessor and offers players the same incredibly interesting side quests that can be accessed during the course of the main storyline. Of course, it will not do without a serious moral choice, important decisions and charismatic characters. Moreover, completing additional side missions in Deus Ex: Mankind Divided can even be more interesting than completing the main missions.
In this article you will learn how to complete all additional tasks in the game Deus Ex: Mankind Divided. It will also be presented here how the choice made during the completion of these same tasks will differ, so that you can choose the most optimal option for yourself.
Walkthrough - Mission: “SM00 - Neon Nights”
→ Neon Nights is a side quest in Deus Ex: Mankind Divided. During the passage, the main character will have to explore the Neon trade in Prague, thereby finding himself in the very center of a war between several serious gangs. And most importantly, there are several key points in this mission where you can get stuck, not knowing what to do next. That is why below is a complete walkthrough of the “Neon Nights” mission.
→ First, listen to the conversation between local drug addicts who are standing in the courtyard located to the west of the post with the police. They will be the ones who will talk about the Neon trade. So, as soon as you manage to listen to their entire conversation to the very end, a corresponding marker will appear on the map, pointing to the local dealer’s house.
. Assignment: “Flower trading”
The courtyard located right next to Adam's house is a real trading platform, where they sell a wide variety of drugs, including Neon. Bonbon and his gang sell drugs in this place day and night. According to the information received, this gang uses apartment 22 Zelen as a kind of base of operations. Moreover, this is literally two floors below Adam’s apartment.


Go to the house where the main character, Adam, lives. Now you need to get into apartment No. 22, which is located on the first floor. Moreover, there are several ways to accomplish your plans. For example, you can use the classic passage, which I think is familiar to many - a ventilation shaft. This ventilation hole is located between the 1st and 2nd floors. But there is another way to get inside - the front door. However, the doors will require an access code and it looks like this - “0310”. Inside, the main character will have to deal with two dealers. After they are finished, go to the kitchen and hack into the laptop that is lying on the counter. I warn you that the laptop has a third level of security, so be prepared. In any case, you will need to read the email on your laptop in order to complete the current stage of the passage and move on to the next stage of the task.

. Assignment: “Behind Our Backs”


It's time now to go to the apartment building, which is located on the north side of the Palisade metro station. The required apartments for the task will be located on the ground floor (apartment 202, building 33, Hlavni street). The doors can either be hacked (there is a second level of security) or you can use a remote hacking device to remove/open the window curtains and jump into the window above. There is also an option with a ventilation shaft in apartment 203 on the opposite side of the apartment complex, but it will require improvements to the legs. In any case, as soon as you manage to get inside, go straight to the bathroom and find and then take the pocket secretary that lies on the very edge of the bathtub. Immediately after this, a new key goal will appear.


. Assignment: "Party"

Of course, looking for a special and unique key card is not at all necessary. Because you can get to the party using other methods. Head to the key icon that is indicated on your map. In the end, the main character will be near the entrance to the building. If you have already discovered an augmentation that increases strength, then simply drag the heavy steel boxes that are located on the left side to open your way to the corridor for local personnel.
However, if you want to get a pass, then in apartment number 202 there will be a locked computer on the right side. Having hacked it, you can ask the “smart home” to call the “cleaners”. After that, go down to the metro, go to another area of the city and return to the apartment. Now it will be sparkling clean, and on the bed on the second floor a pass to the rave party will be waiting for you.
But before you go further, be aware: the floor is under high voltage, but you have the opportunity to simply quickly run across it, and then, if necessary, restore your health. You can also blow up doors using the same fragmentation grenade. And in this case, you will need to immediately run away from the building and wait for the moment when the NPC’s panic passes.

Once you're inside, find the locked doors and break them open. Inside, Adam will find a corpse. Search the pockets of this corpse - this way you will find a portable secretary. Read the information it contains and the next stage of your task will begin.

. Assignment: “The Door of Perception”


Now it’s time to move to apartment number 84. These apartments are located in an apartment building called “Libuse”, which is located in the north-eastern part of Prague. Upon arrival, please go inside. There are two ways to get inside: 1 - by breaking into the central doors (there is a second level of security), 2 - by going through the ventilation shaft (the path to it is shown in the screenshot above). In any case, inside you will need to find a secret/secret room in the kitchen. In order to access this secret room, you will need to find a hidden switch. The spray bottle that lies near the sink acts as a switch.
But when you find yourself in a secret room, after opening the doors, find the safe inside and crack it. The safe, in turn, will have a fourth security level. Inside the safe, the main character will find a pocket secretary, the information in which will advance Adam to the next part of this task.

. Assignment: “Where all the colors come from”

It's time to go down into the sewer, which is located not far from the main character's apartment. In it you have to go through several locked gates, each of which is under a combination lock. Just follow the signs, which will soon lead you to a key location. All gates will open with the code “0311”. Moreover, know that there will be a turret between the gates. This turret can be bypassed and a computer behind it can be hacked with the third level of security. Using a computer, you can deactivate the turret. The password is "IMCARCOSA".
The key location (laboratory) will be guarded by soldiers, a large number of cameras and a couple of turrets. Moreover, the key target will be located in the right corner of the base (back room). If you don’t know what to do, then when you find yourself in a drug production laboratory, first of all, use the laptop on the second tier of this room (there is a third level of security). Using a laptop, you can disable security cameras. You can climb up through the huge pipes on the left side of the entrance to a small nook where there is only one enemy inside.
By the way, if you manage to sneak inside, then the main character will personally be able to talk to the chemist. But know that any attempts to persuade her to help you are futile. So it may be worth using threats rather than ordinary persuasion.

However, if the threats do not have any effect, then you will have to get to the tanks on your own. The doors on the way can either be hacked, or you can lower the ladder for yourself and climb along it to the roof, where, in turn, the terminal responsible for turning off the lasers is located. In any case, it will be necessary to place two batteries in the tanks and activate the terminal indoors so that the chemicals are drained and thereby destroyed.
Dubai, 2029– Cut off access to the atrium.
– (Optional) Turn off the signal amplifier.
Select the difficulty level and start a new game. The briefing will begin. The commander will tell you about the mission. In short, a meeting between Sheppard and Singh is to take place at the unfinished Gem of the Desert Hotel in Dubai. Sheppard is an arms dealer (terrorist), while Singh is an undercover agent. Jensen's task is to prevent the Djinn, militants from Sheppard's group, from getting from the penthouse to the atrium.
Briefing from Miller.
Passage option:
- Not fatal.
– Tranquilizer Rifle (Long Range).
Go forward and right. Jump down and look in the opposite direction. There is a ventilation grill here. Open it, bend down by pressing the C key, and follow inside. Search the corpse and also pick up the triangular code lying nearby. By downloading the Deus Ex Universe application for Android or iOS, you can use it to scan the found code. What will this give? You can watch exclusive developer videos!
Keep moving forward. Open another ventilation, move through the shaft on the right, breaking down the grate along the way. Go up the stairs. Don't rush! Jump down to the tier below where the corpse is lying. Search the corpse. You will find a pocket secretary - Quasim Mir, “Everyone has gone crazy!”. Read the information and find out that the code for the roof vault is 4801.
Climb up and onto the ledge ahead. To reach a higher ledge, simply hold down the Spacebar. Go down to the room with the corpse. Press F3 (or whatever key you have assigned to this function) to activate super vision. In this mode, you see which objects you can interact with. In this case, you need to pay attention to the weak point of the wall. Approach and interact with it to destroy it.
Go into the room. The game tells you to open the door on the right. But don't rush! A little further, against the left wall there is a corpse pressed against a metal structure. Search the construction worker's corpse to find a pocket secretary - Conner Banks, "Shall We Meet?", by Vares Nouri. There is no code here, just a collectible entry.
Approach the panel by the door.
Target. Restore power to the panel.
Follow to where the builder's corpse is located, pinned down by a metal structure. There is a small opening to the next room. Climb up there and look to the right. There is a switch on the transformer. Lower it to apply power to the panel. At the same time, in the passage through which you came here, there is water and exposed wires. You need to climb onto the transformer, and from there - even higher. This way you can get out of the room without getting hurt.
Hacking panels
Approach the panel. You can enter the code if you know it. But since we don't have the code, press the Q key. Briefly about the hack: you start from the blue I/O device. Click on the nearest block to start hacking (either press the C key while it is highlighted, or click on the “Hack” icon again). Follow the closest path to the registry - green icon. Once the registry is captured, the hack will succeed. If you don't have enough time, the best thing to do is switch off.Next, you can agree to learn secrecy. When one enemy leaves, sneak up on the other and attack by pressing the Q key. This will disable him. If you hold down the Q key and hold it, you will kill a person. Drag your body back. You don't have to go straight: on the right side there is a room with the corpse of a builder. There is also a staircase there. Using this ladder you can climb onto the concrete floors under the roof and be above the two enemies. Try to neutralize them - attack one when the other is not looking.
Remember that code 4801? So here there is a metal fence with a door and a panel. Open the panel and enter this code to access the vault without hacking. Once inside, search all the cabinets and the corpse. There is a weak part of the wall behind the wooden box to the right. Destroy it, climb over and jump down the shaft from the elevator. The “Fall of Icarus” skill is triggered every time you land, so you don’t lose health points.
But it’s better to return to the elevator, open it with the green button and select the “Penthouses” direction. Defuse the nearest enemy. You can do the same with the distant ones, since they are turned away from you. Go into the room on the right. You see a dangling grate at the top. When you get close it will fall off. Approach the wall and hold Spacebar to jump into the ventilation. Climb to the very end and climb out through the opening on the left.
Move along the hill. Defuse the nearest enemy. The next enemy will enter the room on the right, opening the door. He's there alone - deal with him. Go down the steps (from this room) and deal with two opponents. On the table in this room, find a pocket secretary - Bark Demian, “This Place Belongs to the Dead,” by Faiz Baddour.
Return upstairs to the penthouse. Find the passage to the technical room. There are still clouds of poisonous gas below. Jump down and immediately climb into the ventilation hole. Climb through it. Once in the new part of the room, deal with the nearby Genies. Climb the stairs to neutralize the terrorist looking down on everyone from above. Before reaching it, go right. Locate the vent. Get there and go right. Along the way you will need to break the grate. You will soon see the second part of the penthouse. This is where the Djinn signal amplifier is hidden. You will see two people guarding it. Once they're separated, deal with them and interact with the amplifier to turn it off.
Use the nearby computer to get information - two entries email. Go further, use the ventilation to avoid enemies. Be careful: there are two enemies next to the doors. You can bypass them through the ventilation, but one of them will enter the very room where you need to hack the panel. Deal with him, and then hack the access panel. Open the door and watch the cutscene.
After the appearance of an unknown group, the task will be updated.
- Don't let the helicopter get away.
– (Optional) Protect Singh.
Jump down. The most important thing to understand here is that Singh, as such, does not need to be protected. You just have to ensure that the helicopter doesn’t fly anywhere as quickly as possible. And to do this you need to approach the helicopter and open the hatch on its side, rear part. Remove the battery and a cutscene will play.
Prague, a week later
Watch the long cutscene.
Mission 2. Morning came too early
Prague, 30 hours after the explosion at the station- Prepare before leaving.
As soon as you regain control, look at your feet. There is a hiding place in the floor (can be seen with super vision). Open it, take out the pocket secretary - anon74@hackernet, “No topic”, from no1@hackernet. There is also a triangular code and an e-book “How to prevent yourself from being killed.”
Go into the hall and pick up another e-book about the Juggernauts team from the table. Go outside through the front door. Adam will automatically talk to the commander, and then to Dr. Vaclav Koller.
Mission 4. Checking OG29
Goals:– Go to the Chista area.
Exit to the street from a multi-storey building. By the way, you can jump out of some window.
Target:Go to the place where the marker points. The guy with the machine gun will refuse to let you through.
Side Mission 00. Neon Nights
A new drug called Neon has appeared in Prague. As it turns out, it is already well known on the black market. There are many places where you may hear about the drug for the first time. You can take the quest under different circumstances, depending on what you heard.The quest, as far as I remember, began in a small courtyard northeast of the apartment complex where Adam Jensen lives. In this shady area, you should hear two homeless people talking about a drug called Neon. If you go higher, you will see a dealer named Bonbon and an Auga looking for Neuropozyne. The cache is located behind her, in a restricted area with security. There is an electric field on the right side. Here you can jump onto the windowsill above the gate and jump down on the other side. Sneak past the guard when his back is turned to you. You will find a locked safe containing money, neuropozyne and a pocket secretary. You will find out the door access code - 0310.
If you have the appropriate upgrade that allows you to break walls, then you can find a weak wall near the safe. It will lead you to the maintenance area with a dead body and a disturbing note in the pocket secretary. You will learn why Neon is not intended for augmented people.
Flower trade
Go up to the second floor of the Zelen residential complex, to apartment 22. On the map you will see that this is a place with limited access. The person inside will attack you as soon as he sees you. However, you can get inside through the bars in the entrance. Overhear a conversation about selling neon drugs and collaborating with the Dvali gang. On a small table outside the kitchen you can find a pocket secretary with an access code to a laptop located in the kitchen. Research the information to get your first objective.

Duncan MacReady.
Target. Find out who is distributing drugs.
Behind our backs
The emails referred to an apartment complex known as Neon Nights, located in apartment 202 of the Main Apartments. When entering the courtyard, look to the left, to the second floor. There is a window here that you must go through. Either use the experimental remote hacking augmentation and open the terminal of the second level of difficulty, or go into the next room and find the grate above the main room. The ventilation will take you to another room.
As it turns out, a Smart Home system is installed here, which recognizes that you do not have access to the apartment. There won't be much time left before the police will be called. You can hack the first level system on a laptop and re-set up a Smart Home that recognizes you.
The clue (clue) you need is on the edge of the bathroom. There will be a pocket secretary that mentions another location. Go up the stairs to an apparent overdose victim who will have another pocket secretary.
Party
Move into Louis's courtyard and find a low wall to jump over into a small park area. The door in the corner leads to the party, but you'll need a key card. If you have multiple augmentations and a lot of painkillers, you can go around the door, look to the left and see heavy trash containers. Behind them there is a weak wall that can be destroyed with the appropriate skill. Behind the wall there will be a channel with electricity.
If you do not have the necessary augmentations, then use another method. Some letters and notes refer to "cleaners." Use the laptop in the apartment again and call the cleaning staff. You should receive a confirmation email indicating when the cleaners will appear. Leave the house, go to the subway. When you return, the apartment will be clean. There will be no body, and on the bed you can find the key card you need.
At the party you will find drug addicts dancing. If you go left, you will overhear a conversation between two people at a locked door. They will talk about dead person. Apparently, all augmented people who took Neon die. When they leave, break open the door on the first level and you will find the body. Read the Pocket Secretary of the Deceased for information on the sellers. You should visit the laundromat next to Pilgrim Station.
Door of Perception
Move to the Pilgrim Station area and enter Libushe's apartment, the door to which is on the second floor. The same symbol will be here. You can get inside in different ways. Either hack the second level door or use remote hacking to open the window shutters. Or move through the ventilation shaft through an open cabinet.
Unlock your laptop and examine the data. Examine the pocket secretary in the bedroom. Continue exploring the area until you see a fake wall in the kitchen. Check the spray bottle on the right to open a secret cabinet (or move through the grate for the memory block below). There will be a safe of the fourth difficulty level. Hack it or use the multi-tool to open it. Inside there will be money, a multitool and another pocket secretary. The next cache is in the laboratory. It's somewhere in the sewers under Jensen's house.
Where all colors come from
Return to your area, leave the Zelen apartment complex and head south to find a sewer grate and go down into the sewers. Move forward into a large room. There is a locked door here on the right side that leads to a rotating turret on the other side. You can get above it by following the left side of the door and using augmentations to negate the effects of the electricity. You will rise to the second tier, to another locked door overlooking the turret. If you turn off the power downstairs, the door break panel will also turn off.
If you can, hack the third-level laptop that controls the turret. Or try to make a dash to the small safe on the couch, near the turret. Inside is a pocket secretary with an access code and money.
Climb up the stairs from the turret and you will find a terminal with the fifth level of access. Alternatively, you can go higher and jump from a height to get to another location (if you can move heavy containers).
There are six armed bandits in the underground laboratory. Two are outside the lab, three are inside and one is upstairs with a laptop in the corner disabling the security system. There are several scientists in the laboratory, one of them is in the far right corner. You can reach the security laptop from above using pipes. To hack a laptop you need the third level of skill. It can be disabled using the same security code as the turret. The laptop also disables the alarm and laser bars near the vat of mixture in the far corner.
If we talk about the far corner, then you can go down from the top floor and talk to the scientist. Counteract her by offering evidence you collected earlier. If you do this, the doctor will relent and open the door, allowing you to turn off the reactors and end the quest.
If she doesn't do this or you choose the wrong options, you'll have to act on your own. This could mean: either you turn off the laser tripwires and jump down from above, or use a remote hacking of the stairs, or hacking the third level security door (there is a multi-tool on the table behind the girl). Once inside, turn off the reactors yourself, using two cell batteries for each container. Then use the first level terminal to apply power.
You can also go through the main laboratory, but you will have to deal with all the guards and make sure that the scientists do not raise the alarm. Both entrances to the laboratory have switches.
Golden ticket
Target. Meet with the clerk.A little to the left there is a police checkpoint with red lasers. Chat with a person who refuses to let you through. Play along with him and agree to visit the clerk.
There is a blue marker on the map where the clerk stands. Follow the street there, it's not far. The clerk stands to the right of the security guard at the entrance. Talk to him about everything. Tell him that Dragomir promised a free pass. Finally, choose a bluff - no pass needed yet.
Target. Interrogate the forger.
Climb over the fence and jump across the rooftops. Below, in the courtyard there are two guards - neutralize them. Enter the house and move past the lasers. There is a guard upstairs. Disarm him and search him to find a pocket secretary - Mikhail Trefil, "Konitzki's Legacy", from Franz Trefil. In the message you will learn the code from the security node - 1980.
Another pocket secretary can be obtained from the clerk. One way or another, inside the house you need to go upstairs. You can hack the laptop to disable all lasers and security cameras. Meet the girl and find out what's going on here.
As it turns out, Dragomir is to blame for everything. Go to him and talk. There's no way to deal with him like that. If you threaten, he will attack you. Give change and the other cops will attack. Dilemma.
For now, you need to give two passes to Irenka and Edward. Follow the nearest marker. The girl is in the basement, inside the house. As for Edward, inside his store you will need to neutralize a bandit with a machine gun using the Q key. After giving the passes to both, go to the station.
Going down the metro, choose the direction - Monument station. Having arrived at the place, rise from the subway to the surface and turn the corner to the left. Go to the registration desk. You can't just enter here - it's a restricted area. Wait for the guard to move away and squat down inside. Move through the doors. The next door will need to be opened by entering the access code on the terminal. Go further and you will find yourself in a room with a computer.
Hack your computer. Disable both cameras, but enable the checkpoint. Quickly go to one of the two working terminals and interact with it. Next, you will need to decide whose pass to activate – Irenka’s or Edward’s. The decision is yours! Take the metro back to Fountain Čapek station.
Go to Dragomir. There are three police officers to the left of the checkpoint. Talk to the woman (officer), tell about Dragomir. Select:
- Surrender Dragomir.
– Extortion and forgery.
Wait until the police kill all the enemies. Also be sure to wait for the alarm to go away (the percentages in the upper right corner of the screen). Mission completed!
Mission 3. Get in better shape
Target:– Find Koller in the bookstore.
As soon as you deal with Dragomir (more precisely, the police will do this based on your tip), then go forward through the place where the old checkpoint was. Follow to the very end. It is advisable to wait until the “Search” procedure with the police is completed (percentages in the upper right corner of the screen). You can turn into the alley, but here you will need to hack a difficult panel. The best way is to climb onto the cargo lift and press the button. You will rise higher.
Move to the balcony and enter the apartment. Climb through the vent to find yourself in a restricted area. Move left along the visor. Climb onto the concrete chimney and jump to the adjacent roof on the left.

Vaclav Koller.
Follow the canopies to the left. At the end of the building, jump down and climb to the top of the scaffolding on the other side of the street. Walk along the windows. One of them can be opened. Inside, on the second floor there are three opponents. You can bypass them, or you can neutralize them. You need to go into the corridor a little further than the enemy standing still, near the stairs. Crawl under the bookshelves and enter Koller's office. Pull the red book on the shelf, call the elevator and go down. Walk towards Koller. Watch the cutscene.
After checking, activate one of the hidden augmentations. In order for the system to stabilize, turn off, for example, leg augmentations. Select deactivation.
Continue the conversation with Koller. Agree to anything to get side quests.
Target. Interrogate Sharif in my apartment.Just go back to Jensen's apartment, follow the marker. Inside, you will need to go to the table, interact with the remote control and select communication with Sharif. Chat about everything.
Sharif will promise to track down Vadim Orlov. Thus, the task will not be completed, but you will be able to continue it after some time. We'll be back later!
Side mission 04. Calibrator
Target. Go to the Chista area.This side quest and the main story quest coincide in place of completion. Get on the subway and go to Palisade station.
Follow the blue marker, climb over the fence and find the hatch. Go down into the sewer. Go to the underground casino and talk about everything with Otar. Tell the truth, agree to a favor. Go up the steps and take the calibrator from the table. The task is completed. After some time, Otar should contact you and ask for a favor. Which one? We'll find out later!
Side mission 02. Cult of personality
The side mission “Cult of Personality” takes place in Prague, in the sewers under the Zelen residential complex, where Adam Jensen lives.While exploring the sewers south of your Zelen apartment complex, which may be part of the side mission 0 Neon Nights, you may encounter two women searching for a lost brother and warning of a mysterious cult nearby. Follow them, you will meet a strange man named Viznik, who cannot properly explain what happened. You will learn that there is a dangerous man named Richard who preaches a cult.
Target. Enter the restricted area and meet with Richard.
As you stand facing the screen with Richard, you will find that your mind gradually becomes distracted. Eventually, you will have to agree with the stranger. He will let you stay in this utopian world
Target. Find a way to reveal Richard.
You will not have access to super vision, so you will have to look around the area as usual. Look at Richard's people. Good people do what they say. Good people don't ask why. Good people don't doubt. Good people don't bother Richard. Good people don't die. The most important thing is that good people don't go upstairs.
Keep this in mind as you continue to collect evidence. Go to the back of the utopia to find another poster of a hypnotist named Richard. Another face and name crossed out. Search the generators in the other corner to find a crumpled piece of paper - a true poster of Richard's partner named Libero.
Target. Find Libero.
Next, as part of the passage of Deus Ex: Mankind Divided to the site, leave utopia, move to another area and find a magic shop. In a conversation with Libero, you learn that he and Richard used an additional version of hypnosis to create an alternate reality, but after the incident, everything stopped when Richard tried to go too far. You will have two options. Either you find Richard's room where he is broadcasting from and neutralize him, or use Libero jammers, which will reduce the broadcast frequency and return people to reality.
Target. Install mufflers.
Return to Richard's world, go up the stairs and get ready to play cat and mouse with the turrets and cameras. You are looking for arrays of signals. There is one in the corner where two corridors meet. But be careful of the stationary camera at the far end. To get to the other two arrays, go back down and move to the opposite wall, where there is a giant screen ladder. Find the platform above. Jump further using the box and sneak up behind the stationary turret to install the next silencer. The last one is behind the turret chamber, near Richard's door, against the far wall.
Target. Reveal Richard to people.
Once all the jammers have been installed, return to the main room and use the microphone to confront Richard in last time. There are several options to expose the preacher's lies and show people that they have been deceived into believing. If you want to take Libero's advice and complete the task calmly and without consequences, then sympathize with Richard, and then choose softer expressions. He will realize his mistakes and you will get the best ending to the mission.
As the lost souls regain their sanity, they will turn away from Richard. In the end, he will be left alone. Don't be shy - go into his room and see a man. Collect useful items.
Target. (Optional) Neutralize Richard.
If you don't want to complete this mission with a good ending, you can simply try to find Richard in his room without using the silencers. This is much more difficult to do, since you will not be able to use weapons and most augmentations. You will have to pick the door with the fifth level lock (you will find yourself behind the turret) or try to pick the second level door, but you will find yourself in front of the turret.
Once inside, if Richard is facing the door, you can distract him by throwing an object or using remote access to the TVs in front of him. Click on the switch in the back of the room to disable the turrets and other electronics. People will be free.
Mission 4. Checking OG29
Goals:– Go to the Chista area.
Go to Task Force 29 headquarters. To do this, in the store, move the picture aside and press the button to go down the elevator. Go forward and up the steps.
Important object. Shooting gallery
At the top you will automatically chat with Aria. She will give you the key card to Tyr. Go down and go towards the exit. There will be an entrance to the shooting range on the right, around the corner. Enter there to capture an important object.Target. Install chip snitch.
Go back up the steps and turn into the information room on the right. At this end of the room will be Peter Chan, looking at the computer. Chat with him to take on an additional task.
Go out to the stairs and look for ventilation here. Remove the grate and climb inside. Jump over the tension. Do you see a switch ahead? Use it to turn off the electricity. After this, get out through another ventilation and find yourself in the room in front of the server NPC.
There will be a panel with hacking level 2. If you have this level of hacking (you need to spend a Praxis point), then try to hack. Otherwise, go to the room on the other side of the second floor where you talked with Chan. Next to Chan's entrance there is a table with Selina Carter's computer. Hack the computer and read the access password 7734 in one of the letters.
Return to the panel and enter your access password. Go to the server, open it and install the snitch chip.
Go to Miller's office, which is nearby. Talk about everything and agree to complete the task.
Side mission 05. “Samizdat”
Target. Find the source of the hackMove to the indicated building, go up to the third floor and go to the door. There will be a panel here that needs to be hacked. Hacking level 2.
Or if you have an augmentation that breaks through walls with cracks, you can find such a wall between the second and third floors. Inside the apartment, go to the right room and hack the laptop. Go to messenger and chat with an unknown person. You must select the options on the left side. Bluff by saying you forgot where to go. You will find out where the meeting will take place, as well as the password for the panel.
Target. Find "Samizdat" in the Davny area.
Target. Prevent Samizdat from exposing OG29.
Follow the marker and go down into the sewer. When you get to the place where the fire escape leads down (there is also a woman and three monitors showing the news), then climb onto the box on the right. There is no need to climb down. Jump onto the black pipe and cross it to the left. Go down and to the right. Talk to Samizdat.
Target. Find incriminating evidence in the president's office.
If you agree to help the man, the task will be updated.
When I first went to the Palisade bank and spoke with the administrator opposite the entrance (you need to wait until he is free), the answer to the question about the personal manager was the same - everyone is busy.
The next time I returned to the bank was after (SPOILER) I found Vadim Orlov dead in an apartment near the headquarters of Task Force-29. You will find a key card for your account at Palisade Bank. Perhaps it has something to do with what happened next. When visiting the bank after these events, the administrator will say that manager Romanek is waiting for us.
Walk further down the hall and enter the room on the left side. It will be empty inside (no code required). Find the pocket secretary on the table, which contains the access code for the door on the lower level. Go down, go to the elevator and hack the panel on the side using the same code. Go into the room. The key card to the Level 3 Palisade Elevator can be found here.
You can find it another way - there is a red barrel on the side of the elevator on the main floor of the bank. Move it aside and climb into the ventilation. Through the ventilation it will be possible to get to Romanek's office. The manager is sitting at the table. To the right of him, on the shelf lies the same key card.
Take the elevator to the third floor. Immediately, without getting close to the lasers, enter the room on the left. Do you see the computer? Wait for the guard to leave, then hack the computer. You will find out the password from another computer. By the way, he is not particularly needed for the quest.
Go to the left of the table with the computer, go up the steps and carefully stand under the surveillance camera. When she is just turning away from the door on the left, start hacking. Simple panel. Inside the office, go to the table on the right, where there are two monitors at once. On one of them you can disable surveillance cameras, alarms and lasers. Having done this, examine the shelves inside the table to find a note with the results of drinking water tests. The task will be updated.
But don't rush! Immediately find another piece of incriminating evidence. Between two desks with computers there is a three-piece puzzle. To rotate the shapes, hold down the E key. To change their height, simply click on the same key. It should look like the screenshot below.

Solving the Palisade Bank puzzle.
Inside the secret room, remove the painting on the right. Hack the safe, which is not difficult to do. Inside the safe there will be information about Flight 451.
Target. Take the incriminating evidence to Kay at the Peak.
Return to Samizdat's lair and talk to the guy named Kay. He will ask you to complete one more task.
Target. Seize control of the city's information hub.
Move to the indicated location. The point that needs to be hacked is on the roof. Find a lift near the building. It requires one cell battery to operate. If you have one, then insert it into the lift. Jump on it and press the key. Once on the roof, remove the cover on the unit and hack it (first level)..
Mission 5. Jurisdiction Claims
Target. Go to Ruzicka.Target. Meet Smiley at Ruzicka station.
After talking with Miller or a little later, go to any metro station. Miller will tell you that all you have to do is select the Ruzicka station on the map. Do so.
After talking with Smiley, you will find out how things are going with him.
Target. Find evidence.
Go up the steps and a policeman will stop you. There are doors on the left and right. Go left and pick the lock on the door. Inside the storage room you must find the key card for the Ruzicka station. Take this key card and return to the corridor. Go to the opposite door. There's a small key card reader there. Use it since you already have the required key card.
Disarm the guard nearby, search him and find the code in his pocket secretary. The code refers to a door located nearby. When the camera turns away, interact with the panel and open the door. This will give you access to the computer room.
Return back to the checkpoint. You can try to break into the booth nearby. There is a generator remote control inside. If you turn it off, run out immediately. One guard will come running, who can be easily neutralized.
There are two more guards ahead, next to the stairs. Go to the room (storeroom) where you found the key card for the Ruzicka station. Remove the large box from the shelf and you will see the ventilation. Lifting the grate, move through the ventilation to the very end. You'll find yourself at the top of the stairs, guarded by two police officers. But there will be two more opponents here. Wait for the right moment, get out of the ventilation and go to the other stairs on the right. Go through the door.
If you can move heavy objects (you bought augmentation), then move the large box immediately to the right of the door. There will be ventilation behind it. It will lead you to the next room, next to where the DCD media with the image is located. Carefully get there, moving along the walls. Take the carrier and go back the same way.
Travel to OG29 headquarters and talk to Smiley to complete the quest.
Side mission 06: 01011000
Side mission "01011000" starts in Prague.This mission starts with "Important Site in Prague". There should be an explosion after the second visit to Prague, you will see a glitch on the screen. Approach an ad panel with glitched displays and you will hear a voice. Examine the sign and a voice will ask Adam to come to the building in the Prekazka area. Next to the time machine.
You will see laptops, all of which will be unlocked. Everyone will allow you to exchange messages with an unknown entity named Hell. The creature is looking for part of its memory, data, and asks for help to restore it all. You can ask for more details, but nothing will come of it. If you agree to help, Hell will tell you the location of the package containing the data. It's next to the old tourist center. You will learn the code for the room - 1591. While you are here, feel free to collect all the loot you need.
Target. Get the Hell package.
Walk down the street to the old toy store and look for the tourist information sign. The door is boarded up, but there are several ways to get inside. You can jump to the second floor, to the window, from where you will have a good view. Alternatively, go to the staff area on the side of the building. Here you can break the weak wall or go through the electric floor to the door with the fourth level of access. This will take you around the small armory and end up at the back of the tourist shop.
Inside, three mercenaries are trying to find the same thing as you. There is a panel on the door on the left side, but no power. There is a switch in the corner that can send electricity to the floor ahead. This will kill the mercenaries, but if you want to complete the mission non-lethally, then don't do it. The mercenaries have a pocket secretary with orders from Mr. Everett, the CEO of Peak, a member of the Illuminati Councils. When you open the door, Hell will power the lock and you can enter the passcode to go inside and retrieve the disc.
Target. Find the reader.
Travel to the Pilgrim area and find the antique store nearby to talk to the overly cheerful clerk who invited you to the future. Learn about the disc reader. It's quite difficult to buy. Several things can happen now. If a comment about another client caught your attention, then you will go to the basement, where the same device supposedly is. When you go there, you will find a tied up body and a lot of explosives. At this moment the clerk aims his pistol at you.
You have fallen into his trap. There are EMP mines here that disable your augmentations. Above there is a shaft with smoke that blinds you. There are also several laser arrays connected to explosives. There's a guy in the corner with an explosive that will go off in 45 seconds. To neutralize it, you need level 5 hacking skills. So you open the door and press the button to turn off the countdown.
There are two ways to leave the death trap. One of them is to use the pocket secretary previously found among the mercenaries.
Target. Activate data.
You will resolve the conflict, take the reading device and return back to the Zelen apartment, where Hell will not detect you. Go to the table in front of the TV to install and use the disc. Hell will appear on the TV screen.
Further events will be interesting. Hell is a fragment of the general consciousness. Find out about everything.
Whatever your decision, Everett's people will come to the apartment. Deal with them.
Mission 6. Let's put things in order
Target. Meet with Dr. Ozen.This task will become available immediately after you leave the Ruzicka station for the previous task.
The doctor is at OG29 headquarters. Just talk to her in one of the rooms.
Alex will contact you when you return to OG29 headquarters after obtaining information at the Ruzicka station. Move from the OG29 headquarters towards the Protez clinic. Go downstairs. Adam knows the access codes. Talk to Alex about everything.

Alex Vega from the Juggernaut Corporation.
After this, the task will be updated.
Move where the marker points. Talk about everything with Miller, and then with the pilot. Watch the cutscene.
Mission 7. Rooker Delivery
Target. Visit Sokol's apartment.Go to the indicated location, enter the apartment and talk to the girl.
Target. Find Tibor in Tesniny.
Move towards the marker and go down to the police station. Bribe the policeman for 1000 credits so you can interrogate Tibor. Chat with him. He will refuse the deal.
Target. (Optional) Free Dusan.
Let's start with the last goal. Do not leave the police station, but go deeper into it from the cameras. There will be a staircase here. But be careful - there is a camera at the top. Go downstairs. On the lower floor there is a room in which a policeman beats Dusan. If you deal with the policeman or neutralize any other cop, a new task will appear.
Target. (Optional) Neutralize the police (0/4).
So there's a total of four cops down there. Until you neutralize them, Dushan will not be freed. To do this, you can neutralize three of them in close combat. As for the cop who is equipped in a mechanized suit, he can be shot several times with a tranquilizer rifle.
When you deal with everyone, free Dushan. Two goals will be achieved, but a new one will appear.
Target. "Optional) Talk to Lubos.
The password that Dusan told you must be given to Lubos, who is guarding the elevator on the first floor of the KPA.
Target. Talk to Lius Galois.
Return to Tibor's holding cell. There is a door where you went down the stairs (to free Dusan). Go through it, but carefully - there are two patrolmen behind it and another cop moves here periodically. Hide behind the boxes on the left. Disable the nearest cop by moving him behind the boxes without the other cop noticing. Get out of the area by climbing over the boxes and turning left. You will leave the restricted area.
Follow the only path and go up the steps. This is the market. Galois must be looked for here.
Target. (Optional) Get rid of Galois.
If you took the part, the necessary equipment, from Otar Botkoveli, he will call you and ask you to kill Louis Galois. If you still decide to get rid of it, then when you meet, first talk about CPA.

Otar Botkoveli from Dvali.
When you get to the market, take a few steps forward and turn right. Go up the stairs at the very end. Go inside the store that the marker points to. Talk to Galois.
Objective (Optional) Retrieve Tibor's key card.
Go downstairs. Remember the steps you walked up from the police station? You left them to the right. But if you go forward, you will find an alley behind which the bald cop decided to take a leak. Stun him, search him and take the CPA key card stolen from Tibor.
Target. Go to the territory of the KPA.
There are several ways to get there. You can talk to Galois without killing him. You can then go through the back door of his store and up the stairs.
The second way is if you found the KPA pass card that was taken from Tibor, then go down to the first floor of the market (the tier you got to after the police station) and find the elevator here. Use the found key card on the elevator panel, and then go upstairs.
The third way is to talk to the security guard at the elevator without using the KPA key card. His name is Lubosh. This is the only way to complete the additional task! If you have already used the key card on the elevator panel, then you will not be able to achieve the additional goal.
Anyway, go through the door at the top. Watch the cutscene. Talk to Marchenko about everything.
After talking with Miller, go towards the marker. Before passing with lasers, look around. On the left side there is a utility room. Pick the first level lock. This is easy to do. Inside, on the shelf, find the pocket secretary KPA_ALL “New Code to the Bridge” from Max. Read and find out code 3354.

Jim Miller.
Now you need to overcome the lasers. You need to move the heavy box on the right. This is only done if you have acquired the appropriate skill. After moving away, make your way through the hole in the fence. Exit through the door ahead.
You have found yourself in a large tunnel. There is a control panel in front. To hack it, you need just the code 3354. Enter it, select the “Push” option. A bridge will appear. Go to the other side, knock down the lock on the door and go inside. Use the KPA key card to call the elevator. Ride it higher.
Knock down the castle and go forward. After talking with your partner, go up the steps and go through the door. Watch the cutscene with Tibor.
Follow Tibor into the room, avoiding the attention of others. If you approach him unnoticed, a cutscene will start. While talking to Tibor, tell him that you are ready to help his family. If the cutscene does not start, then simply neutralize the enemy.
Go deeper into the room through the corridor, climb up the bags and see the enemy. Defuse him. There is a hole in the floor on the left side. Jump down to get into the shower room. Go further and from around the corner eavesdrop on the conversation of two opponents. Wait for one of them to go check the shower. Go back and watch for him there. Deal with the second enemy as well. There is a computer where they stood. Use it to disable the surveillance cameras and laser grid.
Jump through the window and look for a ventilation grill under the camera on the opposite wall. Move the box and climb inside the ventilation. Move to the very end.
Target. Find an elevator.
Go around the corner and deal with the enemy. There will be two women ahead. You can run up and neutralize it at the same time if you have acquired the appropriate skill. In front of them on the right side there is a structure made of boxes and other objects. Climb up along it, like a ladder. Open the grate on the wall ahead and get through the sewer to the far room.
Do not eliminate enemies from below. Follow to the room ahead. There's a camera here. When she turns away, go to the table on the right, which is closer to the camera. When the camera turns away again, jump over the table and go under it. Eliminate the woman and go into the room on the right. In the utility room, open the window and climb out. Go right, get over the barrier.
There is a place ahead where you can jump down. If you want to turn off surveillance cameras, then do so. Jump down and climb through the window. Just around the bend there will be something else - get out into the corridor of the lower tier. From here, go to the next room where there are two guards. Deal with them without being noticed by the enemy in the other part of the corridor. One of the guards will have a pocket secretary with a computer access code on the side. This computer will allow you to disable all surveillance cameras.
Leave the room and find the stairs nearby. Climb up to return to the place where you jumped down into the shaft with the window. Look in the opposite direction from this descent. You can jump down. On the left side there is a parapet along which you got here. There is a room on the right side. There is also a door with burglary level “2”. You can hack it, or you can jump onto the parapet to the left of this room. There is a window here through which you will get inside.
Exit through the other door and eliminate the lone guard. Approach the window, behind which there is a room with two enemies. Deal with them if you have the skill to neutralize two opponents at the same time. If not, then wait until the conversation ends so that the enemies disperse.
Exit through the door, run to the other side of the corridor to avoid getting hit by the turrets. Climb through the window. Here you just have to deal with two enemies, then go to the marker and call the elevator. Press the button to take the elevator higher.
Target. Interrogate Talos Rooker.
Go through the door ahead and talk to Rooker about everything. It's up to you to decide how to communicate. Eventually you will see a cutscene.

Talos Rucker.
Target. Get to the evacuation point.
In the next room there is a weak point - a curved ventilation grille. You can break it if you have the appropriate skill. In general, first look under Rooker’s desk, remove the bottle of alcohol and find Rooker’s key card behind it. Use it to get into the room nearby. Inside on the table, find the pocket secretary with the evidence that Rooker collected. Replenish ammo for the tranquilizer rifle. Wait.
When two enemies appear in the previous room, carefully neutralize them. There will be another one when you leave the room. Figure it out. A little further is the fourth. There will be a drone flying outside all the time. Beware of him, don't raise the alarm.
Follow forward and in a place that looks like a greenhouse, deal with 4-5 opponents. You don't have to stun everyone. The main thing for you is to find the grate in the far right corner of this roofless room. Move through the ventilation. After it, either jump down if you have the skill, or carefully jump along the side ledges.
At the bottom, go around the floor in a circle and press the button. When the gate rises, run forward along the corridor until the video starts.
Mission 8: Track down the real terrorists
Target. Meet Smiley in his office.Just return to the Task Force 29 office and talk to Smiley, who is pointed to by the marker. The task will be updated.
Target. Find Nomad Stanek.
Move to the indicated location. Go into the courtyard and go up to the third floor. Enter the apartment - the door will be broken open.
Target. Search Stanek's apartment.
Go to the bedroom ahead through the kitchen. There are also antique clocks hanging here. Interact with the clock near the table to open a secret room. Inside, hack the computer with the first difficulty level and read all the letters. Watch the video message on the screen.
Target. Get out of Dvali's trap.
If you don't hurry up now, you will die from poison. There is a ventilation grill under the table on which the hacked computer is located. To get to it, you will have to remove several cardboard boxes. Move through the ventilation and leave Stanek's apartment. The task will be updated.
Target. Interrogate Stanek.
Go to the indicated bar, go downstairs and talk about everything with Stanek to find out about his daughter Alison.
Mission 9. Who's in charge here?
Target. Search Miller's apartment.Move to the indicated location. Go to the end of the building and go up to the second floor. Hack the access panel to Miller's apartment (third level), or look for another way to get inside.
Inside the apartment, go up to the second floor and hit the blue punching bag. This will open the secret room. Inside this room, pick up Jim Miller's key card from the table.
Target. Meet Vega near OG-29.
Return to Task Force 29 headquarters, climb over the fence and talk to Vega about everything. Give her the evidence you found in the lair of the poisoned Rooker. You might not have found it at all!
Target. Use the NPC device.
Return to headquarters, go upstairs and enter Miller's meeting room using his key card.
After loading you will find yourself in virtual reality. Walk in a circle and turn into the passage on the left, behind the screen. There will be a purple glowing area and a triangular hole. Stand on it to move to another part.
Target. Hack data towers (0/5).
On the floor there will be an inscription TASKFORCE 29. Ahead, behind the glass, you see a data tower. Go along the left passage, break open the block to break through the path further. To do this, press the E key. You will see a slider. You need to press E again so that the slider coincides with that part of the diagram where there is a beam of large amplitudes. There are three attempts. If unsuccessful, the hack will have to be repeated after a while. Hack the block on the right, raise the ventilation and load the first data tower (1/5).
Go to the next room. You shouldn't walk forward along the bridge, because there are laser beams there. Go down to the left and go into the room, avoiding the security camera. There will already be two cameras inside. Raise the data blocks so that you can hide behind them. Do you see a ventilation grill near one of them? Open it and move to the very end of the ventilation. There will be another camera here. There is a data pad on the ceiling. Hack it to block the surveillance camera's view. Go up the stairs and hack the second data tower (2/5).
Return to the bridge where you can go to the center. But first, go down the stairs, but to the right. Do you see the data tower going up? You can't just jump onto a ledge. A little further in the wall there are two data blocks. Hack them to make ledges. Climb back up and walk along the bridge to the center of the room. But don't cross the lasers! Move along the perimeter to the right. Running jump onto the extended ledges from the data block. From here, jump onto the ledge with the data tower. Download information (3/5).
Go downstairs. There is one more passage left on this floor. This is where laser beams travel. Go through three doorways with lasers, then go up the stairs. Do you see the pillar? Approach it and look up. There will be a point here that allows you to hack the data block. Hack it. This time you will need to combine the slider with two bunches. A ladder will appear. Climb up, climb through the ventilation shaft and hack the data tower (4/5).
Finally, when this tower disappears, two ledges will appear on the left and right. Pull out the other tabs on the shape in the center. Cross them like a bridge to the center. Climb up the glass roof and jump down to the last tower. Hack it. Review the notes, mission completed.
Side mission 03. Mysterious augmentations
Upon arrival in Prague after the seventh mission, Sharif will contact you and say that Vadim Orlov is in Prague. You will find out the address!Target. Inspect the scientist's apartment.
Move to the headquarters of Task Force-29. A little to the left of the entrance there is a gate into the courtyard. Jump over it. The marker points to the apartment located above. How to get there? You need to open at least one of the garages opposite. From one of them (the left one) I had an access code. Enter the access code and the garage door will rise. Move the trash can towards it, climb from it onto the open garage door, and from there onto the roof. By the way, in the right garage (storage) you can find a stone in the wall. Move it aside, take out the pocket secretary and find out the code to the safe.
So, you climbed to the roof of the garages. Move along the parapet to the balcony of Orlov's apartment. Go inside and search the scientist's corpse. There is a safe on the left. Enter the code you read in the pocket secretary hidden in the niche of the right storage room (garage). Here you will find a confidential medical report.
In the next room or in the scientist's pockets you can find a key card for an account at Palisade Bank. Perhaps she is needed for the “Samizdat” quest and a pass to a personal manager.
Important objects. Last service
Again, upon returning to Prague after the seventh mission, Otar Botkoveli will contact you and ask you to provide him with one last favor. You need to talk to the owner of the Red Queen.When you meet Masa Kadlekova at the restaurant, who is sitting on the second floor in the manager's office, talk to her about everything. You will need to make a decision whether to help the woman or not. Agree to start the side quest.
Side mission 09. Family matters
Target. Infiltrate Dvali's hideout.Exit the Red Queen bar and go left. Dvali's people will not let you into the alley. Go further than the Irish bar, below which you could interrogate Stanek based on the eighth story mission. Next there will be an alley. Turn there. Here you can either hack the panel and open the door, or break the weak spot in the wall to the right. It all depends on your skills. One way or another, you will find yourself in the courtyard. Find the lift here, climb on it and press the button.
Climb to the window, open it and climb inside the house. Here you will need to go to the kitchen and wait until the two people leave. After that, neutralize them both.
Target. (Optional) Find the control center.
To complete this task and disable the surveillance cameras, you must leave that apartment into the courtyard. Go up one floor, but be careful. You will need to wait for the camera to turn away. After you rise, if the camera turns towards apartment No. 96, then go to the side and wait for the right moment. There is a guard inside the apartment. If you neutralize it, you can find a pocket secretary with the code to apartment No. 95. This apartment is located on the same floor. This is exactly what you need!
By the way, there is an enemy on the floor that it is advisable to neutralize. Having received the access code, enter it on the panel and get into apartment No. 95. The access code is 0666. Go to the TV. To his right there is a bedside table with an e-book. Bend down to look under the top of the nightstand. Click on the button. Turn around and see that a secret passage has opened. Go inside. There will be a computer here. Hack it using level 3 hacking skills. The password could not be found. Turn off cameras and alarms. Additional goal achieved!
Target. Find and neutralize Dominic.
Go down to the very bottom. Defeat two enemies standing next to each other. If you have the skill, then attack at the same time. Otherwise, you should wait until they finish the conversation and go their separate ways. Dominic will be here below, in the next building. Stun him and drag his body the same way you got here. Go up to the second floor, enter room No. 86 and open the balcony. Climb your body onto the lift and lower it. Down in the small courtyard, drag the body inside the vault. Close the storage door. Mission accomplished!
Side mission 07. Fade into darkness
Target. Search Vince Black's office.Just go to the office indicated by the marker and hack Vince Black's computer (second level). Read both letters, Adam himself will contact Delara Ozen.
Target. Meet with Vince Black's informant.
Go to the Red Queen Bar and go up to the top floor where there is a minibar. You must determine which of the bar's patrons or employees is Vince Black's informant. Dobromila Novakova is the informant, a girl with short hair blond hair. Talk to her. Agree that the conversation will need to be continued elsewhere.
Target. Go to Prekazhka.
Go to Fountain Čapek station. Go to the indicated courtyard and watch the cut-scene.
Target. Wait for Dobromila.
Target. Get information from Dobromila.
Talk to the woman about everything. She will offer information in exchange for 350 credits. Agree. You will find out where the warehouse of Vlasta, Dobromila's husband and a member of the Dvali gang, is located. The woman will also give you the password to the warehouse where the contraband is located.
Target. View map.
Go to Palisade Station after looking at the map that Dobromila gave you in your inventory. So, you need to find a warehouse of contraband. Go to the bank. Go down the right side and turn right. There will be two storage areas here. Open the left one. The marker should point here. You can open it using the code received from Dobromila. Remove the painting on the left and pull the lever. A passage leading down will open.
Go down and talk to Olivi Devos. You will find out what she wants. You will decide whether to help her or catch Vlasta.
Target. Find Vince Black's apartment.
Follow to the indicated location, enter the building and go down to the basement. There is a shower stall on the left. Next to her is a pocket secretary with the access code to Vince's safe, which is located in the headquarters of OG-29. A useful thing, because to crack a safe you need the fifth level of skill. Here you will find Vince's corpse. Search him. Beneath it lies a pocket secretary.
Important objects. Cache
Alex will contact you and inform you about the next story mission - the tenth in a row. At the same time, the girl will say that she hid information on Marchenko in a cache. Move to the indicated point, go down to the station. Go down just one flight. There are two trash cans against the wall here. A “tick” is drawn in chalk above one of them. Search and find a pocket secretary.Mission 10. Facing a mystery
Target. Meet Janus.Go to the point marked on the map. Get inside the building through broken window. Hack the door (first level) and climb into the ventilation shaft on the right side. Follow further, go down the stairs and climb into the opening. Go to the room on the right and talk to Janus.
Target. Evade the drones.
Move to the indicated location, avoiding the drones. Although, you can run ahead if you know the route. If there is a disguise, then it will be generally simple. As soon as you get to the surface, Nomad Stanek will contact you and ask for help. A new mission will begin.
Mission 11. Meeting with a terrorist
As soon as you get on the subway, Alex Vega will contact you. She will say that you need to rob a bank, otherwise information about the Orchid poison will be lost. You will have to make a decision - save Alison or go on a bank robbery.
Important. If you choose to save Alison, you will not be able to complete the next Heist mission. But you can pick up a signal jammer from Alison, which allows you to fulfill one of the two conditions for a good ending at the end of the game. On the other hand, you will not have an antidote and Miller will die from the Orchid. It's up to you to decide.
But if you go for the robbery, Alison will die and you will not receive the signal jammer.
Target. Meet with Nomad Stanek.
Talk to the clockmaker and go through the door behind him.
Target. Save Alison Stanekova.
You will find yourself among augmented people. Go into the courtyard and go up to the roof of the annex nearby. From here, move down onto the ledge and follow it along to the next structure. There will be two mines here, proceed carefully. Crouch up to them and then deactivate them. Soon you will find yourself on the other side of the building.
Find a weak wall and destroy it. Once inside, follow through the ventilation near the ceiling. Follow the pipes to the next ventilation, at the very end of the passage. Try not to fall down where the electricity will kill you.
You will find yourself in the restroom. Remove the ventilation grill and deal with the enemy using a tranquilizer. Follow the girl who is on the couch and get to the stairs. Hide behind the railing and wait until the two opponents finish their conversation. One of them will go to the computer.
Keep an eye on the camera. Move across the bridge to the window and wait for the girl to turn away. Deal with her, go under the surveillance camera into the next room and make your way through the ventilation. You will find yourself on the stairs. Go up, open the door and talk to Alison.
The resulting signal jammer is stored in inventory. As you go through the rest of the missions, don't accidentally throw it away somewhere.
Mission 12. Robbery
Target. Get to the bank.Head towards the bank after you decide to rob it before rescuing Alison. Vega will contact you.
Target. Climb the Vega package.
Go down to the parking lot. You can either pick the fourth level lock or move the trash cans on the right side and break the weak wall. According to the second option, break the wall and climb inside the room. Open the ventilation and move through it to the left. After jumping into the parking lot, follow the wall, hiding behind the cars, into the storage room. Inside the pantry, move another container and climb into the next ventilation.
When you leave it, go right and enter the room with two guards. Here you can disable surveillance cameras. Deal with the two guards first when the third moves away. After that, close the windows by clicking on the red button to the left of the entrance. Next, log into the Security computer and turn off the cameras, open the door, turn off the alarm. Neutralize the last guard in the parking lot, then find the Janus package in one of the cars. This car will not be connected to the alarm system - the car is blue.
Target. Gain access to the terminal.
Go to Palisade Bank. If you don’t know how to get to the office on the third floor, then read the walkthrough of the additional mission “Samizdat”. The biometric key card encoder that you need as part of the current mission is located on the same table under which you found incriminating evidence on President Peak. Once you get to the right place and break into the door, encrypt the Janus card.
At this moment Stanek will contact you and say that his daughter has died. The mission will fail.
Target. Use the elevator to the corporate storage facility. In the office where you encrypted the key card, there is a figure of three objects. It's a puzzle. You need to rotate it as shown in the screenshot in the chapter describing the passage of the “Samizdat” mission. You will open a secret passage. There is a ventilation grill inside. Make your way into the ventilation and go down. You will find yourself in the lobby of the first floor, in the corridor where the guard did not let you in. Call the elevator, use the encrypted key card inside and go down to the corporate vault.
Go forward. You will need to break into the door on the left with a lock of the third difficulty level. Having done this, go up one flight of stairs and jump up using the container. Climb inside the ventilation and move right and immediately right. You will find yourself in the technical area. Insert the cell battery so you can see the turret on the TV ahead. Now you can use the computer to disable the turrets, but only if you have the appropriate skill.
Make your way a little further and jump into the server room. There will be a computer here. Turn off cameras and laser beams. If you have the skill, then neutralize the robots. Return upstairs and into the ventilation through which you got here. Turn right through the ventilation and jump into the toilet.
Neutralize the guard on the couch, then move through the door in the far corner. Go forward to the room where the guards are. You need to go to the left. When the turret turns to the right, move left. In the nook you will find a hatch. Go down and move through the ventilation to the desired corridor. Walk around the security camera ahead and enter the vault. Call the Versalife storage facility.
Target. Get out of the bank.
Inside the vault, watch the video. Be sure to hack the terminal on the side to gain access to the safe. Inside it you will find the Orchid Neutralizer.
Exit the vault and climb up the stairs on the side. Press the button to make the storage go up. Don't get off him. Once up, move to the platform on the side where there is a button on the wall. Press the button to open the hatch up. Climb the structures above. Follow up the fire escape, go around the perimeter of the tunnel and hack the terminal to pull out the Belltower vault. You won't be able to open it, but the point is different - climb onto the vault to climb even higher from its roof. Head up the other stairs and reach the door. Next, follow the marker, turn off the fan and get out through the parking lot. Jensen will contact Miller.
Target. Meet Miller at the helipad.
Go to the meeting place, talk about everything. If you are ready, then inform Chikana about the start of the mission.

Elias Chikane.
Side mission 08. Repair
When you move to the meeting place with Miller after the Palisade Bank robbery (or Alison's help), Valtsav Koller will contact you. He will say that he is ready to fix Jensen's augmentations.Target. Go to Prekazka.
Move to the meeting place, go down to Koller's basement and talk about everything. It will fix all augmentations, after which you will be able to purchase any without worrying about system failures.
Important sites in Prague. Too close to home
When you move towards Koller, Aria will contact you and inform you that one of the augmented ones was killed near Jensen's house. Follow there, talk about everything with a girl named Daria Myshka.Side mission 10. Reaper
Agree to help the girls to start this quest.Target. Talk to Montag.
Chat with the investigator standing nearby.
Target. (Optional) Investigate the crime scene.
Target. Go to Davny station.
When completing an optional task, you will need to find seven clues. First, pick up the EM cartridge fragment in the middle of the intersection (1/7).
Target. (Optional) Carefully examine all the evidence (1/7).
Examine the corpse of the deceased woman - bruises on the neck (2/7), marks on the shoulders (3/7), a needle in the right shoulder (4/7). Pick up the identification card (5/7) from the floor, not far from Daria Mouse, closer to the exit from the location. A little further there are broken glasses (6/7). Also, go back to the corpse and look for pieces of augmentation on the wall with blood (7/7). Additional goal achieved.
Take the metro to Pilgrim station.
Target. Talk to Johnny Gunn.
Go into the courtyard, go up to the second floor and enter the apartment. Chat about everything with Johnny.
Target. (Optional) Find compelling evidence.
This is an optional quest, but you can still look around Johnny Gunn's apartment. Stand with your back to the front door through which you got here. Look to the right. Do you see a white cabinet with drawers in the near corner? To the left of it is a square envelope. Take it away - this is a referral to a doctor.
Target. Go to Prekazka.
Take the metro back to the Fountain Čapek station. Talk about everything with Carl Montag, detective. Do not select the Finish option.
Target. (Optional) Go to Monument Station.
Get on the metro and go to Monument station. Go inside the police station that the marker points to.
Target. (Optional) Review Smolinski's notes.
A new task will appear. When the policeman just comes out, hack the computer on the table to get the code from the letters 0010. Enter this code on the panel next to the door. Go down to the basement. Go to the far side. There are several vertical lockers for the changing room. Open the one that says Smolinski. You will need to knock down the lock. Inside the locker you will find what you need.
Go back to the Fountain Čapek station.
Target. Report to Montag.
Don't rush! Of course, you can complete the mission by accusing or acquitting Johnny Gunn and then either saying you don't know who the killer is or blaming the impersonator.
But you need to interrogate one more suspect - Radko Perry. You will learn about it after you talk at the crime scene with the character looking at the phone. He is signed as a "gossip". Next, talk to Detective Montag again about the case, after which the target will appear.
Target. (Optional) Talk to Radko Perry.
Go to the indicated place, you will see Radko Perry, who is wiping his poster on the wall of the house. Talk to him.
Target. (Optional) Find compelling evidence.
Go inside the building and go downstairs. A guard will follow you. Neutralize him, search him and read the information in the pocket secretary. Find out the code. Go downstairs and hack the computer. Study the letters and chat about everything with an unknown girl in the chat.
Return back to Montag and talk to him. Select the "Complete" option and acquit both suspects. The mission will be completed, but that's not all.
If you acquit both suspects, then after you leave Montag, Daria will contact you. She will contact you later if anything goes wrong.
Mission 13. Garm
Target. Infiltrate the complex.Go forward, hack the first level access panel and try to open the door. Watch the cutscene.
After awakening, choose who you want to contact - Vega or Miller. In our case, the first option.
Target. Leave the complex.
On the right side, find a ladder. Climb up it and jump on the ledges, then enter the building. Go through the door on the left and deal with two enemies at the same time (skill required). Go down the steps. You need to get to the opposite right corner. Do this using your skills and then pick the lock and go through the door. Neutralize the enemies in the corridor. You can jump to the right and go past the laser beams through the ventilation on the left hand.
There is a blue pipe running along the corridor. Use it to get to next part complex. It's dangerous to go through the door. To get into the pipe, you need to find a door approximately in the middle. But before you climb there, find the switch on the pipe and turn off the electricity.
The electricity won't go away completely, but it will give you time to overcome the pitfalls. Eventually you will end up in a room. Close the windows by pressing the red button. After that, leave if there is no one at the door. Go left. Hide behind the cabinet. On the right there is a hatch in the floor. Wait until the enemy turns away, then jump into the hatch.
Move along the hatch to the very end. Enter the building ahead and neutralize the enemy. Exit the building through the side window on the right. You need to walk along the object with the turret at the top, while paying attention to the camera turning in the distance. When she turns away, go around the object and go up the stairs. Enter the room and immediately open the double door on the right.
Go through the other doors and go into the room opposite. Three opponents are walking around the room. Defuse them. Get into the room where the camera is installed on the outer wall. There is a computer inside. By hacking it, you can disable the camera. Call the elevator using the button opposite the camera. Take the lift higher. Chikane will contact you.
Mission 14. In search of the last clues
Target. Meet Vega at the Prosthetic Clinic.Just leave the helipad and the building. Watch the cut-scene, after which you will talk to Vega.
Target. Meet Miller in his office.
Talk to Miller in his office to learn more about the task.
Target. Penetrate the territory of Dvali.
You must first reach the Red Light District, moving past the police barricades. If you are using a lethal method, then make sure that you have the necessary upgrades and ammunition. When you find yourself in Dvali territory, try to be stealthy as the area is heavily guarded. Move to the northern part of the courtyard to find an open window and get inside the apartment. Miller will contact you and inform you about the territorial status.
Target. Find Radic's office.
Inside the building, move forward to the marker. Go through the theater patrolled by Dvali guards. Your main task is to sneak into Radic's office and hack into the computer on the first floor. Prepare for resistance as the guards are on high alert. If you raise the alarm, the whole gang will be ready to destroy you. Just move through cover, neutralize enemies one by one.

Radich Nikoladze, head of the Georgian criminal organization Dvali.
Target. Find Radic's security room.
You should return back to the balcony when you have dealt with the enemies and continue to the marked point. When you go down to the northern part of the building, you will see a couple of robots. Use EMP projectiles to disable them, then interact with the computer to disable your opponents.
Finally, you will meet Radic and Otar in the office (if they are alive). Deal with them and hack Radic's computer to find out about the next terrorist attack. Inform Alex and Miller about everything, after which you will need to leave the building. You can act carefully, or you can completely leave the building.
Target. Get to Jensen's apartment.
Once you leave the Dvali area, take the metro to Prague South Station, where Jensen's apartments are located. Talk to Vega and report another terrorist attack in London. Wait until Miller contacts you again and confirms where you should fly. Return to the street and go to Chikana. The mission is completed, the next story mission begins.
Side mission 03. Mysterious augmentations
When you move to OG-29 to meet with Miller, David Sharif will contact you (if, of course, you completed the previous part of the quest).Target. Contact Sharif via home TV.
Go to the Fountain Čapek station. True, Jensen will not go, but will walk along the metro lines. Once outside, get to your yard, go up to the apartment and contact Sharif using the TV remote control.
Side Mission 11: The Last Harvest
When you move to the “Samizdat” point, Daria Myshka will contact you. This mission is the continuation and finale of the story that began in the Reaper mission.Go to the Capek Fountain station, to Jensen's house. Daria lives on the floor below. Approach the door near which the detective is standing. Talk to him about everything, and then hack the terminal to get inside.
Target. Find evidence related to Daria.
Go into the room ahead and examine the bear rug on the floor. Examine the cat collar on the figurine located on the cabinet on the right side in the same room. Take Daria Myshka's diary from the bed. Exit into the hall and go to the kitchen. Enter the utility room on the left and take the accessory lying on the cabinet. In the bathroom opposite you can find injection needles.
Hack into Daria's bedroom computer and discover that she has undergone some kind of medical procedure. You need to find Doctor Kipra at the local pharmacy in the Davny district.
Target. (Optional) Travel to the Long-ago area.
Target. (Optional) Find Dr. Kipra.
Both tasks are about the same thing. Travel to Pilgrim Station via the metro lines.
Go back.
Target. On the trail.
Go down into the sewer and find a brick pipe. Move through it, and then go to Daria. Interview her, don't get close. The battle will begin - all you need to do is get close to the enemy and stun him. Mission completed..
Important objects. Samizdat sends SOS
Upon returning to Prague, you learn about an alarm that is coming from Samizdat headquarters. Go to the indicated location at the Fountain Čapek station. Go down to the basement and find "Samizdat". Talk to Lowercase K. Agree to complete the task.Side mission 12. "K" means every
Target. Go to Monument Station.Target. Infiltrate the station.
Go to Monument Station and enter the police station building north of the entrance. It's located nearby, you don't have to go far.
Target. Find a way to open the cage.
When you go down to the basement, you will see a portable cage in which journalists are imprisoned. Go to the lockers and find the terminal between them and the cage. Easy to hack - first level of difficulty. When you unlock the terminal, simply open the cage.
When talking to Kay, you will have three options:
– Kay and Bones will put on police uniforms and go to the meeting place. This is the safest option.
“Three will go out and wreak havoc, but then there might be pain.”
“You can tell them to wait here until you clear the way.”
Target. Meet with Samizdat.
If you chose the first option, then you won’t have to worry about men. They will reach their destination without risk. Just go there and then talk to Kay. Mission completed.
Mission 15. Security at the conference
After meeting Chikane, you fly to London to meet Mr. Brown. After the cutscene you will be able to talk to Brown. Go to Liam Slater, head of Tavros security. Take the elevator down and talk to the guard. Jensen finds out about the staff. Talk to Miller, find out from him about the new goal.
Nathaniel Brown.
Target. Get to Slater's office.
Hack the security room, and then deal with every enemy that stands in your way to Slater's office. He is dead, Marchenko already has his own plan. It is necessary to destroy everyone so that the guests do not die. When you are inside Slater's office, activate the security system.
Note. The guards are armed, so be sure to use ventilation.
Target. Find the key card to the service area.
According to Miller, one of Marchenko's guards carries a key card to the service area. You need to rush there and find him before anything happens to Mr. Brown.
Find the right guard with the key card, neutralize him and take him away.
Target. (Optional) Neutralize the guards (0/10).
Everything is clear here.
Target. Explore the service area.
Once you have your key card, proceed to the service area. To do this, go forward to the marker. You need to go to the restroom and find a vent that you need to use. Jump and use the ladder to reach the roof and go to the entrance to the service area. Use the key card and deal with the enemies before exploring the location.
Enter the kitchen where a cutscene will begin. Miller was seriously wounded, Marchenko's guards mixed poison into the champagne of the guests (politicians). Marchenko will contact you and ask you to meet with him as soon as possible, or he will blow up the residential complex.
Now you must make a choice - either stop Marchenko or save the politicians.
Mission 16. Stop Marchenko
Run north from your starting position and reach the exhibition area. If you have the silencer from Alison in the eleventh mission, then you will have 10 minutes to get to Marchenko. If you don't have 10 minutes, you won't be able to defuse the bomb. On the way to the exhibition hall you will meet opponents. Deal with them or use the vent to get past them.Target. Defeat Marchenko.
After the cutscene, the duel will begin. The area is littered with turrets, laser beams and unmanned drones. We recommend climbing as high as possible to find cover. From here you can easily deal with unmanned drones and turrets. At the top, avoid mines and laser beams.
Note. Avoid melee battles as he has a strong mechanical arm.
Move objects, collect ammunition from different rooms. For a non-lethal outcome, you will need to shoot Marchenko with a tranquilizer rifle.

Victor Marchenko.
Mission 17. Protecting the future
After making the decision to save the politicians and Mr. Brown, move to the south side, where the restricted area is located. Leave the kitchen and explore the newly unlocked level. Run towards the southern elevator. The time is the same - you need to do it in 10 minutes, or the politicians will be poisoned and they will need additional help (the antidote, if you completed the mission "Robbery" and did not cure Miller with it).Use the same invisibility to sneak past enemies. Destroy turrets or guards if necessary. When you get to the stairs, hide and you can destroy the enemies by throwing grenades. Get to the elevator after a serious battle and use the code 2202, which allows you to get into the VIP sector and save the politicians.
After this, you can try to stop Marchenko and save the innocent from the bomb explosion.
How to get the bad ending:
Try to stop Marchenko before the politicians.
Destroy it when all the delegates in the VIP room are dead.
In the news you will learn about an attack by augmented terrorists.
How to get the good ending:
Save the delegates and Mr. Brown.
Fight Viktor Marchenko.
Use the silencer to stop the bomb from working.
Destroy Marchenko and everything will end well.
In the news, Eliza will say that Mr. Brown is grateful to Interpol, which prevented the terrorist attack..
The sequel to the acclaimed game project Deus Ex: Human Revolution has finally been released. In this article we will describe in detail the passage of Deus Ex: Mankind Divided, or rather the implementation of its main story missions - additional quests will be discussed in another guide.
Backstory of Mankind Divided
The game takes place in 2029, that is, a couple of years after the story told in the previous title of the series. Although 2 years have passed since the Panchaean incident, which led to the death of millions of people around the world at the hands of those on whom the latest implants were installed, this still has not reduced the level of mistrust in society towards modified people. An incredibly large gap has formed between ordinary and augmented inhabitants of the Earth, which is now almost impossible to overcome.
In the current confusion, high-ranking statesmen and the heads of transnational corporations directed all their efforts to hide the real reason for what happened. They managed to take public opinion under your control and competently manipulate it throughout these two years, turning the current situation to your advantage.
However, they did not take into account the fact that Adam Jensen will not stop his fight and will try to do everything possible to bring corrupt politicians and greedy corporations to clean water. In Deus Ex: Mankind Divided, he decided to leave his post as head of security at Sarif Industries and become an Interpol agent, joining Task Force 29. He also actively collaborates with a mysterious group of hackers calling themselves the Juggernaut Collective in order to uncover the Illuminati conspiracy.
Together with his squad, Adam heads to Dubai to carry out another secret mission to capture a dangerous terrorist who is gathering a real army of modified people under his command. This is where our first mission begins...
M1 - Black Market Purchase
The first mission in Deus Ex: Mankind Divided, which begins with a briefing in which James Miller lays out a plan to capture Shepard, a local weapons baron who sells weapons to augmented terrorists. We also have to protect Arun Singh, a double agent who spent a lot of effort to become a member of the Jinn smuggling cartel operating in Iraq.
The actions of this quest will take place in a huge unfinished hotel located in the capital of the UAE. Shepard meets with Singh in the atrium of the building, while the “genies” will guard the penthouse. The main goal is to apprehend Shepard and help Singh.

Even though they were sent on a mission whole squad, however, Jensen will carry out his work alone. His priority will be to prevent the Genie cartel from attending the “party” that will take place in the atrium. To do this, he will have to block all the elevator shafts. During the briefing, Miller will ask Adam how he prefers to complete the mission - killing enemies or stunning them. He will then offer him a choice of several types of ranged and melee weapons. We will try to complete the game without killing, so we will take with us long-range rifle with tranquilizers. At the end, Miller will inform you that a sandstorm is approaching the city, so you should hurry.
Close approaches to the atrium
Once the cutscene ends, you will have full control of Adam Jensen. First, move in different directions and look around to get used to the controls, and then head towards the entrance. On the rooftop, Miller will continue to help you by developing a route to your goal. But he will immediately note that it is better for us not to go in a straight line. Therefore, we move forward a little, then turn right and jump down. We crouch down and go through the entrance, littered with rubble. Turn right again and find a ventilation grill. We open it and climb inside. We go up the stairs and see large boxes on the right blocking the passage. We move them to another place in order to clear the way for ourselves.
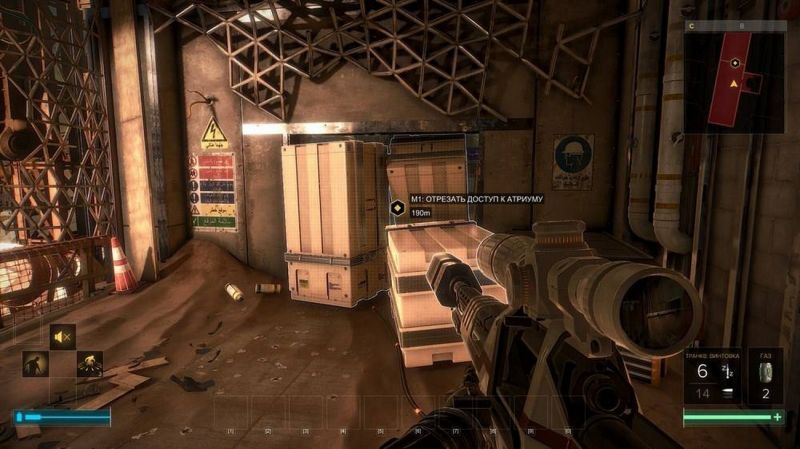
Restoring power to the panel
Considering that this is our first task of this type, we will consider it in as much detail as possible. So, you should first climb onto the high ledge and go forward to the entrance. Next, we listen to Duncan, who will ask us to hack the panel. First of all, we activate super vision (should be selected in the augmentation wheel) to find all the panels and optimal routes. Then we break through the wall and go inside. There you will see that the panel is de-energized. We turn on super vision again to detect the switch and restore the power supply. We jump over the switch and move forward along the ventilation passage.

How to use cover and stealth
Use your hacking skills to obtain access codes. After opening the door, the game will give you a choice: continue with Deus Ex: Mankind Divided or take cover training. If you are playing this project first time, we do not advise you to skip the instructions. After you finish training, you will have to perform all the learned tricks with real opponents. Knock out all the enemies in the level, and then climb into the elevator and take it up to the penthouse.
We do not recommend skipping the stealth training, which will reveal to you the secrets of one of the main game mechanics. Take out the two guards, then drag the large steel box towards the vent to reach the vent. When you find yourself in a new location, the game will offer you to go through one training lesson related to battles. It will be especially useful for those players who are going to kill their enemies and complete the game as Rambo. Eliminate the enemies and then go down to given point, where a meeting takes place between Singh and Shepard.
Note: Don't forget to check your opponents' pockets after you knock them out. The fact is that you can often find ammunition for weapons, grenades and other useful things in them.

Muting the signal amplifier (additional task)
This is a small secondary mission that we did not include in a separate guide. To complete it you need to find a place in the penthouse that is guarded by a large number of people. Turn right and go up the stairs into the ventilation hole. We move forward without turning anywhere. As a result, we will find ourselves in a room with a signal jammer and two opponents. We advise you to deal with them using a tranquilizer rifle. Now you can turn off the jammer.
Don't let the helicopter take off
At the control point you will need to hack another access panel. As soon as you open it, a new cut-scene will start. Get ready for a serious battle. You will need to go down the elevator and start dealing with the terrorists one by one. Soon a sandstorm will cover this entire place, so you should eliminate the enemies as quickly as possible. Don't forget to protect Singh as well. Go to the helicopter and remove the battery from the panel. If you don't want to bother with killing terrorists, but at the same time you don't want the agent to die, then we advise you to immediately run to the helicopter, without paying the slightest attention to the enemies shooting at you.

Note: Super vision should be activated in order to quickly spot the helicopter and the undercover agent.
After you manage to stop the helicopter, a sandstorm will immediately begin and a cut-scene will start. This will complete the first task.
M2 - Morning came too early
30 hours after the event in Prague, you will again be able to control Jensen's actions. He will be shocked by what happened and after a short conversation with Alex, he will decide to meet with an implant specialist, Vaclav Koller. This expert must help Adam repair his augmentations.
Preparation before leaving
Look around your apartment and take with you everything that seems useful to you. The fact is that these things can later be used to craft weapons. Start your inspection from the bedroom: look in the wardrobe, search the shelves, go into the restroom (here you can find painkillers), open the bedside table, and then go into the living room.

Try to find the Juggernaut collectible figurine in the hall. Then read e-books and activate your laptop. Examine the secret photo frame. In general, turn your apartment upside down to hide everything that is not screwed to the floor in your pockets. Talk to David, and then get dressed and leave the house.
M3 - Get in better shape
Finding Koller in a bookstore
Talk to Koller online, and then go to the bookstore. A couple of thugs will guard access to the trading post. Once you leave your apartment, head to the stairs, go down and go through the first door. Next, go to the window and jump down.
Go to the marked point, but do not enter the store through the main entrance. Better climb onto the roof and go inside from above. Climb through the ventilation hole and climb up to the destroyed bridge. From here it is very easy to remove opponents quietly. Then climb through the building through the window located on the first floor. Deal with the thugs and find the doctor using the marker. Once in the library, Koller will remind you of a secret book with which you can open the entrance to the basement.
Note: Check all the nooks and crannies before going any further as you won't get another chance to do this.
Get into Koller's basement
We get into Koller's workshop on the elevator and watch the next cut-scene. We agree to a test so that Koller can check for hidden augmentations and help you unlock them. After the tests, the doctor will ask you to obtain a certain item from Otar, which will allow him to optimize the operation of our implants, and then we will be able to use several skills at the same time.
M4 - Checking exhaust gas29
We go to the offices of Task Force 29

Using the metro, we go to the offices of the Operational Group. We go into the Prague Dovoz building, which is a cover for the headquarters, and go to the poster marked on the map. Click on it to access the panel. Enter the code to activate the elevator.
Installing a snitch chip
We go forward and go up the stairs to the top floor. We talk with the girl and pay attention to the ventilation grille. We climb into it and get to the floor under voltage. Here you should jump onto the pipe located on the left side, and then jump onto the cabinet. We cut off the power supply and climb further.

Here a combination lock with the second level of security will be waiting for us. You can try to hack it or enter the access code (7734) found in Selina Carter's laptop, lying in the Cybercrimes Office. We place our chip and return to the corridor.
Talk to Miller in his office
We go to Miller's office, talk with him and get a new quest.
M5 - Jurisprudence Claims
Let's go to Ruzicka
We use the elevator to return back to Prague, and then we go to the metro and get to the desired point on the map. We talk with Smiley.
Search for evidence
We go up the stairs to the top floor, go into the utility room on the left and find a box located on the rack (top shelf). We move it, thereby giving ourselves access to the ventilation grille. We go through the hole and crawl to the very end. Near the exit we wait a little until the police talk to each other and disperse in different directions. We get out of the ventilation and go to the stairs, without being seen by strangers. Having walked a little forward, you will find yourself in a spacious room, which will be full of police officers. We take advantage of the fact that all the cops have concentrated their attention on the briefing and find the entrance to the ventilation, hidden behind a large metal box.
We move the container (certain augmentation will be required), climb into the hole and go to the room with the magazines. In the far corner you will find another ventilation entrance. With its help we get to the hole in the floor. We go outside and observe a cop in an exosuit. As soon as the policeman turns away, we run out of cover and run to the right room. Inside we are looking for a DSD device (it will be on the table).

We transfer the media to Smiley
We go back along the same road to the headquarters of OG29. We find Smiley and give her the device.
M6 - Let's put things in order
The mission will begin already during the last quest, when you approach the Task Force office.
Meeting with Dr. Ozen
While in the elevator, Alex will call you, as a result of a conversation with her, a new subtask will appear in the diary, for which you will need to meet with Vega at the Prosthetic Clinic. We go to a psychologist and answer a few questions. After this you will be allowed to work again. As you exit the office, you will run into Chan, who will give you a side quest. You can agree to help him or refuse.
Meeting with Vega
We look at the map and go to the marker. There will be a combination lock on the door with high level security, but you already know the access code (4464). We go down the stairs, talk with Alex, and then go upstairs and leave the building.
Meeting with Miller at the helipad
Already in the basement, Miller will call you and say that he will be waiting for you at the helipad. We go into the building located next to the clinic and enter the following access code to unlock the door: 4465. We go through the workshop and reach the courtyard. We talk with Miller and meet the new pilot.

Flying to Golem City
Let us note in advance that if you decide to fly to Golem, then all side quests you take will be automatically failed, so we advise you to first complete all the side quests, and only then head to a new location.
M7 - Rooker Delivery
A very long task, the action of which will unfold in a new area - Golem City.
Visit Sokol's apartment
Having arrived at a new location, we open the map and look where the point we need is located. We follow the marker and reach the marked apartment. We talk with Adela and learn that Tibor was arrested and hidden in Tesniny.
Find Tibor in Tesniny
We head to the northern part of the area and get to the territory under protection. We go down the stairs. You shouldn’t go straight - it’s better to use the ventilation duct located under the stairs.

We climb into the hole and wait until the cop leaves his post. We get out of the ventilation and take cover behind several boxes. As soon as the policeman returns again, we immediately knock him out. Don't worry, the other cops won't hear you. Then we go to the doors, go through them and find ourselves in the prison block. Here we find Tibor. Unfortunately, you won't be able to pull him out, but you will have a couple of options for further completion of the mission.
Talk to Louis Galois
We go to the merchant. You should exit through another door located not far from Tibor's cell. We use supervision or take cover behind the wall and go through the door. We're watching the cops. When only one of them remains, we pass behind it and get to the ventilation grill.
Pick up Galois goods
We go down the stairs and get to the warehouse marked on the map. The warehouse includes several rooms with separate entrances protected by access panels. In addition, the area is patrolled by cops. You need to wait until she gets as far away from you as possible, and then break open the first door. We go inside, lock the door and take away the box with the goods.

Now you need to break into the door located in the middle, since it has the lowest security level. We take another box and return to the merchant.
Attribute neuropozyne to Galois
You have fulfilled your part of the deal, so the merchant will open the door behind him. Through the passage that appears, you can easily reach the CPA. We open the door, go up the stairs and go through another door. However, we do not advise you to rush and go inside, since in this case all side missions that you have not completed will automatically fail. If you do not want this, then we advise you to do the following: after transferring the supplies to Galois, take on all the available secondary quests, and only then go to the CPA, and it is better to go there through the Lubosh elevator (this way you will definitely complete all the additional tasks).
Retrieve Tibor's key card (optional mission)
The key card can be found from the officer, who can easily be caught in the market square under the shop owned by Galois. When he goes around the corner to relieve himself, knock him out and search his body.
Free Dusan (optional mission)
When talking to Tibor, he will ask you to help his brother. Walk forward a little to see someone being interrogated on the lower floor. We are waiting for it to end. Then we go down the stairs into a room where there are several cameras. Now you will need to deal with four cops (one of them will be wearing an exosuit). Before you start taking down the police, study their routes.

You should hide behind a large box near the stairs and as soon as the cop in the exosuit turns his back to you, we knock out an ordinary policeman. The body should be dragged to a far corner so that no one finds it and the alarm is not raised. Now we need to deal with the guy in the armor. You won't be able to take him down with regular stunning blows, and tranquilizers won't be able to penetrate the suit. Therefore, to eliminate it, you will need a pistol with electromagnetic projectiles and a silencer.
We hide behind a box near the patrol place of a cop in armor and wait for him to turn away. After that, we shoot him with a pistol. His suit will short out, giving you the opportunity to quickly disarm him. You need to get as close to him as possible and stun him. Then drag the body to the same corner where you left the last policeman.
Two more need to be taken out. We pick up a rifle with tranquilizers and take cover behind the boxes located not far from the place where we previously stunned the soldier to the exoskeleton. First of all, we knock out the lawman who is standing next to the entrance, and then we immediately shoot at the cop sitting at the computer. Now you can go to Dushan and free him from captivity. He will tell you the elevator password.
Talk to Lubosh (optional mission)
After completing all the above tasks, you can approach the guard standing near the elevator, located on the market square next to Galois's shop. Tell Lubos the following password: “The person from whom everything was taken away is no longer under your control, he is free again.” The guard will let you into the elevator.
Use the Tibor map in the elevator (optional mission)
This should be done simultaneously with the previous task after talking with the guard.
Go to the territory of the KPA
We go into the elevator and indicate “Throat” next to the inscription destination. We go through the long narrow corridor and open the door at the end. If you got here using the hidden path in Galois's shop, this door will be immediately in front of you after going up the stairs.

After entering a new location, a short cutscene will start. Then we go forward and notice several lasers. On the side we see a massive box. We move it and go through the ventilation hole.
Adam will find himself in a huge tunnel. We walk a little forward to the pillar. We find the access panel on it and hack it to extend the bridge. If you have not upgraded your hacking skill, then use the access code, which can be found in the pocket secretary hidden in the utility room, not far from the lasers (code: 3354).
Penetrate further into CPA territory
Chikane will call you in a couple of minutes. You have to go through large territory, full of opponents. You should climb up the inclined ladder and watch the cut-scene. We take cover behind a pillar and wait until all the enemies disperse to different corners of the map. Now you can go to the vertical stairs located on the far right side. Ahead you will meet a girl standing at the side. We wait until she continues patrolling, and then we climb into the ventilation passage located behind her.
We open the code panel on the door, go forward through the shower room and get to the window located in the far part of the room. We climb through the opening and jump down into the corridor. Then we go up the stairs. We quietly make our way through two guards chatting with each other to the door located on the other side of the room. Then we open the door on the right. Try to avoid patrols and take cover behind boxes if necessary.
There will be a camera in the room, so you need to act carefully. Go under the camera, jumping over the container, and then go to the second door. We pass through it and immediately take cover behind the wall so as not to catch the eye of the guards. We are waiting until they talk to each other and go in different directions. One of them will go far, and the second will stand near the side. We run to the elevator located on the right and activate it. It will take him a long time to get to you, so we advise you to hide in the room from where you ran out. As soon as you have the chance, run into the opened elevator and go down to the lower level.
There is no need to leave the elevator immediately, as a patrolman will be passing nearby. Wait until he leaves you, and then take cover behind the boards covering the stairs located opposite the elevator. There will be a guard on the top floor. At some point he will decide to look the other way. That's when you should quickly go downstairs. Some guards may still notice you. In this case, you need to press yourself against the sides of the ladder and not move for several seconds. When you find yourself downstairs, quickly run into the room closest to you.

We break the grate located in the opposite part of the room (you will need a special augmentation for this). We climb inside, walk a little forward and find ourselves in a corridor in which the floor will be flooded with water, energized due to broken wires. You won’t be able to get through here, for this reason you shouldn’t rush - it’s better to go back a little and find a box in the recess. Take it and throw it into the water. Jump onto the box, and then jump onto the laundry bucket. Already from it you can easily cut off the power supply to the cable.
Find an elevator
Chikane will call us again. We remember his words and move forward to the ventilation hole. We climb into it and reach the exit. However, you don’t need to jump down right away - wait until the two girls decide to step aside. Then we go down, go straight to a small structure, climb onto it and get to the bridge opposite.
Now we climb into the ventilation duct again. We go into the room, trying not to get caught by the cameras, and knock out the girl when she is next to the laptop. Next, we turn left and find ourselves in a corridor in which in the distance you will see a passage protected by laser devices. We approach the guard and knock him out, waiting for the right moment.
Near the lasers there is a room in which there will be two more opponents. We climb out the window, out of sight of them, and take cover behind the table. We wait until the guard with long hair decides to sit down at one of the tables, take a tranquilizer rifle and shoot at him. The second enemy can be taken out hand-to-hand. We get out of the room from the second entrance, thereby finding ourselves behind the laser mechanisms.

We go forward to the turret. We take cover behind the container, and when the turret is turned in the opposite direction, we run behind the box located at the other end of the corridor. Again, we wait until the turret turns away, and then we run to the column located near the deadly device. Now you can easily walk behind the machine gun and call the elevator.
Interrogate Talos Rooker
We get out of the elevator and move forward without being distracted by anyone. Talos decides to invite Adam to his office. We go to him and start small talk.
Get to the evacuation point
After the dialogue with Rooker, you will have very little time to hide somewhere. You can find a key card on the table next to the bottle. We take it and run into the secret room located on the left. We close ourselves in it and inspect the room.
Then you should press yourself against the wall near the door and open it. Take out your tranquilizer rifle and start eliminating your opponents one by one. First, knock out the two bandits in the room, and then the enemy walking near the entrance.
We get out, not forgetting to hack the security drone, otherwise it will raise the alarm. We deal with another guard using tranquilizers. We go further and find ourselves in a room with five enemies. Try to eliminate them from the shelter one by one. Go to the far side of the room and look for the entrance to the ventilation there. We climb into it and crawl forward.
You don't need to jump down right away - use the ledges. You will find yourself in a location patrolled by a drone and one enemy. We take cover behind the nearest column and wait for the drone to fly in through the window, and the enemy will not look in our direction. We immediately shoot at the guard with a tranquilizer rifle, and then run to the opposite part of the room and jump down. You should not hide behind the nearest boxes, as the drone will definitely notice you. You need to take cover behind the boxes located next to the massive door.

We wait for the right moment, and then press the button to open the door and again hide in a secluded corner. When no one is looking in your direction, go through the door you opened and go outside. We go down the bridge, and then just jump off. We watch the cut-scene.
M8 – Hunting down the real terrorists
Meet Smiley in his office
After completing the last task, you will receive a call from Smiley. We talk with him, and then head to the headquarters of Task Force 29. We go into Smiley’s office and enter into dialogue again.
Find Nomad Stanek
You should go to the watchmaker's apartment. Near the entrance you will find signs of a break-in, but you will not find any strangers in the apartment itself.
Search Stanek's apartment
We begin to search all the rooms. We get to the office and interact with the wall clock located next to the window in order to open the door to the secret room. You should not use the laptop right away - first remove all the drawers under the table and thereby open access to the ventilation grill. Also clean out all the nooks and crannies of the apartment, and only then start hacking the laptop.

Get out of Dvali's trap
After reading the email, poisonous gas will begin to enter the room. You should immediately crawl into the ventilation hole and get out.
Interrogate Stanek
Head to the point marked on the map. You will be taken to a local bar. Approach the bar counter and go through the door behind the counter leading to the basement. We talk with the watchmaker and watch how the eighth mission moves into the completed section.
M9 – Who's in charge here?
We talk with Smiley on the phone, and then immediately talk with Alex. Two story missions will appear in the journal at once. You can do them in any order.
Search Miller's apartment
We get to the residential complex. Miller's apartment will be on the second floor. You can enter the apartment unnoticed in two ways: either crawl through an open window, or hack the access panel. You should choose a window located on the third floor, because if you try to do this on the second, you will be immediately noticed. First you need to climb to the third level by stairs, and then along the cornices to get to the desired opening. You shouldn't jump right away - you'll break a couple of limbs (although this won't happen to Icarus). You need to go down to the desired window along the ledges installed on the left wall.
In the kitchen we find a laptop lying on the table. Let's hack it and find out new information about Miller. Then we go up to the next floor and hit the punching bag. This action will open a hidden door. We select the key card and leave the apartment. Although you can stay longer to better explore the premises. For example, not far from the secret room there is a hiding place in the floor.
Meet Vega near OG29
We talk with Alex at the place she indicated, and then head to the headquarters of the Task Force. When talking to her, you have to make a difficult choice: give Alex the Rooker evidence or keep it for yourself. You can see the consequences below.
Spoiler: if you decide to give up evidence, then last mission Alex will help you by giving you the access code to the door behind which the delegates and Brown will be. If you don’t give it back, you won’t receive any code.
Use NPC device
We head to Miller's office. Look around the room. Under the table you can find a button that raises a painting hiding a safe. Then we go to the adjacent Neural Subnet room and find ourselves in virtual reality. Near one of the columns there is a bright light source. You need to stand on it to get into the neural subnet.
Receive data from 5 servers

You should approach the gray object that is susceptible to hacking. We open it to remove it from our path, and move on. We go around the room in which the first server is located (purple cube), from the back side and find a hatch at the bottom. It will be covered by a gray object similar to the one we hacked earlier. We open the ventilation grill and make our way inside.
Data towers hacked
We approach the purple cube and download all the information from it. There are still four servers left. We get out through the same hatch and go forward. On the right we find another cube. You need to pull out two gray objects not far from it, and then go around the central structure and pull out an additional bridge. This will open the way for us to a new server.
The third database is located on the opposite side of the room. Be careful - there are several cameras there. You can find a ventilation hole nearby, but to access it you will first have to move aside a massive box. We move forward along the ventilation duct, and then remove the gray object located on the ceiling. It can be used to partially block the view of one of the cameras. We get to the far side of the room and go up the stairs. Then we load data from the next cube.
There is no need to jump down immediately, since in this case the camera will detect you. Therefore, you will have to choose the same way. We go down the steps and remove the gray object under the ceiling in the recess - this will give you access to the ventilation duct.
We climb inside and in the new room we find a triangular code, and then we lift one of the columns located on the sides. We jump on it and climb to the upper level. We go upstairs again, but this time along the stairs. We hack access to another staircase and end up next to a new server.

In the central part of the room you need to push out all the gray objects, and then jump on them. We look up and see a glass pyramid and a small window. We jump onto the pyramid, and then we reach the window. We jump down and find the last purple cube.
Exit NPC
Getting out won’t be as easy as you might think at first glance, because an unexpected visitor will appear in the office. The conversation with him will not last long, otherwise you will both be caught.
M10 – Facing a Puzzle
Meet Janus
After completing the previous quest, go outside and receive a call from Alex, who will inform you that you should meet with Janus. We go to a closed building and make our way into it through a broken window. We break open the door, go into the room and find a ventilation hole near the doorway. We climb into it and go down to the room on the left. We watch the next cut-scene.
Evade the Drones
It is necessary to get out of the room as quickly as possible. However, you can spend a couple of tens of seconds and pick up several useful items in the room. Then we find the ventilation grille on the ceiling, open it and jump inside using the table. We get to the cornice and run along it to the right. Once near the opposite wall, we go to the nearest corner. As soon as the drones turn away, jump down and look for a hole in the wall. We make our way into the hole.
We go into the next room and wait until the second drone flies up to the hole in the floor. We jump down and listen to how the alarm begins to “scream” (it will sound in any case).
On your way you will encounter two more drones. You shouldn't get into a fight with them. Turn left and find a locked barred door. We break it open and go inside. We move secretly between several shelters on the left and reach straight to the wall. We wait for the nearest robot to be on the far side, climb onto the top pipe and run across to the other “shore”. Then you need to jump off and immediately look for cover.

We go further, go through the second door and come across lasers. We crouch and crawl under the lasers. In the tunnel we try not to step on mines. They can be turned off - to do this, press the Ctrl key and slowly approach the mine, making sure that the lights on it do not light up. At close range you can easily deactivate the mine. We reach the vertical ladder and get out into the street.
M11 – Meeting with a terrorist
This mission will be given to you as soon as you complete the previous task. Once on the subway, Alex will contact you again, who will ask you to do her a favor. Both quests cannot be completed, so you will have to make a difficult choice. You can find out about the consequences below.
Spoiler: if you choose Alison, you will not be able to complete the task with the bank. You will have to infiltrate a house that is full of augmented fanatics. Miller will be pleased with the outcome of the mission, no matter how you complete it. At the end of the quest, talk to Alison, from whom you can take a signal jammer. This device will help you save ordinary people in the very last task. Miller will die in this case.
If you decide to choose a bank, then Alison will be killed, and you will have to go through bank security. Miller won't like your actions, but hackers will like them. The reward will be somewhat larger - information about the Orchid and the opportunity to create an antidote against it, which will help you in the final quest to save the delegates and Miller. In addition, near the exit of a financial institution, you will find many useful things in storage cells.
Meet Nomad Stanek
We talk with the watchmaker, and then go through the door located behind the quest character.
Save Alison Stanekova
We find ourselves in a community of fanatics with augmentations. We get to the courtyard without any problems, and then climb onto the roof of the extension. Afterwards we go down to the ledge. We follow it to another part of the structure. 2 mines may interfere with you. You need to slowly reach them, and then deactivate them. We reach the opposite side of the house.
We find a weak point in the recess and break it. We go inside the house and climb into the ventilation hole, located in the same room right under the ceiling. We move along the ventilation passage, and then move on to the pipes. Along them we reach another ventilation, which is located at the other end of the corridor. Do not fall down, otherwise you will immediately be shocked, since the floor is under high voltage.

As a result, we end up in the restroom. We lift the ventilation grille and take out one sectarian using a rifle with tranquilizers. Then we go behind the girl sitting on the sofa and get to the littered ladder. We hide behind the side and wait until a couple of fanatics finish their dialogue and one of them decides to work on the computer.
Without taking our eyes off the camera, we walk forward along the bridge to the window opening. We wait until the girl decides to turn in the other direction, and then we knock her out. We move further under the video camera into another room and again climb into the ventilation hole. We find ourselves on the stairs. We go upstairs, open the door and talk with Alison. Those who want to save her and get the jammer should tell her the following:
- Closer to the topic
- Closer to the topic
- Closer to the topic
- Advise
Your inventory should also have free space for signal blocker (2 cells). This device is not a quest device, so it will end up in the general inventory. Be careful not to throw it away or give it away accidentally.
After the end of the cut-scene, you can start exploring nearby locations - no one will bother you. In this building you can find many useful things, including consumables and weapons. Then you should head to the helipad.
Fly to the GARM complex
M12 – Heist
This is the second quest from Alex, which you can either complete or refuse to complete by choosing the task with the terrorist. The consequences of your choice are indicated in the description of the previous mission.
Get to the bank
As soon as you approach the main entrance of the financial institution, Alex will immediately call you and ask you to pick up a bag from the luggage compartment of the car parked in the parking lot.
Pick up Vega's package
Near the square there is a building with the Ludvik’s sign. You need to enter it and go to the bar counter. There will be a door behind it. We pass through it and go down to the basement. We open the lock and climb into the ventilation passage. As a result, we find ourselves in the parking lot.
We try to crawl unnoticed to the blue car on the right. We find a bag in his luggage compartment. We take the required item and leave the parking lot.
Gain access to the terminal
Once again on the square, we move to the main entrance of the bank. Then we go to the stairs located on the opposite side of the hall and go down it. If you have already been here before while completing the side mission “Samizdat”, then you should not have any difficulties in bypassing the security systems, since most of the passage will coincide with the implementation of the side mission. Plus, you won't have to look for the key card for Vault A again.

If you don't like doing side quests, you'll have to spend a lot of time bypassing the bank's security system. So, we turn right and find in the far corner the entrance to the room, blocked by an electronic interface. We hack it and go inside. Under the table you can find a button that opens access to a hidden wall safe. We open the safe and find a key card in it.
We get back out into the hall and head to storage A, located in the back of the room. We use the card we found and wait for the doors to open and the lasers to turn off. We reach the opposite side of the new room, find another access panel and hack it. Then we go through another door.
Here, on the other side of the door, we come across a ventilation hole. We climb inside and get through the ventilation to the stairs located behind the laser turrets and the guard. We go up the stairs and take cover. As soon as the cleaner talks with the guard, we go to the toilet and knock out the sentry. We hide the body in the stall, move to the adjacent restroom and exit at the other end of the corridor. We take cover behind a column and follow two people talking to each other and standing far ahead.
After they talk and go in different directions, we find the guard patrolling here and put him to sleep with a tranquilizer. We find the door on the left side of the corridor and open it. We go inside and climb into the ventilation duct located to the right of the entrance to the room. We get through the ventilation to the technical room.
We observe the guard standing in the corridor. When he leaves his post, we go to the room opposite and go up the stairs. We try not to get into the camera lens and get to the access panel. We break it open and climb inside. On the table we find a blue encoder device. We insert the key card into it, and then put it in the inventory.
Use the elevator in the corporate storage facility
In this room you can find a hidden room. You need to go to the table with glowing cubes. To solve this puzzle you need to do the following:
- Raise the first pillar 2 spaces.
- Lower the first pillar completely down, and then raise it 1 cell.
- Rotate the platform.
- Raise the second pillar 1 cell.
- Rotate the platform again.
- Raise 2 pillars 1 cell.
- Rotate the platform 2 times.
- Lower the pole all the way down.
As soon as you release the pillar, the door you need will immediately open. If you've already solved this riddle before, you won't have to solve it again. In the new room, look for a ventilation hole. You can take it directly to the elevator. We use the key card and go down to the storage room by elevator.
Get into the Versalife vault
You need to wait a little until the bank guards disperse in different directions. Then we approach the left door and pick its lock. We reach the first landing and look up - there we find a ventilation grill behind a column. We climb into it and climb forward, following the marker. At some point, another access panel will need to be hacked. As a result, we find ourselves near the door leading to the storage room. We make our way inside and activate the interface located in the center of the room.
We wait for the large safe to come down, use the card and go inside. We watch the cutscene, and then take a good look around - here you can find a lot of useful things. The most valuable item is found in a safe located near the laptop. We open it and find an antidote in it, with which you can neutralize the Orchid.
Get out of the bank
We leave the safe and go up the stairs. Then we jump onto the bridge and press the button on the wall to open the path. Ahead you can search a couple of vaults if you have certain keys.

We go up another ladder, and then we jump onto the nearest bridge and open the combination lock. A storage unit will pop out from the wall. You need to climb onto it using the steps located on its side. From the roof of the vault you can jump to the next level and use the stairs again. We gain access to the new grille, turn off the ventilation system using the access panel and go forward.
We find ourselves in a car parking lot. We make sure that no one sees us, and we get to the door leading to the exit. We get to the square and go to the main entrance. Access to a new target will appear.
Meet Miller at the helipad
We head to the helipad, where we talk with the pilot Chikane and Miller.
Fly to the GARM complex
Again the pilot will offer us a choice: fly right now or a little later. If you choose the first option, then all side quests will be automatically failed, so we advise you to complete them first, and only then fly to a new location.
M13 – GARM
Regardless of what mission you decide to complete - infiltrate the bank or rescue Alison, you will still have to go to the Alps, to a well-guarded complex called GARM.
Infiltrate the complex
Go forward along the only road available to you, hack the access panel and open the entrance to the building. Watch a short cutscene and then try to contact a character.
If you decide to contact Miller, then at the end of this quest an alarm will sound, even if you did not appear on any of the cameras and did not catch the eye of anyone. Therefore, we recommend choosing Alex.
Leave the complex
We go forward and find a mine in which a large fan is working. We pass next to the column and deactivate the power supply to the panel. We go to the fan again, remove the grille from the ventilation and move on.
We climb into the ventilation hole, and then go up the stairs. We wait until the video camera turns in the other direction, and we run into the adjacent room. Then we get to the far corner of the room. If you have the “remote hacking” augmentation open, then after gaining control of Adam you can pull out the ladder located on the left. Through the technical room you will be able to get to the place you need.
We go down the stairs, knock out the guard in close combat or with a tranquilizer and climb into the ventilation located under the stairs. We make our way under the orange arch, reach a new room and find a new hatch in the floor. We jump down, climb through another arch and watch the guard. As soon as he leaves his post, we move a little forward and find a ventilation hole under the boxes. We drag one of the containers and climb into the ventilation.

We find an exit near the stairs. We watch the guard and the camera - when they turn away, we run to the other side. You will have to make dashes a couple of times. First we hide behind the columns, and then behind the containers under the stairs.
Let's go to the upper level. We open the door and climb into the ventilation passage located under the table opposite the door. We jump down and destroy the panel. We turn off the power supply at the panel and climb into the pipe.
Then Chikane will call you and the alarm will sound (if you decided to contact Miller at the beginning of the quest). We go forward, trying not to get into the electrified sections of the pipe. We get to the end of it and find ourselves in the back room.
Wait until one of the guards walks past you and enters the hangar, and the second one has his back to you, and then quickly run to the boxes on the right. Turn on your super vision and see what's happening in the left hangar. You will need to wait until a person walks inside it near the entrance, stand behind him and crawl through the ventilation hole in the floor.
We move forward through the technical room located under the hangar, and then get out of the ventilation when the guards leave the room. You must immediately hide behind the rack on the right and knock out the patrolman who entered.
We get to the door through which the guard just entered, take cover behind the wall and open the door. We find a ladder ahead. We watch the camera and two guards. When the moment is right, we run behind the containers under the stairs and wait. When the guard leaves his post, we go up to the top floor.
On the right we find a room. We go inside, take cover behind the wall and open a new door. We wait until the guard goes a little forward, we get out into the corridor and run into the room opposite. We go to the other end of the room, go behind the guard and hide near the boxes. We knock out the guard using a tranquilizer. One shot will not make him fall asleep, but he will be interested in where the fire was coming from. He will approach your cover, and then you can knock him out in close combat.

From here you can knock out the second guard patrolling the entire room. There will only be one person left who constantly stands near the camera. You can turn off the video camera on your laptop so that it stops looking at the elevator. Then we take cover behind the wall near the door and open it. The guard will decide to check why it opened on its own. We run up to him and knock him out in close combat.
We climb into the elevator and go up to the street. Chikane will be waiting for us there. We go to the transport and watch as the thirteenth mission goes into the completed section.
M14 – Finding the last clues
We fly back to the capital of the Czech Republic. This will be our third visit to Prague in the entire game. The authorities have decided to impose a curfew, so movement around the city will be difficult.
Meet Vega at the Protez clinic
We get out and watch a short cutscene, after which we immediately find ourselves in the clinic we need.
Meet Miller in his office
Once you have the above goal, you can achieve it in two ways. If you have unlocked an augmentation that improves jumping, then try jumping into the hatch installed on the ceiling. Here you will find a lot of interesting things and can get into the ventilation. We get out into the street and jump onto the truck. Next we go down to the ground and take cover behind a flowerbed.
The second path involves exiting the street from the main entrance. Once outside, we immediately take cover behind the wall. We wait until a policeman passes next to you, and then we run left into the arch and jump onto the truck. Now you need to jump from the truck to the ground and hide behind the flowerbed.
We're watching the cop. When he stops looking in our direction, we jump through the flowerbed and turn to the right. We go forward along the bridge, again choose the right path and reach 2 warehouses with combination locks. We break into the one with a low security level, go through it and climb through the ventilation passage into the adjacent storage room.
We break the ventilation grill and find ourselves on the street. We jump over the fence and immediately sit on a bench so that the patrolman standing next to the advertising board does not suspect you of shady dealings. We get closer to the cop and wait for him to start digging into the locals - we go behind his back and hide in cover. We find a yard highlighted with a marker and go to its territory.

We find an open window, climb into the building, go to the elevator and take it down to the headquarters of Task Force 29. Next we talk with Miller.
Infiltrate Dvali territory
We get out onto one of the city streets and go left until we find ourselves near the Protez clinic. Don't forget to hide from the police. We walk even further, trying to stay on the right side of the street. Watch the patrolmen, wait for the right moment and run behind the person wearing the exosuit. Then take cover behind the van.
Go to the next street to find yourself in the right area. Now there is no need to rush. Go to the Red Queen club and find three Dvalis. Pay attention to the one who has long hair. Keep an eye on him. Once he is on the second level on the far side of the corridor, not far from the booths, knock him out and take the key card from him that opens the Dvali gate.
You need to go outside and go to the tunnel that the mini-map points to. Again we try not to get caught by the police. We use the card taken away earlier and open the gate. However, you should not rush to go inside, as a horde of hostile “monkeys” will immediately attack you.
Wait for the right moment, and then head to the left nook, located directly in front of the building. We climb to the upper level along the vertical ladders. We take cover around the corner of the structure and knock out one enemy with a tranquilizer. We move to the roof of the building where the enemy was just there and hide behind the dome. We deal with the second patrolman in the same way.
We make our way under the video camera. There will be a ventilation duct on top of it. We move the box to the wall and climb into the ventilation. Then we jump onto the pipe, and from it we move to a ledge with a destructible grate. We find ourselves in the ventilation again. Having reached the fork, turn right. Then we jump into the toilet.
Find Radic Nikoladze's office
The wall in this room is destructible, so you should wait until the enemy leans against it and break it, knocking out the guard. We turn left, go forward to the end of the corridor, and then go through the door. There will be a video camera that covers large area, including the ladder we need. We wait for the right moment, and then we run to the stairs. We go down it, run around the corner and pick the lock on the door. Let's move forward.
We go out into the corridor and come across a robot guarding the perimeter. On the right you can see the stairs. We follow it down and find ourselves in a new corridor, to which the marker pointed. We get to the quest door and watch the cut-scene.
Related articles
 The best amulets against the evil eye and damage Amulet against the evil eye with hands for children
 How to read the Psalter correctly
 Delicious dishes with sausages
 A glimpse of Bella. Romantic chronicle. A glimpse of genius. Messerer about Akhmadulina Boris Messerer glimpse of Bella romantic chronicle
 I dreamed that I was sailing on a boat on the river
 How to cook beef entrecote in a frying pan
 About the company Foreign language courses at Moscow State University
 Which city and why became the main one in Ancient Mesopotamia?
 Why Bukhsoft Online is better than a regular accounting program!
 Which year is a leap year and how to calculate it