
Professional tips for shooting portraits. Portrait photography, learning how to take a high-quality portrait
This is one of the most difficult photography techniques, because a portrait shows the character, inner world, and life values of the person depicted. The photographer must discover the main personality accents in the model, emphasize characteristic features, emotionality of a person and reveal spiritual disposition. Quite often, before a shoot, you hear from people that they are not photogenic and at the same time cannot relax. This is a wrong opinion! You can photograph any person in such a way that you really like him and thank the photographer very much. Absolutely every person is individual, moreover, the more unusual the person, the more expressive and interesting a portrait can be made, in a genre manner.
Preparing for shooting
A group of people is usually filmed in normal. horizontal position of the camera. Portrait photographs are taken by turning the camera 90 degrees. So the frame turns out to be elongated upward. This is called portrait position. This position allows you to place your face more advantageously in the frame, eliminating large empty spaces that will distract the viewer. To photograph a model from the shoulder or just the face, you need to stand far enough away while using the zoom. This approach allows you to minimize perspective distortion and blur the background more. You should never take portraits with a wide-angle lens. This distorts facial features. If your camera only has digital zoom, you don't need to use it. This will only degrade the quality of the photo and will not affect the perspective in any way.
-In no case should you exactly copy the poses of outstanding models; focus on your naturalness and uniqueness, then the result will be at a high level.
Aperture setting
If your camera has manual shutter speed and aperture settings, you should use the widest possible aperture. There are two reasons for this. First of all, this will allow you to use a faster shutter speed, which will eliminate blur and movement. Also, such settings will allow you to blur the background and foreground, excluding all secondary elements from the focus area. If manual camera settings are difficult to cope with, you can simply switch it to portrait shooting mode. If the lighting when shooting is not very good. It's better to use a tripod.
Lighting
There is an opinion among ordinary camera users that portraits are only taken in the studio. Actually this is not true. A lot of portraits are taken of the model at home, at work or just on the street. You can take a decent photograph anywhere, and you can find everything you need for good portrait can be done in almost any home. Most best light- natural. Great photos can be taken near a window or on the street. Make sure the rays are diffused. Avoid direct contact with the model's face. sun rays. If the light falls only from one side, then a reflector will come to the rescue, which will fill the shadows with reflected light and soften them. You can buy a reflector in a store, but you can also use a regular sheet white cardboard. For a reflector to work effectively, it must be 1 square meter in area. A lot of cameras are equipped with a built-in flash. IN portrait photography It's better not to use it. This flash creates harsh shadows and red eyes. Using an external flash allows you to better control its light. If you cannot do without using the built-in flash, then it should be covered with translucent paper. This will make the light diffuse and softer.
Construction of light
Place the model in a chair, turn her head 45 degrees. Conditionally divide your face in half in the middle of the nose. The part of the face that is less visible will be called short. The part of the face that is closer to the camera will be called wide. Now imagine the light from the wide side of your face. You will get a whitened ear, cheek and hard shadows that will be cast on the short side. This is not the best lighting setup. It will be much better to place the light source on the short side of the face. It's worth taking a closer look at the centuries. If they are lit normally, then the lighting setup is successful. We must not forget about the shadow of the nose. The ideal option is the position of the shadow when it follows vertical line from nose to mouth.
Framing the face correctly
The placement of the model's face follows the rule of thirds. One of the centers of attention may be the eyes or the tip of the nose. Correct framing can be done when shooting or while processing the frame in a graphics editor. The model's arms and shoulders should also be on leading lines that focus attention.
Blur background
When shooting a portrait indoors or outdoors, the aperture should be opened as wide as possible. This will allow you to get rid of unnecessary elements by blurring them. This will focus the viewer's attention on the model. You can also use faster shutter speeds and take photographs without a tripod. Shooting can be done from various points. Try to find an interesting angle.
Style selection
If you get one photo, you don't need to make all the others look like it. Look for new approaches and interesting solutions.
White balance
One of the most important differences between digital photographs and film is the availability of white balance settings. Light consists of three primary colors - green, red and blue. They are combined in various proportions. Artificial lighting produces light that is different from natural light. For example, an incandescent lamp produces a reddish light, while fluorescent lamps produce a greenish light. This color balance is called color temperature. The human eye adapts very quickly to changes in lighting, and the surroundings look quite natural, but the camera records this difference. White balance settings tell the camera what it should look like White color in the pictures.
Order in the frame
When the model's hands are included in the frame, there should be no problems with the composition. Here are some tips on this:
The hand should be photographed from the side. This will visually reduce it.
To keep your fingers from looking too long, they should point either toward or away from the camera.
Straight and open fingers create a feeling of tension. To create a relaxed environment, they should be slightly bent and closed.
Men's hands should be closer to each other, because they are larger than women's and much more noticeable.
Crossed fingers create a feeling of awkwardness and tension.
The head resting on the hand creates weight on the face and slightly distorts the facial features.
IN this material Let's look at some valuable tips for aspiring portrait photographers. Portrait photography is a difficult genre of photography, but if you know the basic laws, then learning becomes much easier. After reading the article, immediately apply and implement, this is the only way you can achieve visible results.
Extra headroom
When beginners take portrait photographs, they usually don't think much about composition and leave too much space above the subject's head. This is very serious mistake, disrupting the harmony in portrait photography.
This free place does not carry any information, but only adds unnecessary free space. So, if you're shooting a close-up portrait, try to never place your subject's face below the top horizontal third line, and always keep this rule in mind when composing your shot.
The example on the right shows the shaded area where the face would look most harmonious. An exception to this would be if you want to add extra emphasis to an interesting background.
Portrait photography - portrait orientation!

The vast majority of photographs were taken in horizontal orientation, because this is understandable - cameras are primarily designed for just such shooting, due to their design and button placement.
Portrait photography involves vertical positioning of the camera, this is the so-called portrait orientation. To get more interesting portrait photos, position your camera vertically and shoot in that mode. This tip is especially useful when taking full-length portrait photographs.
Of course, as with any rule, there are exceptions, some of which I will discuss in the examples below.
Using the battery pack
If you, like me, take a lot of portrait photographs, then a large number of You will spend time with the camera positioned in portrait orientation. After some time, you will get tired of constantly reaching right hand to the camera shutter button, which is not very conveniently located.
For many cameras, there are battery packs that allow you to take portraits comfortably, but also significantly increase the battery life of the camera.
In addition to the shutter button, the block may contain additional control dials and buttons that make it easier to navigate the menu and control the basic camera settings.
Also, when using a heavy lens, the battery pack helps improve balance when holding the camera.
The sun is behind

When shooting outdoor portraits, bright sunlight can often prevent you from getting a natural expression because... it may get into your eyes. The model begins to squint and it all looks unnatural in the photographs.
To avoid this, place the sun behind you so that the light falls not on your face, but on the back of your head and shoulders. This way you will get rid of this problem, and also get a nice illuminated halo around the shoulders and head in the pictures.
If the face turns out to be too dark, then use a flash or reflector to brighten it.
When using manual flash, be careful when setting the power, because we do not want to highlight, but only lightly illuminate the face. Therefore, start with the minimum values and find the required level.
Shoot at a wide angle, almost up close

When using a wide-angle lens to take portraits, the proportions in your photos may be distorted. You can avoid this by placing the model close to the lens. This way, normal proportions are obtained in the center and periphery of the frame, but distorted at the edges. Therefore, place the model not close to the corners of the frame.
Shooting in landscape orientation

So, we have just discussed and learned the rule of shooting portraits in vertical orientation. Now we can break it (that’s the beauty of rules in photography, once you master them, you can break them).
Note that there is clear space to look to the left
It is advisable to take profile portraits in a horizontal orientation. The thing is that the model’s face is facing the border of the photo and, when shooting in portrait orientation, it seems as if it is squeezed into a “box”. Therefore, you should always leave free space for the gaze.
Shooting with telephoto lenses
Always try to shoot portraits using telephoto lenses, as they have the property of optically compressing the perspective of the frame, allowing you to get depth in the photo. Long-focus optics distort less perspective, reduce geometric distortion, and allow for better background blur when shooting portraits.

Try to shoot with lenses with focal length more than 50 mm. Professional photographers shoot models from a distance and use the maximum focal length of the lens when shooting. For example, if you have a 28-135mm lens, you should use a 135mm for portrait photography to get the most effective shot.
Improve your portrait background

When composing a frame and selecting a background, the rule works well - “The less, the better.” Any unnecessary objects in the background can distract the viewer from the subject of the photo itself - the model.
The purpose of portrait photography is to highlight the model in the frame and focus the viewer’s attention on her. Always pay your attention to the details in the frame. If you're shooting indoors, some objects can simply be physically moved, thereby improving the background of the final photo. When shooting outdoors, position your model so that there is nothing significant behind her.
As a result, if there are no unnecessary distracting objects left in the background, then the person in the foreground will certainly be the center of attention. Which is exactly what is required.
Fashionable composition

Since most photographs are taken in a horizontal or vertical position of the camera, all photographs taken from a different angle look different! One of the very popular methods today is angled photography. All you have to do is tilt the camera left or right and take a few shots. Soon you will achieve the desired composition.
Don't be afraid to trim the crown

This approach when shooting is a logical continuation of the recommendation “not to leave too much space above the model’s head.” You don’t have to be afraid to crop off the top of the model’s head, and no matter how strange it may sound, this method is widely used by professional photographers in order to fill the frame with the model’s face as much as possible. After all, the crown and upper part of the forehead carry very little compositional load in the frame.
It is important to remember that it is highly undesirable to crop a person’s chin in a photograph. When the top part of the image is cropped, the face still looks quite harmonious. But if you crop off the lower part of the face, the photo turns out unnatural and even strange.
Many photographers are engaged in photographing portraits. This overview guide will help expand your knowledge in this area of photography by answering the question. It will tell you how to shoot in the most different conditions and gain inspiration and learn from the professionals.
For many people, the point of buying a camera is to be able to take pictures of friends and family. Every beginner and professional photographs people to a greater or lesser extent.
Getting the result
The article will teach you how to get the maximum result from portrait photography. You will learn how to shoot at home and adjust lighting without the use of expensive equipment. It will also talk about building a composition in a frame and using various effects. If you are interested in advice from the famous portrait photographer Kevin Wilson, then this material is for you.

Preparing for shooting
A group of people is usually filmed in normal. horizontal position of the camera. Portrait photographs are taken by turning the camera 90 degrees. So the frame turns out to be elongated upward. This is called portrait position. This position allows you to place your face more advantageously in the frame, eliminating large empty spaces that will distract the viewer. To photograph a model from the shoulder or just the face, you need to stand far enough away while using the zoom. This approach allows you to minimize perspective distortion and blur the background more. You should never take portraits with a wide-angle lens. This distorts facial features. If your camera only has digital zoom, you don't need to use it. This will only degrade the quality of the photo and will not affect the perspective in any way.

Aperture setting
If your camera has manual shutter speed and aperture settings, you should use the widest possible aperture. There are two reasons for this. First of all, this will allow you to use a faster shutter speed, which will eliminate blur and movement. Also, such settings will allow you to blur the background and foreground, excluding all secondary elements from the focus area. If manual camera settings are difficult to cope with, you can simply switch it to portrait shooting mode. If the lighting when shooting is not very good. It's better to use a tripod.

Lighting
There is an opinion among ordinary camera users that portraits are only taken in the studio. Actually this is not true. A lot of portraits are taken of the model at home, at work or just on the street. A decent photograph can be taken anywhere, and you can find everything you need for a good portrait in almost any home. The best light is natural. Great photos can be taken near a window or on the street. Make sure the rays are diffused. Do not expose the model's face to direct sunlight. If the light falls only from one side, then a reflector will come to the rescue, which will fill the shadows with reflected light and soften them. You can buy a reflector at the store, but you can also use a regular sheet of white cardboard. For a reflector to work effectively, it must be 1 square meter in area. A lot of cameras are equipped with a built-in flash. It is better not to use it in portrait photography. This flash creates harsh shadows and red eyes. Using an external flash allows you to better control its light. If you cannot do without using the built-in flash, then it should be covered with translucent paper. This will make the light diffuse and softer.

Construction of light
Place the model in a chair, turn her head 45 degrees. Conditionally divide your face in half in the middle of the nose. The part of the face that is less visible will be called short. The part of the face that is closer to the camera will be called wide. Now imagine the light from the wide side of your face. You will get a whitened ear, cheek and hard shadows that will be cast on the short side. This is not the best lighting setup. It will be much better to place the light source on the short side of the face. It's worth taking a closer look at the centuries. If they are lit normally, then the lighting setup is successful. We must not forget about the shadow of the nose. The ideal position is for the shadow to follow a vertical line from the nose to the mouth.

Framing the face correctly
The placement of the model's face follows the rule of thirds. One of the centers of attention may be the eyes or the tip of the nose. Correct framing can be done when shooting or while processing the frame in a graphics editor. The model's arms and shoulders should also be on leading lines that focus attention.

Blur background
When shooting a portrait indoors or outdoors, the aperture should be opened as wide as possible. This will allow you to get rid of unnecessary elements by blurring them. This will focus the viewer's attention on the model. You can also use faster shutter speeds and take photographs without a tripod. Shooting can be done from various points. Try to find an interesting angle.

Style selection
If you get one photo, you don't need to make all the others look like it. Look for new approaches and interesting solutions.

Official portrait
To create portraits in a formal setting, you need to choose a background that will contrast with the clothes and hair color of the model. In order for the model to remain the main object in the frame, backgrounds with obvious texture should be avoided. Such portraits are most often taken from the shoulder. In this case, you should not worry about the position of your hands. This makes the job easier. Hair plays a very important role in such a portrait. you should pay attention to the position of the strands and individual hairs. The main light should be located in front of the model, about a meter away from it. Power can be set to maximum. The second light source should be placed on the right and directed slightly upward. It will fill in the shadows from the chin. In this case, the second light source should be closer than the first. The shadows of the background will also be filled.

White balance
One of the most important differences between digital photographs and film is the availability of white balance settings. Light consists of three primary colors - green, red and blue. They are combined in various proportions. Artificial lighting produces light that is different from natural light. For example, an incandescent lamp produces a reddish light, while fluorescent lamps produce a greenish light. This color balance is called color temperature. The human eye adapts very quickly to changes in lighting, and the surroundings look quite natural, but the camera records this difference. White balance settings tell the camera how white should appear in photos.

Order in the frame
When the model's hands are included in the frame, there should be no problems with the composition. Here are some tips on this:
- The hand should be photographed from the side. This will visually reduce it.
- To keep your fingers from looking too long, they should point either toward or away from the camera.
- Straight and open fingers create a feeling of tension. To create a relaxed environment, they should be slightly bent and closed.
- Men's hands should be closer to each other, because they are larger than women's and much more noticeable.
- Crossed fingers create a feeling of awkwardness and tension.
- The head resting on the hand creates weight on the face and slightly distorts the facial features.

Master class on portrait photography
Kevin Wilson is a renowned portrait and wedding photographer. Kevin shared his tips on technique and organization for photography at home with photographers around the world.
Prepare a plan
It doesn't matter who you're filming. The very first thing you need to do is find out what kind of portrait the model wants to get. Where does a person feel most comfortable: outdoors, at home or in the studio. If you're photographing children, try speaking to them in their language. Feel free to be funny. This liberates the subject and allows you to get more natural portrait shots.

Use natural light
To create unique portraits, it is absolutely not necessary to have studio light. Enough good natural light. This light makes it easier to work at home. It's worth shooting near a window. The further the model is located from the window, the softer the light will be. To direct the light, you can use any homemade reflector. This could be a sheet of white cardboard or silver foil. The best results are obtained at ISO 400. In this case, you can use a shutter speed no longer than 1/15 of a second and get the most out of the lighting. If you need to resort to additional lighting, you can use a table lamp and built-in flash. The lamp will add warm tones and depth, and the flash will even out the shadows on the face.

Controlling white balance
If possible, it is better to set the white balance manually. Some cameras have a manual white balance feature. You can adjust the white balance using special cards gray eg Kodak Gray Card or Opti Card. It is best to always take photographs in RAW format. This will give you much more control and will allow you to carry out better color correction in the future.

Correct posture
When shooting in full height You can photograph a person so that he appears slimmer. The model should shift her weight to her back leg and turn 45°. When shooting outdoors, a long focal length will allow you to compress the frame.

When is it better to shoot in black and white?
Shots with high contrast and strong texture look better in black and white. Faces in this color space look more dramatic.

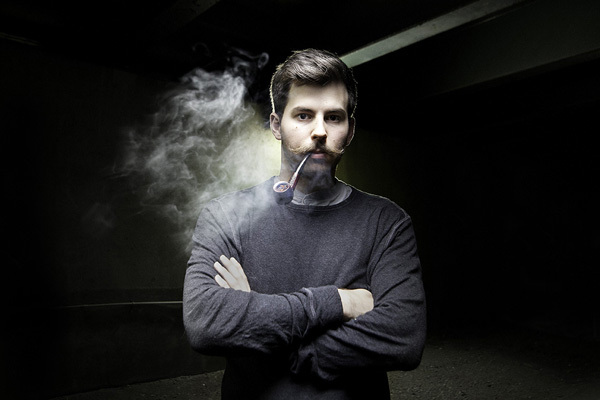
Portrait in a dark key
The essence of a dark key portrait is to illuminate only part of the model, and leave the rest in shadow or completely black. The camera settings in this portrait do not differ from the usual settings when photographing people. The point was to keep the light source out of the background. The reflector was installed a little further than usual.

The main light source is installed at a distance of 2 meters from the model. Thus, it will illuminate a wide space. All lighting was provided by the main light source from above and a reflector, which was installed on the right. Flash power has been halved. The essence of such a picture is to preserve maximum quantity dark color. To add more darkness, you can ask the model to cover her shoulders with her hair.
Photographing on the street
Many people believe that in bright sunlight turn out nice photos. This is wrong. Bright light creates very harsh shadows. In addition, the model begins to squint. The most Better conditions are created when the sky is filled with fluffy white clouds. Passing through them, light is scattered. Don't avoid taking pictures on the street. Posing your model against the seashore or cityscape can result in stunning photographs. Natural lighting is quite usable, you just need to use a reflector to fill the shadows with diffused reflected light.

The position of the reflector can adjust the hardness of the shadows. It can be moved around the model or brought closer and further away.
6 tips the right approach to photographing
The following 6 tips from Kevin Wilson will help you move in in the right direction on development in portrait photography:
- Keep a tripod with you at all times. This tool will help you shoot in low light conditions outdoors and in the studio.
- Buy a reflector. The silver reflector is very light and affordable. It is convenient to carry with you. If you don't have a reflector, you can use white cardboard or other material that reflects light.
- Stock up on memory cards. A terrible moment when the memory ended, and the model just relaxed and began to pose normally.
- Before pressing the shutter button, make sure that the composition is set correctly.
- After determining an acceptable distance from the camera to the model, take another step back. This will allow you to work more flexibly with framing.
- You should learn to take photographs very quickly and as efficiently as possible. This is especially important when photographing children. Children are not able to keep one object in their attention for a long time. They get distracted quickly.
Portrait- a difficult but very interesting genre of photography. During photography courses, sometimes there is a conversation with students about portrait photography- people show their photographs, which often contain errors, and almost everyone has the same ones. I'm also asked to tell people how best to photograph a portrait. In this article I want to present my vision of portrait photography, if possible, in a form that beginner photographers can understand. Before I was ready to create this article, I re-read a fairly large amount of materials on the Internet. It turned out that articles on the topic " how to take a portrait"Only the lazy don't write :) At the same time, I noticed that many articles are only step by step instructions, written in “dry” language, sometimes even without examples, as if “for show”. The other extreme is “multi-volume books” that reveal all the possible and impossible aspects of portrait photography, the authors of which bury themselves in such depths that you involuntarily begin to realize your insignificance :)
If you studied at the institute, remember how boring it was to listen to professors in lectures! :) There aren’t that many really competent materials that are also easy to read... I’ll try in simple language tell, how to take a portrait- the most ordinary, not studio, in natural lighting conditions - all portraitists start with it! Of course, emphasis will be placed on ensuring that the result is closer to artistic photography than to household. So, go ahead!
From what distance should you photograph a portrait?
Usually, to maintain the “correct” scale, it is recommended to focus on the focal length of the lens. For portraits, it is recommended to use a focal length of 85 mm (plus or minus). All this is great, but this recommendation does not take into account the fact that different devices with a focal length of 85 mm will have completely different scales due to the crop factor. If at full frame 85 mm is a really convenient focal length for shooting a portrait, it’s not the most close-up, then on a cropped image the scale of the picture will be completely different (the larger the crop factor, the larger the shot will be). On point-and-shoot cameras, 85 mm is generally the distance for photo hunting! But what if you want to shoot a portrait with an 18-55 mm kit lens, which does not have an 85 mm focal length at all? This, by the way, is a sore point among beginners who want to master portrait photography. In response to this, I will give a recommendation - simpler and more universal.
Take a portrait from a distance of at least 2 meters! Compensate for the lack of scale with zoom.
Shooting from a relatively long distance with a “zoom in” offers a number of advantages:
1. A calm and familiar perspective. Try to shoot a person point-blank with a wide angle and get a photo where he doesn’t look like himself! The perspective is to blame for distorting the proportions of the face. The further we move away from the model (compensating for the decrease in scale by increasing the focal length), the less the perspective effect, the more “correct” the portrait turns out. But you don’t need to go to extremes - you shouldn’t photograph a portrait from 30 meters with the telephoto lens extended to full, while the perspective practically disappears altogether and the face becomes excessively flat and wide. Besides
2. When shooting a portrait “from afar” it is much more convenient to work with the background. Firstly, it is easier to remove photo debris from the frame - unnecessary objects that distract attention (they are cut off by cropping). Secondly, the longer the focal length (the stronger the “zoom”), the more the background is blurred. Of course, in order to beautifully blur the background, it is advisable to have a fast lens. A kit lens at the long end with an aperture of 5.6 gives blur just for show. It may happen that the lens, when shooting from two meters, will not provide the required scale. In this case, you need to choose one of three solution options (from bad to good):
- Shoot from a closer distance. The simplest and affordable way, but you need to carefully monitor the perspective effect - after a certain point it begins to grow very quickly!
- Shoot as is, then crop photos during processing. There will be some loss of photo resolution, but with today's megapixel counts this isn't a big problem. Plus - you can try several framing options and stick with the one you (and/or the model) like best.
- Use longer focal length optics. The downside is that you may have to purchase it first. Plus - you will immediately get the desired scale of the portrait, and at the same time the background will be well blurred ("portrait" optics are designed just for this).
The role of the background
The background in a portrait is very important; its main task is to create the emotional atmosphere of the photograph. A monotonous background (for example, a bare wall) is boring and uninteresting. If photography takes place in nature, a wonderful background is obtained from leaves illuminated by the sun. The combination of the play of light and shadow on the leaves and bokeh (lens blur pattern) makes the photo more emotionally rich.

Photo by Maria Strutinskaya
True, not all lenses can really blur the background beautifully, so that it “plays out.” This works best with fast primes with a focal length of 50 mm or more. The background blur of most zoom lenses is not that interesting - most of them are not designed for this. The principle works for lenses - the narrower the specialization, the better the result when used for its intended purpose. This is why many photographers purchase a separate lens specifically for portrait photography, a macro lens for macro photography, a good wide-angle lens for landscape photography, etc. A zoom lens in this case is a compromise solution. However, you can practice with a zoom, understand whether it is necessary and, if necessary, consciously choose a real “portrait camera”.
The following things enhance background blur:
1. Maximum open aperture. Portrait lenses allow you to open the aperture to 2, 1.4 and even 1.2! The depth of field at f/1.2 is a few centimeters. Everything that is closer and further goes into blur.
2. Increased focal length. Portrait lenses for crop have a focal length of 50 mm, for full frame - from 80 mm. The longer the focal length, the more the lens will blur the background at the same aperture value.
3. (this is often forgotten) Distance between model and background. The greater the distance, the further the background is from the focus point and the greater the blur. There is no point in trying to blur the background too much if the model is half a meter away from it.
What to do if it is not technically possible to greatly blur the background?
We figured out how to blur the background and what is needed for this. But what if we don’t have high-aperture optics or even have a point-and-shoot camera? What if you want to blur unwanted background objects, but you can’t? In our case, this can only be solved by choosing an angle in which unwanted background objects are outside the frame. Important note! If the composition is poorly constructed, the background can cause harm. Agree, portraits with poles or road signs sticking out their heads in the background look extremely unprofessional! Therefore, make it a rule - when constructing a frame, concentrate not only on the model, but also on the background.
Where should you focus when taking a portrait?
Let's assume we've sorted out the blurring. But the question remains open - what should be sharp? Someone will answer - “Of course the face!” Indeed, it is difficult to argue with this. And many novice portrait photographers focus strictly on the center of the face, that is, on the tip of the nose :) As a result, the nose is obtained in all details, and the most expressive part - the eyes - go into a slight blur. This makes the entire photo appear out of focus. Conclusion - sharpness in a portrait needs to be focused on the eyes. But the trouble is that the face is placed frontally quite rarely; most often the portrait is photographed at some angle. In this case, one eye is closer to the lens, the other - further. In this case, the focus is on the eye closest to us.
Rule of thirds in portraiture
I hope there is no need to talk about the rule of thirds, you know about it very well. In a more or less close-up portrait, the eyes are located at about 1/3 level from the top.

It is customary to leave a little horizontally more space in the direction in which the model is facing. With a horizontal layout the principle is the same.

A guide from Akry will help you with framing.

Natural light in portrait photography
Many portrait artists believe that the best light for portrait photography is natural. If you are photographing indoors, use window light. It is clear that the location of the window cannot be changed, but you have the freedom to choose the position of the shooting point, the model and the angle at which the light falls. You can also cover the window with a curtain, creating the effect of a light “wedge”.
The photos below as examples were taken by me at Sergei Vorobyov’s master class “Stylish Wedding Photography”
If you divide the face into two halves (along the line of the nose), then from a similar angle they will have different widths. Let's call the part of the face that is closer to the camera " wide". The other half, distant from the camera - " narrow":
It is believed that it is better if the light falls from the “narrow” side. If, on the contrary, the light falls from the “wide” side of the face, it may appear more round: The model’s gaze can be directed both into the lens and slightly to the side (as in last photo). Please note that in this photograph the gaze is directed towards the light. And we know that if there is movement of objects in opposite directions in a photograph (or at least a hint of movement), this contributes to the balance of the composition (at least this rule works great in landscape). In the portrait, as it turned out, no one canceled it either. When taking portraits, do not use the built-in flash! Even when you really want to highlight the face of the subject, you should not resort to the built-in flash - it makes the face look flat, with glare and, often, with red eyes.
But what if the shooting takes place against the light (for example, against the background of a window just against the sun, in backlight?) We agreed not to use a flash, but there is a high risk of getting only a silhouette in the photo! With such a complex arrangement of subjects, how can you get detail on the model’s face? Many people think that there is no way to refuse such an interesting perspective. But there is a way out! The first thing that will help is spot metering. We know that by default the device almost always uses matrix (integral, multi-segment - they're the same thing) exposure metering - over the entire frame area, based on the arithmetic average principle. In this case, the light background will have significant influence for exposure - the automation will decide that the lighting is generally good and will set a short shutter speed. As a result, the landscape outside the window will be exposed correctly, but the model will only appear as a silhouette. If you switch the metering mode to spot or partial, the metering will be taken over a very small area in the center of the frame, which at the time of metering should be aligned with the model’s face (it is dark against the general background). In this case, the automation will set a relatively long shutter speed, at which the face will be well detailed. True, in this case, the landscape outside the window will inevitably fade into whiteness - the dynamic range of the matrix is limited, you should choose one of two.
However, there is a way to get both the face and background done at the same time! It is logical that for this you need to somehow “get” back into the dynamic range limit and reduce the contrast between the foreground and background. We won’t be able to dim the background, but we can add light to the foreground! For this purpose, a simple device was invented called reflector.

When folded, it fits into a small bag; when unfolded, it forms a reflective surface with an area of about 1 square meter. This is quite enough to illuminate the model with reflected light from the point we need. Examples of shooting a portrait with and without a reflector can be found in the article Shooting with a reflector, practical tips on the website photokubik.com.
Height of the survey point
The height of the shooting point plays an important role. It is considered a classic of the genre if it is located at the model’s eye level. In principle, you can deviate from this rule, but it is worth remembering that when shooting “from the bottom up”, the model appears to have a “double chin”, and when shooting “from top to bottom” you need to make sure that the model raises her face, otherwise the forehead will be too large. Another extreme is filming children from their height “against the background of the floor.” The conclusion is simple - if you are shooting a child's portrait, sit down. If you are photographing a person who is taller than you, either stand on something or move further away and increase the focal length.
Is it possible to photograph a portrait with a kit lens, or do you need something more serious?
The whale lens of most cameras, although it has a sufficient focal length for portrait photography (equivalent to 80-90 mm), but it has a number of limitations, due to which artistic portrait photography with a whale lens is difficult. As you can probably guess, the key drawback is the low aperture ratio at the “long end,” which makes it impossible to properly blur the background. However, this is not always critical. For example, a portrait in a setting is most often shot with a large depth of field, and lighting plays a decisive role in the success of the shooting. When shooting portraits in a setting, you can achieve success even with a kit lens. If the shooting takes place against a uniform background, the role of blur tends to zero, the main thing is interesting light. However, whatever one may say, it is much more pleasant to work with good optics - it conveys tones better and gives a “cleaner” picture.
If you absolutely need to blur the background, you should think about a fast prime with a focal length of 50 or 85 mm. The simplest lens - the classic "fifty kopeck 1.8" (50 mm 1: 1.8) on the crop turns into an 80 mm portrait lens. It costs comparable to a kit lens, but portraits with it are much more interesting than with a kit zoom 18-55mm 1:3.5-5.6. In general, when it comes to optics, there is no limit to perfection. Professional portrait fixes easily exceed the cost of the carcass itself. However, I personally believe that you can learn the basics of portrait photography using the most inexpensive optics (50/1.8, 50/1.4, 85/1.8), and when you really feel that its capabilities are not enough for you, think about buying a professional lens.
Widget from SocialMartConclusion
The topic of portraiture is extremely multifaceted and it is absolutely impossible to cover it all in one review article. As you know, the secret of successful photography rests on two things - technical part and creative. Portrait is no exception. Moreover, if the technical part of the portrait can be described, everyone must reach the creative part themselves. I am sure that the article dotted, if not all, then a significant number of i’s on the technical side of portraiture. If you have additions, suggestions and wishes, please leave them in the comments. Happy shooting!
There are many photographers who specialize exclusively in portrait photography. And their passion is understandable: portrait photography is one of the most complex and interesting genres in photography, which reveals a person’s character.
Exciting? Then you just need to learn everything about portrait photography techniques.
Camera settings for portrait photography
- It is best to use aperture priority mode. An open aperture when shooting a portrait is the ideal solution. This way you will “blur” the background, create a bokeh effect by highlighting your subject well. Surely you assumed that we would give you the magic numbers of perfect settings suitable for any occasion. But, for example, we cannot say anything about certain aperture values, since the aperture will depend on specific cases, shooting conditions, as well as on the capabilities of the camera and its lens.
- To eliminate grain and noise, set the ISO to the lowest possible value. These parameters directly affect the brightness of the image and need to be adjusted based on the lighting, but we recommend setting the most small value which is possible. However, the extent to which noise appears at high ISO depends on your camera and the optics it uses. And therefore, the photosensitivity settings will be individual in each case. Speaking of optics: if you want to devote yourself to portrait photography, then a portrait lens is simply the perfect solution.
- Since a person cannot stand still like a statue, but play with the model the game “Marine figure, freeze!” somehow not comme il faut, to avoid blurry pictures, just set the shutter speed to 1/60 - 1/125 seconds.
- Don't worry too much about white balance. Standard settings are also suitable for any conditions. If the soul requires more creativity, then there is always a manual mode M.
- Metering mode is also an important parameter in portrait photography. Most modern cameras offer to perform the average, that is, over the entire frame. You can also apply it to a small area in the center of the frame (evaluative or spot).
Taking portraits indoors
If you are on a limited budget and do not have serious lighting equipment, and neither you nor your model can afford to rent a studio, just use the light from the window. Taking a portrait at home can be very successful if you shoot in a room with one window and light up parts of the face that are in shadow a little using a reflective screen. Place the screen about a meter or two from the model.
If you decide to shoot on a bright sunny day, when direct light mercilessly illuminates your face, we advise you to lightly cover the window with a light white fabric. This way you will be able to avoid unpleasant shadows on the model’s face (unless, of course, you wanted to turn this nuisance into the highlight of the photo).
Taking portraitsat home: practical advice
- Ask the model to stand sideways to the window at a distance of about one and a half meters. Position yourself with your back to the window so that the visual axis is perpendicular to the plane of the window.
- The background can be either plain walls or some bright element. To find the perfect angle, ask your model to walk around the room until you find the lighting conditions that best suit your idea. Since when shooting indoors you have to set a longer shutter speed, shooting a portrait with flash, unless you have a tripod, of course, is simply inevitable. Point the flash upward and attach the reflector so that it can cast light on the model.
- Here's a great lighting scheme for quality results. Use a pair of electronic flashes, which you place at a distance of about one and a half to two and a half meters from each other. Use the main light source to give your subject the desired effect, and place additional light sources as close to the top of the lens as possible, using them to highlight shadows.
Below we have described several classical schemes lighting used for portrait photography in the studio.

1. Take two additional light sources and place them at a slight angle in relation to the model. This will help you add extra volume to your photo.
2. Direct one source parallel to the camera, place the other at an acute angle in relation to the model, securing it at a height of about three meters. Light the model's head third from behind and slightly from the side - this will allow you to create volume in the frame. Light the background with a fourth light source.
3. In order to soften the picture a little, use reflected light, which can be obtained by directing the lighting device at the walls and ceiling.
4. The simplest lighting technique is carried out using a single source - a reflective screen. The method is as simple as three pennies, but despite this, you can use it to create unusual lighting effects.
Taking a night portrait
Portraits on a black background with bright spots of color usually look very unusual and contrasting. True, such conditions require a good external flash and the absence of too long shutter speeds. For example, you won’t be able to set a shutter speed of thirty seconds. Because even the most powerful flash will not give the object clarity in such conditions, only if the model freezes in one pose for a long time.
And now we will try to describe the technique of taking portraits at night against the backdrop of the colorful lights of the city at night.
- Try setting the shutter speed from 1/15 to 1/10 sec.
- Set the aperture value not very large, in some cases f 1.8 is perfect.
- Photographing a portrait at night, as we have already said, involves using a flash. In principle, in the absence of an external flash, you can try the built-in one: just set the synchronization to the second curtain so that the picture does not turn out blurry.
- If you shoot with an external flash, you can set it up in the same way as the built-in flash. First, try it on automatic; if this option doesn’t suit you, turn on manual mode and have fun with the settings all night long.
- Indirect light is best suited for this type of photography, so use umbrellas. If you have a synchronizer, place the flash on a tripod at 45 degrees, to the side of the model. This will give your photo depth and contrast.
- Want to make your background stand out more? Set it in settings great importance ISO.
Common mistakes when taking portraits

- Shooting using a wide-angle lens. Such optics are not suitable for portrait photography, as they exaggerate the perspective. If you wanted to get a comical effect, go ahead, but if the shooting is artistic, then you shouldn’t use such a lens.
- Unsharp eyes. The eyes are perhaps the most important thing in a portrait and as such they need to be sharp, especially when you're shooting wide open to limit the depth of field.
- Depth of field too deep. Shooting with a closed aperture is also not the best best idea. A harsh background will distract from the main subject and the photo will not look good
- Objects sticking out of the head. This can happen if you don't pay enough attention to the background. Of course, the tree peeking out from the head or road sign can be removed in the editor during post-processing. But why burden yourself with unnecessary work when you can pay attention to the background and, if necessary, step slightly to the side.
- Wrong angle and height of shooting. The correct height for shooting is best determined based on the context of the image and the subject, but the best results, as practice shows, can be obtained by shooting from the eye level of the subject.
- Sharp shadows. Often such shadows do not provide a favorable effect for the photo.
- Red eyes. To avoid this, move the flash away from the lens (unless it's built-in, of course)
- Overkill with details. In pursuit of sharp eyes, we often forget about the rest. You should not use modes that increase saturation - they can highlight skin imperfections, which will then have to be retouched for a long time and painstakingly.

- Before you pick up a camera, you need to decide what kind of photo you want to get as a result. What is the purpose of your shoot? Perhaps it’s a business portrait, fashion photography, online promotion, or you just decided to take an artistic photograph of a friend. Think carefully about the settings and style of future shooting, based on the task assigned to you.
- Have you decided on the purpose of shooting? Great! In this case, it will be easier for you to choose the appropriate place for it. What might be ideal for realizing your idea? For artistic photo it could be a forest, an abandoned house or any other mysterious place. Fashion photography can be organized in a studio or stroll through the city at night. A business portrait can be taken in a cafe or office.
- If you are working outdoors in natural light, it is very important to consider the time of day at which the shooting will take place. We do not recommend shooting in the middle of a sunny bright day, when the sun is especially merciless, because direct light, the blinding rays of the sun, will complicate your work, and it will be quite difficult to avoid overexposure.
- Don't forget about the basics of chiaroscuro, which everyone studied in art classes at school. Harsh, harsh lighting creates dramatic shadows. If such an arrangement was not included in your plans, then try to create conditions under which the light would fall on the entire object at once. Soft light can create an effect that makes everything appear flatter, but it can save you from worrying about losing detail in dark or bright spaces.
- The advantage of working in a studio is the freedom to experiment with art using artificial light sources. In field conditions, this is, of course, impossible. But in the studio, you, as a photographer, hold all the cards! We can set different light patterns, move and adjust the height and tilt of the sources in accordance with the idea. In other words, working in the studio makes you feel like a master of light.
- It is very important to organize competent work with the model. Reach mutual understanding, find contact and win over a person. Don't think that the model can read your mind - communicate with her! Talk about what pose is best for her to take, where to look. Smile, joke, create a relaxed environment in which a person will feel comfortable and be able to open up.
If you are interested in portrait photography, training is a must. Ours can offer a large number of different courses taught by professional photographers. Everyone is welcome!
Similar articles
 The best amulets against the evil eye and damage Amulet against the evil eye with hands for children
 How to read the Psalter correctly
 Delicious dishes with sausages
 A glimpse of Bella. Romantic chronicle. A glimpse of genius. Messerer about Akhmadulina Boris Messerer glimpse of Bella romantic chronicle
 I dreamed that I was sailing on a boat on the river
 How to cook beef entrecote in a frying pan
 About the company Foreign language courses at Moscow State University
 Which city and why became the main one in Ancient Mesopotamia?
 Why Bukhsoft Online is better than a regular accounting program!
 Which year is a leap year and how to calculate it