
DIY revolver stand. How to use a glue gun
When modeling or creating various designer items, there is a need for a gluing method that is very simple and quite fast. In this regard it will be useful glue gun"Zubr" or from another manufacturer.
There are several basic rules for using this tool that will extend its service life. What consumables there are for such a pistol and the advantages of its use will be discussed in the article.
Benefits of using glue guns
We can talk a lot about the advantages of glue guns, here are just a few of them:
- ease of use;
- light weight of the product;
- minimum hardening time;
- working with various materials;
- high adhesive strength;
- absence of harmful fumes;
- moisture resistance;
- low cost of consumables.
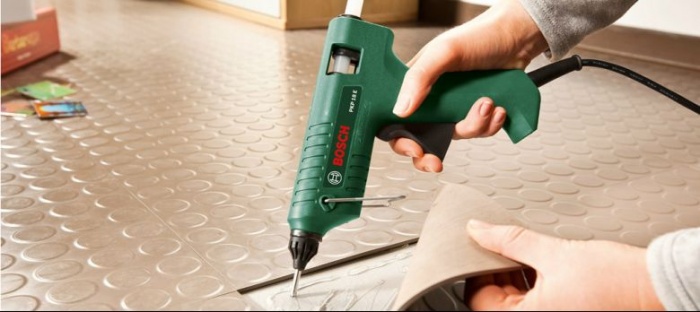
There is no need for complex instructions to learn how to use a glue gun to create crafts. Everything is intuitive and accessible. The gun is lightweight, so even a child can easily handle it. Special rods serve as consumables. After heating, the rods turn into a liquid mass, which carries out gluing. In this case, hardening occurs in a matter of minutes, which is very convenient.
For crafts using a glue gun, you can use the most various materials. It is known that a glue gun glues not only wood and metal with rods, but also various polymers and glass.
Note! The glue gun is not suitable for gluing cement-containing and similar components. This is due to their dustiness, which does not allow the expected adhesion to occur.

After the rod hardens, a strong seam is obtained, which, when processed correctly, is not inferior to other adhesive compositions. If desired, the glued parts can be separated and then the remaining glue can be removed so that no trace is visible. The advantage of this glue from a gun is its fluidity. It is able to fill cracks and deformations well, which additionally levels the surface and makes the joint airtight.
Using glue gun refills is safe for children. This is due to the fact that the consumables do not include toxic substances, which could evaporate when heated. A hobby that requires the use of such a device will not cost too much. The price of the rods is within reasonable limits.
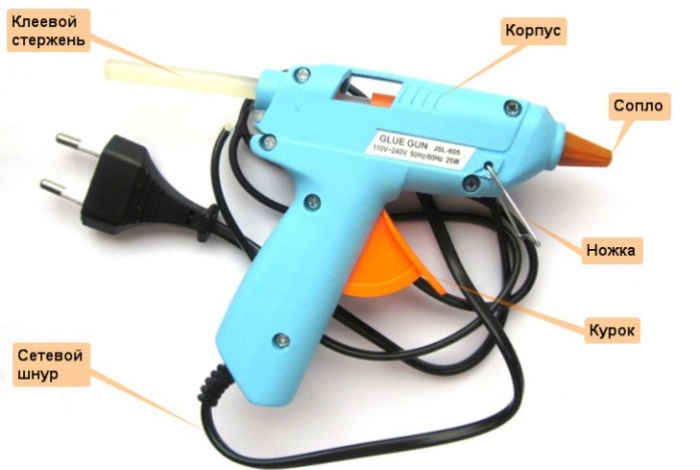
Design features
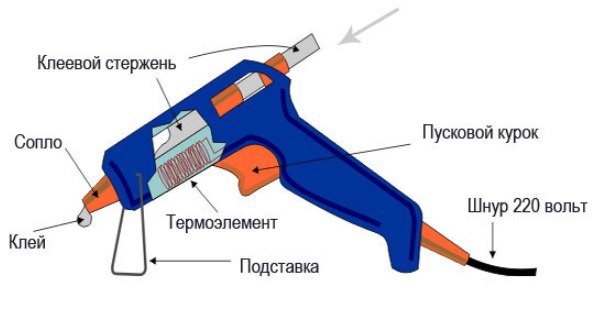
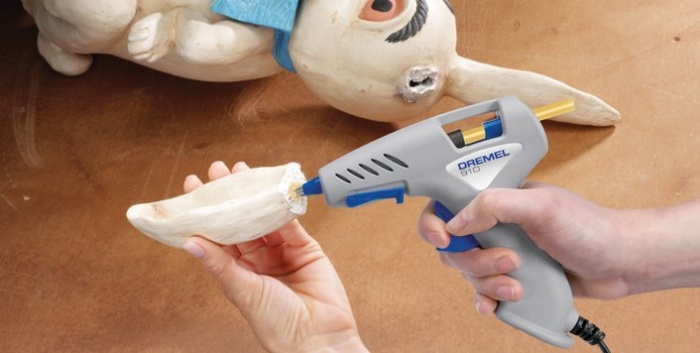
The glue gun got its name from appearance. It really looks like a toy weapon. The body is usually made of refractory plastic, which does not deteriorate from constant exposure to temperature from the heating element. There is a comfortable handle with a large button on it. It is connected to a pusher, which pushes the rods towards the heating source. The absence of harmful emissions is explained by the use of polyurethane in the rods. The diameter of the consumable may vary depending on the model of the main tool. The minimum size is 7 mm, and the maximum is 11. They are inserted into a special hole, which is located in the back of the device.
The heating element is most often located in the stem part. It can be made in the form of a tube into which the consumable completely fits. It is heated from below; due to the good thermal conductivity of the metal, the temperature quickly spreads over the entire area. Gun models from top manufacturers have several rod heaters. On the one hand, they increase the melting rate of the rod, and on the other hand, they can duplicate each other in the case of parallel connection. If one of them fails, the second will continue to function quietly. You will have to pay extra for this feature, but the efficiency will increase significantly. When choosing a pistol, you should focus on power consumption and output. The higher they are, the better the product. The size of the metal chamber where the rod is placed also affects performance.
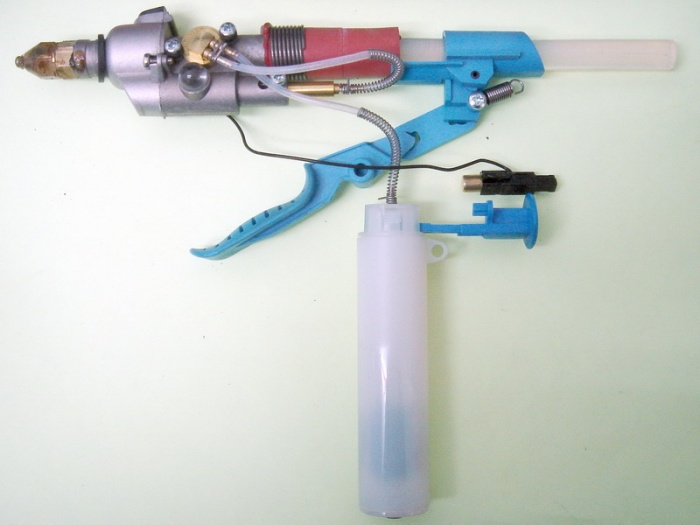
The movement of the rod inside the gun mechanism is carried out using a small ring, which is moved by the trigger. The latter has an installed spring that returns it to its original position. The gun pusher works by shifting the axis of the ring, which allows you to lock the rod and force it to move. This is one of the weakest parts of the pistol. You don't have to put in a lot of effort when working with it. It is enough to gradually advance the rod as it melts.
Note! Do not try to use larger diameter rods. With great physical effort, it is easy to break the ring that holds the glue.

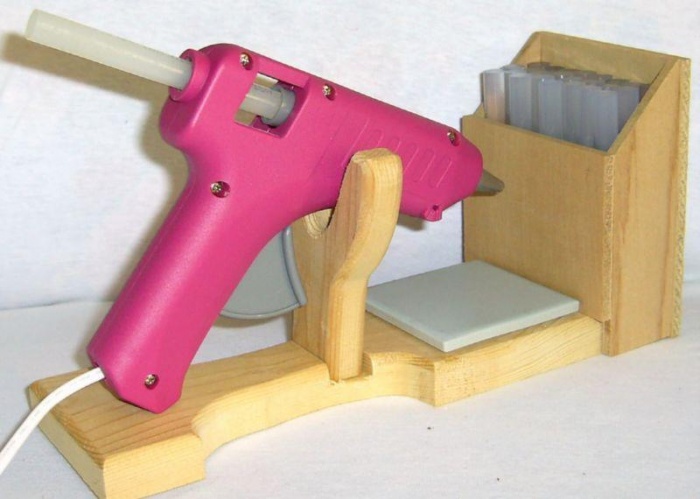
After the trigger mechanism of the gun there is a guide tube for the rods. It is fixed to the entrance a heating element. Its purpose is also to prevent the molten rod from leaking into the working mechanism. At the exit from the heating tube of the gun, the hole narrows. This gives greater freedom in dosing the composition when applying it to the craft during gluing. In high-quality models, the outlet closes when the trigger is released. This prevents the melt from leaking onto the surface, which could, for example, ruin paper diagrams or documents. Cheap models of such pistols come with a bracket on the handle. There is no danger when hanging reverse glue. Some pistols may be supplied with a stand on which the device is placed at an angle.
For greater user convenience, the handle can be made in an ergonomic shape using rubber inserts. They can be thermal absorbers that prevent burns. Better control over the movement of the glue stick is facilitated by the presence of a window between the pusher and the heating chamber. Most often, it is not protected by organic glass, so that glue residue can be easily removed if necessary.
Application area
The use of a glue gun has no restrictions on the type of activity. It is perfect for solving household and other tasks. Below are possible usage patterns.
Solving everyday problems
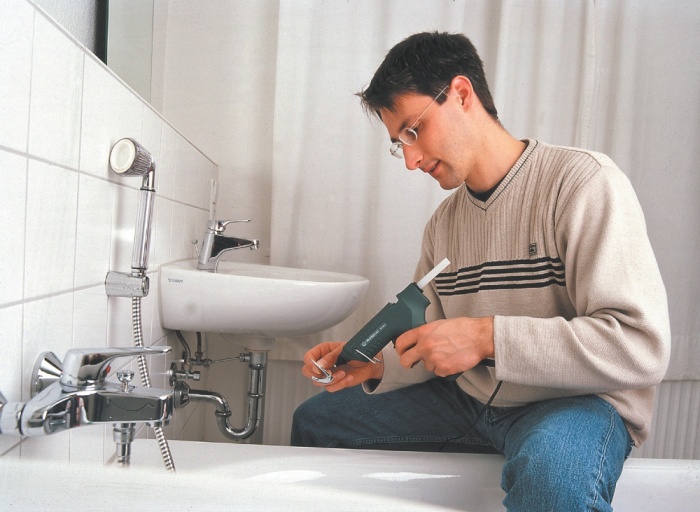
A glue gun is an indispensable tool in the household. With its help you can prepare your apartment for cold winter. If old wooden windows are installed, through the cracks of which leaks a large number of heat, then you can seal them using this glue.
If a piece of tile breaks off in the bathroom or kitchen, it can be easily fixed in place using polyurethane glue. Punched rubber boots can be easily repaired using this gun. It will be enough to degrease the surface well and apply the composition to the surface. It will perfectly seal the gap, which will prevent water from getting inside again.

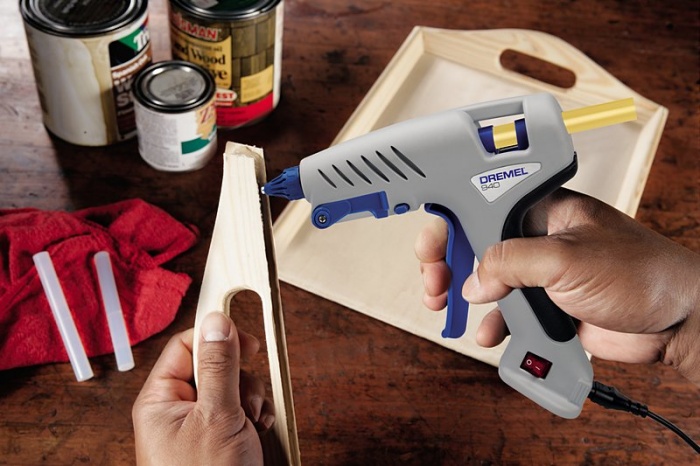
PVA glue was previously used to connect some parts of furniture products. But we had to wait quite a long time for it to gain strength. With a glue gun this happens much faster. It is enough to melt the rods to the required consistency and fill the holes with them. Some types of paper cannot be glued using this gun. This is due to the glossy surface, which prevents the adhesion of the molten rod from occurring.

Hobby Application

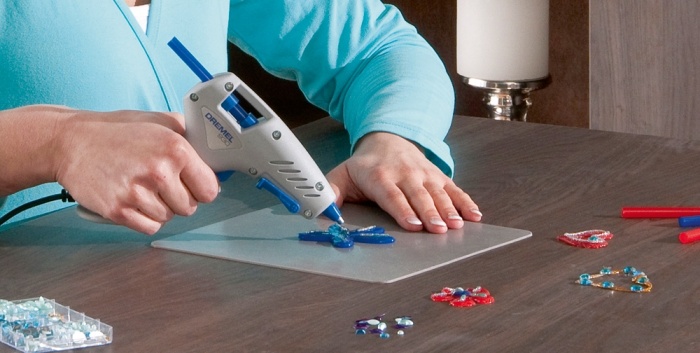
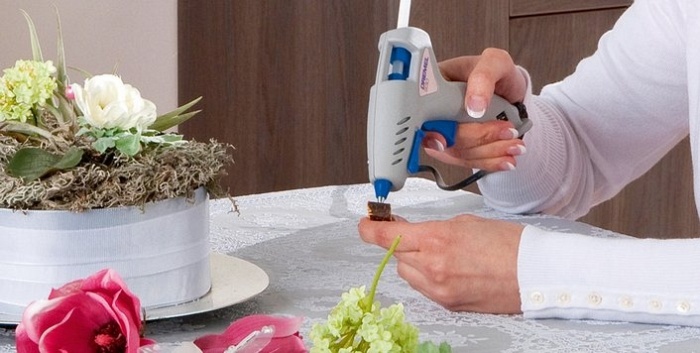
Modern needlewomen, whose crafts require quickly connecting various parts, cannot do without glue guns. With their help, it is easy to create intricate shapes and patterns that would be impossible to hold using traditional glue. Melted rods do an excellent job of gluing natural and artificial fabrics together and various components with them.
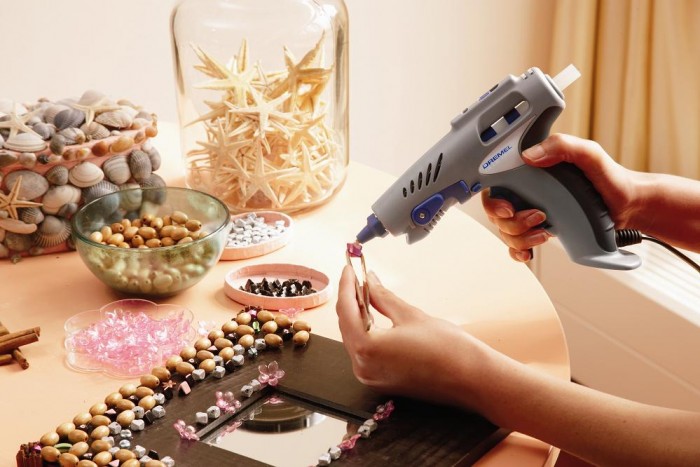
For example, it is easy to put artificial pearls or rhinestones on such glue. Manufacturers of glue sticks in some cases may add a certain dye to them. This makes the cured glue almost invisible on the finished craft. There is freedom in combining materials, because there are practically no barriers to the glue in the rods.
Additional features
When choosing a gun, you should pay attention to how the feed mechanism is made. It can be carousel or slider. The first type is more difficult to use, because it does not require pressing the trigger, but turning it, which can be inconvenient. Different kinds rods may differ in melting temperature. To solve this problem, it is better to purchase a gun that has a built-in regulator. It makes it possible to preset the required operating mode. If you need mobility when making crafts, then you can get a battery-powered gun. It can function without a central power supply.
Conclusion
As you can see, using a glue gun can be very useful. With the minimal cost of both the gun itself and the rods, you can have it at home just in case. When it appears, it will definitely find a use for solving everyday problems.
A regular hot glue gun can be used not only to glue various parts, but also to create various patterns and crafts.
When working with hot glue, be careful and pay attention Special attention for the safety of children, as the glue gun heats up and the glue comes out of it very hot.
Here are some very interesting and extraordinary ideas on how else you can use a glue gun and hot glue:
Crafts made from glue. We use wax crayons
You will need:
Glue gun
Wax crayons
* It is possible that after using wax crayons, your glue gun will deteriorate, so it is advisable to use an old or inexpensive gun.
*If children are working on the project, be careful when working with a hot glue gun and hot melted crayons.
1. Remove the labels (papers) from the crayons.
2. Cover your work area with an old towel.
3. Heat up the glue gun.
4. Carefully insert the chalk into the glue gun and gradually press it down. The glue gun trigger won't be able to push them through, so you'll have to do it by hand.
5. The wax will begin to melt and you will be able to use the colored wax drops to create colorful blots.
Decorate a vase or candlestick with hot glue.
You will need:
Inexpensive, round vase or candlestick
Heat the glue and begin to carefully apply it to the vase, layer by layer, so that you end up with transparent lines on the walls of the vase.
If you want to make straighter lines, ask someone to help you - let them twist the vase for you while you apply the glue.
Hot glue corals.
You will need:
Thin wire
Hot glue gun
Acrylic paint
Brush
Piece of plywood
Nails and hammer.
Making red coral
1. Cut the wire into several pieces different lengths. IN in this example their length varies from 10 to 40 cm. Bend each piece in half.
2. Heat the glue and carefully cover all the pieces of wire with it.
3. Select the color you want to paint the coral, in this case red. Use acrylic paint to paint the glue on the wires.
4. When the paint is dry, you can assemble all the parts into one coral. Take 2-3 pieces of wire with glue and connect them together using another thin, clean wire (not covered with glue).
Add 2 more parts to the structure and connect them again with clean wire.
In order for the coral to stand on a flat surface, all ends of the clean wires must be twisted and bent into the shape of a stand (see image).
Making white coral
1. Cut 3 pieces of wire, each between 30 and 35 cm long and twist their ends together
2. Bend all the wires the way you like and place them on a flat surface to which hot glue will not stick - glass, for example.
3. Cover all the wires with glue. After this, you can add additional branches of glue to your design.
4. Once you have the coral in the shape you want, let the glue dry and paint it with white acrylic paint.
5. To make the base for the craft, prepare a piece of plywood and attach the ends of the wires to it with nails.
6. Cover the ends with glue and paint with acrylic paint.
Snowflakes made from hot glue.
You will need:
Hot glue gun
Nail polish or acrylic paint
Parchment paper (NOT waxed (wax) paper)
A drawn snowflake shape (if desired).
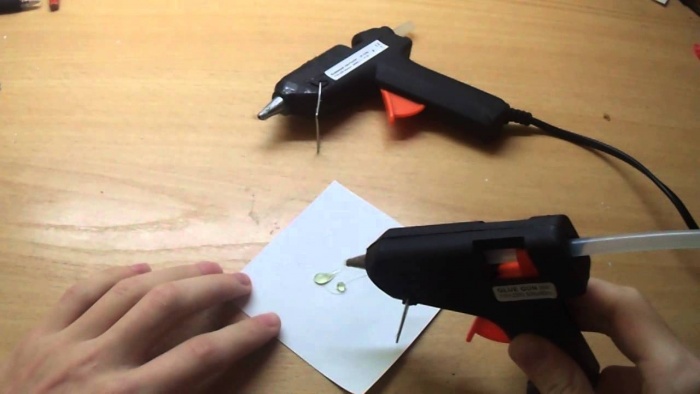
1. Print or draw a snowflake on a regular sheet of paper and place the design under parchment paper.
2. Using a glue gun and hot glue, trace the snowflake design. Wait a minute for the glue to dry.
If necessary, after the glue has dried, you can straighten the shape a little using a hairdryer.
3. Carefully remove the snowflake from the paper. The paper can be further used to create several more snowflakes.
4. Both sides of the glue snowflake can be painted with nail polish or acrylic paint.
Glass holder for candles.
You will need:
Small glass vase or glass
Hot glue gun
Aerosol or acrylic paint
Spray oil or simple vegetable oil.
It is advisable to choose a wide vase so that the heat from the candle inside does not heat the glue, which may leak.
1. Wash and dry the vase, then wipe it with vegetable oil and a paper napkin.
2. Start applying hot glue to reverse side the bottom of the vase, drawing patterns with it. The main thing is that all the lines are well intertwined so that it is easier to remove the glue from the vase.
Continue drawing patterns with glue on the sides of the vase.
It is advisable to wear glasses to protect your eyes, as the glue will heat the glass.
3. Once the glue has dried, carefully begin to separate the design from the vase. You may need to use a screwdriver, knife, or other tool to make it easier to separate the design from the glass vase.
4. Clean the vase from any remaining glue. Use dishwashing detergent.
5. Paint the glue design. If you are using spray paint, read the instructions carefully and act according to them.
Crafts for children: do-it-yourself printing
* First, cover the surface of the table with a special silicone board or silicone oilcloth.
Crafts for the home: making a vase from glue
Makeup brush cleaning board:
Good day!
I really love making things, doing things with my own hands! In order to make a topiary (tree of happiness) I needed a glue gun. I went to the Fix Price store to get it, since that’s where I saw it, bought glue sticks for it and went home to try working with it.
This is what it looks like in the package.

And on the reverse side.

As well as a set of glue sticks for the gun.

The gun also has a convenient stand, thanks to which it does not stain the table when used. Next in the photo is a glue gun in a “charged” state with a glue stick.

User manual:
Before connecting the gun to the network:
- Pull out the stand.
- Place the gun on the stand.
- Fill the gun with glue cartridges through the special hole.
The surfaces to be bonded should be connected immediately after applying the adhesive.
After finishing the work you should:
- Unplug the gun.
- Wait until the gun cools down.
- Store the pistol in a dry place out of reach of children.
Unused glue cartridges may remain in the gun after the job is completed.
After working with this glue gun I can highlight the following disadvantages and pros. Let's start with the positives.
Pros:
Very low cost;
Comfortable;
Small size;
Glues different surfaces well;
The glue hardens quickly.
Minuses:
Heating time - 5 minutes;
Unreliability (I’m very afraid that it may not last long);
Made from cheap materials;
After hardening, the glue becomes whitish, but I would like it to be transparent;
Quite a lot of glue consumption.
These disadvantages are, of course, conditional and they are more than compensated for by the cost of this product - only 39 rubles (and the same for 10 glue sticks)! For this price you simply cannot find anything better!
Similar articles
 Delicious dishes with sausages
 A glimpse of Bella. Romantic chronicle. A glimpse of genius. Messerer about Akhmadulina Boris Messerer glimpse of Bella romantic chronicle
 I dreamed that I was sailing on a boat on the river
 How to cook beef entrecote in a frying pan
 About the company Foreign language courses at Moscow State University
 Which city and why became the main one in Ancient Mesopotamia?
 Why Bukhsoft Online is better than a regular accounting program!
 Which year is a leap year and how to calculate it
 Prayer for lighting a lamp at home
 What was their strength and what was their weakness?