
How to give a subcutaneous injection in the shoulder. How to easily inject yourself
The result of therapy largely depends on the thoroughness of following the instructions of the attending physician. Many drugs are most effective and safe in the form of an injection, and therefore patients are forced to visit the treatment room in the clinic throughout the entire course of treatment. Which may be inconvenient due to poor health or a busy schedule.
The way out of this situation is to learn how to inject yourself. Having found out how to correctly inject yourself into the thigh intramuscularly, and having developed practical skills, you can follow the doctor’s instructions independently at any time. convenient time. Our article will help you with this. Let's figure it out
Preparation for the procedure
Preparing for the injection is an important part of the procedure. All necessary items must be in maximum accessibility, and all hygiene requirements must be strictly observed.
Before injecting yourself in the thigh, you need to prepare:
- a bottle of antiseptic or disposable wipes soaked in an alcohol solution;
- cotton wool or cotton pads;
- sterile syringe;
- file for opening the ampoule;
- ampoules with the drug.
The injection solution must be room temperature. Therefore, if the drug was stored in the refrigerator, the ampoule needs to be warmed up by holding it in your hand.
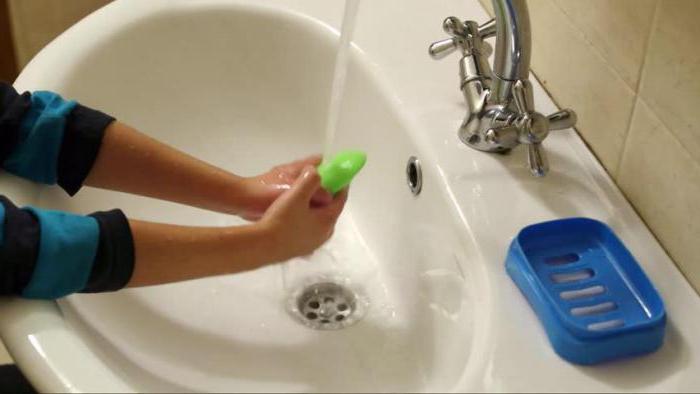
The last stage of preparation is washing your hands with soap, and then subsequent treatment with an antiseptic. The most effective solution is an alcohol solution that kills almost all known bacteria. But you can also use a water-based hand spray.
Preparing the syringe
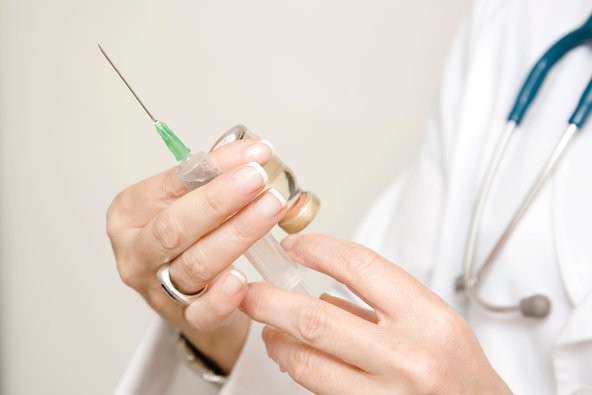
After treating your hands, you need to take a file and make cuts on the narrowest part of the ampoule or on a special mark. After this, the ampoule is wrapped in cotton wool and the glass is broken with a sharp movement.
The package with the syringe is torn, the protective cap is removed from the needle, and the drug is drawn into the syringe. Then the protective cap is put on the needle, and air is released from the syringe cavity. It is necessary to put on the cap so as not to splash the medicine around the room.
An important point is the choice of syringe. Regardless of the volume of injected liquid, the volume of the syringe should not be less than 5 ml. The fact is that its size correlates with the length of the game. Therefore, 2 ml syringes are only suitable for subcutaneous injection.
Dilution of the drug
Some medications require prior dilution. The manufacturer can produce the medicine in the form of two ampoules: one will contain the drug in the form of a tablet or powder, the other will contain a liquid for diluting the medicine. In this case, it is necessary to prepare the drug as follows:
- file and break both ampoules;
- draw the dilution solution into the syringe;
- fill the ampoule with the medicine with the solution;
- After the powder or tablet has dissolved, fill the syringe with the medicine.
In a similar way, the drug solution is mixed with an anesthetic, which eliminates pain before and after the injection. But in this case, it is important to take into account the risk of an allergic reaction to the anesthetic component.
After this, you can start injecting, but before that you need to figure out how to properly inject yourself in the thigh.
Where to give the injection
An intramuscular injection is most often performed in the gluteal region. To do this, the buttock is visually divided into four equal parts, and the injection is placed in the upper outer corner. This method is used in any medical institution where manipulations are not performed by patients independently.
When we're talking about To inject yourself, it is better to inject into the thigh. This method is convenient because a person injects himself in the most comfortable position and gets the opportunity to control the progress of the process, for example, the angle of insertion of the needle into the body. All that remains is to find out.
Technique
After preparatory stage finished and the medicine is drawn into the syringe, you need to decide on the point where to put the injection. It is possible to make an intramuscular injection into the thigh on the outside of the leg, into the vastus lateralis muscle, which is located along the entire length of the side of the leg to the kneecap.

The needle is inserted with a confident, quick movement strictly at a right angle to the surface of the leg. It needs to be inserted completely to ¾ of the length and only then the drug should be injected slowly. Recommendations for the rate of drug administration are usually indicated in the instructions for the drug. A good indicator that the drug was administered too quickly is if the person feels worse, such as feeling weak or dizzy.
After emptying the syringe, you must pull out the needle in one motion, while simultaneously pressing the injection site with a cotton swab soaked in alcohol or other antiseptic solution.
Injection pain
Even if a person knows well, he may encounter pain. And the measures that need to be taken to combat pain depend on the cause of its occurrence:
- It is recommended to use imported syringes that have thinner needles. An injection with such a syringe will be almost imperceptible.
- Injections with some drugs are quite painful no matter how well the technique is used. In this case, you can dilute the drug with a solution of Lidocaine, but it is important to remember that anesthetics can cause an acute allergic reaction, so it is not advisable to use them at home.
- Often pain occurs due to the wrong angle of insertion or removal of the needle from the body. In both cases, the angle should be exactly 90 degrees.
- Immediately after the injection, it is recommended to press a cotton swab or alcohol-soaked napkin tightly to the injection site. After the bleeding stops, you need to gently massage the thigh, which will improve the absorption of the medicine into the bloodstream.
- Often pain occurs towards the end of the course of treatment, when injections are repeatedly placed in the same place. To avoid this, you need to alternate the injection site, and if hematomas appear, use means to get rid of them. For example, heparin ointment.

Therefore, before injecting yourself in the thigh, you need to carefully read the instructions for the drug and once again remember the basic rules for injecting yourself.
Fear of injections
The main problem that people face before injecting themselves in the thigh is the psychological discomfort of inserting a needle into their body. This entails the following problems:
- if a person cannot relax, he muscular system tense, it will be more difficult to insert the needle, most likely the person will experience pain;
- with strong tension and fear, it will be difficult for a person to coordinate his actions enough to insert the needle at the most correct (straight) angle.

There is only one way to get rid of the fear of injecting yourself in the thigh: try to relax the muscle into which the injection is being made as much as possible and insert the needle with a confident movement. After the first successful experience, anxiety before the procedure will noticeably decrease, and next time there will be no fear of an injection.
Injection position
To ensure that the muscle is relaxed and the injection does not cause pain, you need to take a comfortable position for the injection. The most comfortable positions for giving an injection into the thigh muscle are sitting and standing.
While standing, you need to shift your weight to the other leg so that the thigh muscles into which the injection is made are relaxed. You should do the same when giving yourself an injection while sitting.
Common Mistakes
Despite the fact that the instructions on how to inject yourself in the thigh are extremely simple and clear, people often make the same mistakes, not paying attention to the recommendations and instructions.
- It is strictly forbidden to use the same needle several times or touch its surface until it is inserted into the body.
- You should alternate the injection site to avoid hematomas.
- When working with a new drug that has not been used before, it is better to give the first injection of the course in the treatment room. In the event that intolerance to the components of the drug occurs, the medical professional will be able to quickly take necessary actions. In practice, this happens extremely rarely, but the seriousness of such a situation should not be underestimated.
- You cannot spontaneously change drugs to analogues, vary the dosage or degree of dilution of the drug. Any changes to the doctor’s initial recommendations can only be made by the doctor himself during a face-to-face consultation.
In conclusion, it should be said about the disposal of the syringe and ampoule after the injection. A protective cap should be put on the needle, and the broken ampoule should be wrapped in paper, such as syringe packaging. This way you can protect yourself and other people from the risk of injury from glass or the point of a medical needle.

Thus, knowing the injection technology, having studied the instructions, useful tips and a photo (now you understand how to inject yourself in the thigh), it is quite possible to independently carry out the doctor’s instructions in a comfortable environment: at home, without long waits in line at the treatment room and adjusting your schedule to the nurse’s work hours.
Subcutaneous injections perform therapeutic and preventive functions and are carried out according to the indications and prescription of a doctor.
A subcutaneous injection is performed deeper than an intradermal injection; the penetration depth here is fifteen millimeters.
The area under the skin was chosen for injection due to the good blood supply to the subcutaneous tissue, which facilitates rapid absorption of drugs. The maximum effect of the drug, which was administered subcutaneously, occurs within half an hour.
Figure: Subcutaneous injection: needle position.
Injections for subcutaneous injection should be made in the places marked in the figure, these are the subscapular region of the back, the upper third of the outer surface of the shoulder, thigh and side of the abdominal wall. 
Figure: Subcutaneous injection area
To make an injection, you should prepare materials and equipment. You will need a clean towel, soap, mask, gloves and a skin antiseptic, which can be used as AHD-200 Spezial or Lizanin.
In addition, you must not forget about the ampoule with the prescribed medication and a nail file for opening it, a sterile tray and a tray for waste material, cotton balls and 70% alcohol. You will need an Anti-HIV first aid kit and a couple of containers with disinfectant solutions. This can be a 3% and 5% chloramine solution.
For injection, you will also need a disposable syringe with a capacity of two to five milliliters with a current needle, with a diameter of no more than half a millimeter and a length of sixteen millimeters.
Before carrying out the manipulation, you should make sure that the patient knows about the purpose of the upcoming procedure and agrees to it.
Once you are sure of this, perform hand hygiene, select and help the patient take the required position.
Be sure to check the tightness of the syringe packaging and its expiration date. Only after this the package is opened, the syringe is collected and placed in a sterile patch.
Then they check the compliance of the drug with its intended purpose, its expiration date, dosage and physical properties.
Next, take two cotton balls with sterile tweezers, moisten them in alcohol and process the ampoule. Only after this the ampoule is opened and the prescribed amount of the drug is drawn into the syringe. Then the air is released from the syringe and the syringe is placed in a sterile patch.
After this, use sterile tweezers to place three more cotton balls soaked in alcohol.
Now you can put on gloves and treat them with a ball in 70% alcohol, after which the ball should be thrown into the waste tray.
Now we process the ball large area skin at the injection site using spiral or reciprocating movements. The second ball is used to directly treat the injection site. The balls are dropped into the tray and then we make sure that the alcohol has already dried.
With your left hand, at the injection site, the skin is folded into something in the shape of a triangle.
The needle is placed under the skin at the base of this skin triangle at an angle of 45° to the surface of the skin and penetrates to a depth of fifteen millimeters, the cannula is supported at this time index finger.
Then the hand fixing the fold is transferred to the piston and the drug is slowly introduced. Do not transfer the syringe from one hand to another.
Next, the needle is removed, while it must be held by the cannula, and the puncture site is held with a sterile cotton swab soaked in alcohol. The needle is placed in a special container, however, when using a disposable syringe, the needle and cannula of the syringe break. Next you should remove your gloves.

Figure: Performing a subcutaneous injection
There are special rules for the introduction of oil solutions. They are administered only subcutaneously, since their intravenous administration is prohibited.
The fact is that drops of an oil solution clog blood vessels, which is fraught with necrosis, oil emboli in the lungs, suffocation and death. Poor absorption of oil solutions can lead to the development of infiltration at the injection site. Before administration, oil solutions are heated to a temperature of 380C. Before administering the drug, you need to pull the plunger towards yourself and make sure that the needle does not enter a blood vessel, that is, blood should not be absorbed. Only after this procedure is the injection slowly introduced. After the procedure, a warm compress or heating pad is applied to the injection site to prevent infiltration.
A note must be made about the injection performed.
Subcutaneous injection
Subcutaneous injection is performed to a depth of 15 mm. Maximum effect from subcutaneously administered medicinal product is achieved on average 30 minutes after injection.
The most convenient areas for subcutaneous administration of medicinal substances are the upper third of the outer surface of the shoulder, the subscapular space, the anterior lateral surface thighs, lateral surface of the abdominal wall. In these areas, the skin is easily caught in a fold,
therefore there is no danger of damage to blood vessels and nerves.
Do not inject medications into areas with swollen subcutaneous fat or into lumps from poorly absorbed previous injections.
Necessary equipment: sterile tray for a syringe, disposable syringe, ampoule with a drug solution, 70% alcohol solution, pack with sterile material (cotton balls, swabs), sterile tweezers, tray for used syringes, sterile mask, gloves, anti-shock kit, container with a disinfectant solution.

Rice. U-b. Subcutaneous injection technique: a -~ formation of a cutaneous patch and injecting a syringe needle into its base; b- administration of the drug.
Procedure to complete:
1. Invite the patient to take a comfortable position and free the injection site from clothing (if necessary, help the patient with this).
2. Wash your hands thoroughly with soap and warm running water; Without wiping with a towel, so as not to disturb the relative sterility, wipe your hands well with alcohol; put on sterile gloves and also treat them with a sterile cotton ball soaked in a 70% alcohol solution.
3. Prepare a syringe with medication (see section “Preparing a syringe with medication for injection” above).
4. Treat the injection site with two sterile cotton balls soaked in a 70% alcohol solution, widely, in one direction: first a large area, then with the second ball directly at the injection site.
5. Remove any remaining air bubbles from the syringe, take the syringe into right hand, holding the needle sleeve with your index finger, and the cylinder with your thumb and other fingers.
6. Form a fold of skin at the injection site by grasping the skin with the thumb and forefinger of your left hand so that a triangle is formed (Fig. 11-6, A).
7. Insert the needle with a quick movement at an angle of 30-45°, cut upward, into the base of the fold to a depth of 15 mm; in this case, you need to hold the needle coupling with your index finger (Fig. 11-6, a).
8. Release the fold; make sure that the needle does not fall into the vessel, to do this, pull the plunger slightly towards you (there should be no blood in the syringe); If there is blood in the syringe, the needle should be inserted again.
9. Left hand transfer to the piston and, pressing on it, slowly introduce the medicinal substance (Fig. 11-6, b).
10. Press the injection site with a sterile cotton ball soaked in a 70% alcohol solution and quickly remove the needle.
11. Place the used syringe and needles in the tray; Place used cotton balls in a container with a disinfectant solution.
Demchenko Alina Gennadievna
Reading time: 4 minutes
For some women, the thought of daily injections during IVF is not only unpleasant, but also difficult. Many clinics recommend arriving every day at a certain time for the procedure, but this is not always convenient. Therefore, a nurse or doctor carefully advises patients how to give an injection in the stomach or buttock during IVF.
Details about the procedure
A subcutaneous injection is a shot given into a fatty area under the skin (as opposed to an intravenous injection, which is injected directly into the bloodstream). An injection into the abdominal area is mainly prescribed to patients undergoing an IVF protocol and undergoing hormonal medications.
Prescriptions for drugs are usually accompanied by detailed instructions for proper use.
Injections in the stomach during IVF
For any protocol (long, short), medications are prescribed.
- With slight tension, immerse the needle completely into the skin. Typically, it should be inserted at a 90-degree angle (straight, up and down) to inject the medication into the fatty tissue. Act quickly and confidently so as not to be nervous. Tension can cause the needle to not go in or slowly pierce the skin, causing increased pain. Apply even pressure to the plunger until the medication is completely injected. Use one controlled, steady movement.
Part medicines injected into the subcutaneous fat tissue by injection. This method is used to quickly dissolve the substance, knowing the mechanism of its specific action in the body. The method is called "subcutaneous injections". Knowing the technique, it is not difficult to give an injection.
Necessary materials, tools
Let's consider the algorithm for preparing for manipulation.
1. We clarify the patient’s tolerance to medications, presence in the past allergic reactions. We reassure him with a friendly tone of conversation.
2. Please confirm your consent to the injection.
3. Let's perform simple preliminary steps:
We take into account the location of the procedure:
A) Medical institution. We use a special table;
B) At home. Spread a light cloth ironed for disinfection or gauze folded in two to four layers on the surface of the table.
4. Let’s place here everything we need to give the injection:
A sterile tray or one treated with a disinfectant solution (you can use a clean plate, doused with boiling water and dried);
Disposable sterile syringe 2, less often - 5 ml and an additional needle in a separate package;
Cotton swabs or cotton wool;
Ampoule or bottle with the drug;
File - ampoule opener;
Disinfectant solution, such as alcohol;
Towel;
Pharmacy rubber gloves;
. Container for recycling waste material.
Important: The expiration date, integrity of the packaging of instruments and medications, and compliance of the latter with the doctor’s prescription should be carefully checked.
Hand treatment
Not only sterile equipment, but also hand disinfection helps prevent infection during the procedure. The hand processing algorithm is as follows:
1. Wash with soap;
2. Dry thoroughly with a clean towel;
3. We put on thin rubber gloves (if we are not injecting ourselves);
4. We wipe our hands or gloves with a cotton ball moistened with a disinfectant solution;
5. Wait until they dry.
Important: All actions related to injections are performed with the greatest possible sterility. Compliance with the hand treatment algorithm is mandatory at each stage of the procedure.
Medicine set
The rules provide the following algorithm:
A) Working with the ampoule. Sequence, technique.
1. Partially remove the syringe from the package from the piston side, put a needle on it and leave it assembled in the package;
2. Shake the ampoule so that some of the contents do not remain at the top;
3. Visually check by color, absence of impurities, sediment: the medicine is suitable for use;
4. Treat the opening area with alcohol;
5. Slightly file it if there is no notch or point on the neck;
6. Break the ampoule with a sharp movement;
7. Take out the syringe, remove the cap;
8. Insert the needle into the ampoule, draw the contents into the cavity of the syringe by moving the piston towards you;
9. Carefully remove the needle by grasping the cannula and holding the syringe vertically with the piston down;
10. Put on another needle, release air bubbles by lightly pressing the piston;
The cap must be on the needle before the injection is performed.
B) Medicine in a bottle, operation algorithm.
1. Bend down the center of the cap with scissors;
2. Prepare the syringe assembled according to the algorithm;
3. Open the ampoule with injection solution using the method described above;
4. Disinfect the rubber stopper;
5. Draw the solution into the syringe according to the algorithm;
6. Introduce the solvent carefully inside the bottle, piercing the stopper;
7. Holding the cannula, disconnect the syringe from the needle;
8. Shake to dissolve the powdery contents;
9. Insert the syringe into the needle, draw out the dissolved medicine;
10. Replace the needle;
11. Remove air in the same way as method “a”.
Important: Needles intended for subcutaneous injection should not come into contact with anything other than the medicinal solution.
Place of injection
The human body has unequal innervation and distribution of fatty tissue. Subcutaneous injections are made where the likelihood of finding a vessel or injury to the nerve trunk is excluded, and the subcutaneous fat layer is well developed.
Areas of preferential administration of drugs subcutaneously:
1. Abdominal area.
2. Hip area.
3. The area under the shoulder blade.
4. Shoulder area.
Let's take a look and make a choice.
The patient himself will not be able to give an injection with subcutaneous injections under the shoulder blade. The options remain: in the thigh, shoulder, stomach.
Important: Compliance correct technique The procedure guarantees painless administration, good absorption of the drug, and the absence of complications.
Carrying out the procedure
Let's look at the technique of performing a subcutaneous injection using the example of an injection in the shoulder.
It is advisable for the patient to take a stable position and relax. To do this, we invite him to sit or lie down. The manipulation algorithm is as follows.
We treat the middle third of the shoulder closer to the top with a disinfectant solution;
We gather the skin with our fingers into a fold at the site where the needle is supposed to be inserted, forming a triangle;
We insert the needle under the skin triangle with a quick movement. The angle of inclination and depth of insertion depend on the length of the needle.
The needle can be inserted from above or below, the main thing is to do it correctly, the medicine should be distributed in the subcutaneous fat.
We check by carefully moving the piston towards ourselves to see if blood appears, which indicates that it has entered the vessel. Once we are convinced of the opposite, we inject the contents of the syringe under the skin of the shoulder. Let's do it slowly.
Applying a cotton ball soaked in disinfectant solution to the puncture site, carefully remove the needle.
Press down on the injection site and rub it lightly with a ball.
We are interested in the patient’s well-being. The injection is done. Preliminary study of the instructions on how to give the injection and following the instructions will ensure the success of the procedure.
Important: Stay calm at all stages and complete the task easily.
Related articles
 The best amulets against the evil eye and damage Amulet against the evil eye with hands for children
 How to read the Psalter correctly
 Delicious dishes with sausages
 A glimpse of Bella. Romantic chronicle. A glimpse of genius. Messerer about Akhmadulina Boris Messerer glimpse of Bella romantic chronicle
 I dreamed that I was sailing on a boat on the river
 How to cook beef entrecote in a frying pan
 About the company Foreign language courses at Moscow State University
 Which city and why became the main one in Ancient Mesopotamia?
 Why Bukhsoft Online is better than a regular accounting program!
 Which year is a leap year and how to calculate it