
Learning to determine direction using a compass. Choosing a compass for hunting: overview of varieties and best models
Innovative technologies have long stepped beyond the boundaries of the human mind: the brain is replaced by a microprocessor, the map is replaced by navigation devices. However, a significant drawback of multimedia devices is the lack of autonomous “life”.
Ultimately, the battery will run out, and the unfortunate traveler will find himself in a stalemate. “Grandfather’s” equipment in the form of just a compass and a notepad should become an integral part of tourist equipment.
- Magnetic compass. The principle of operation of the compass is based on the interaction of the magnetic field of the device with magnetic field land. Freely rotating arrow, located along the lines force field, pointing to the north pole. The device is characterized by low cost, compact size, and ease of use. Among the disadvantages, the sensitivity of the device to anomalies in magnetic fields should be highlighted.
- Gyro-compass. Mechanical true meridian direction indicator globe. Scope of activity: determining the course of water vessels, plotting the azimuth of the oriented direction. The operating principle is based on the properties of a gyroscope (rotation of the globe around its axis). At the moment of crossing the equator, the guide arrow begins to rotate chaotically around its own axis. Advantages: indication of the true direction, lack of sensitivity to changes in magnetic fields.
- Electronic compass. The operating principle of the device is based on microprocessor calculation using a GPS beacon. Coordinates and routes are built automatically based on satellite readings. The compass is widely popular among professional travelers. A modern device combines the functions of a multimedia platform, including watching movies. A significant drawback is the limited working hours, the lack of sockets becomes a problem.

Checking your navigation device for functionality is an integral part of preparing for a trip to the forest. A broken compass will only worsen the situation in the end; in forest conditions, a fatal mistake can cost your life.
- The compass is placed on a hard, stable surface.
- At the moment the guide arrow comes to a complete stop, it is necessary to bring a metal object (fork, knife). The arrow begins to rotate chaotically around its own axis.
- If the arrow returns to its original position, then the device is considered working. In case of deviations from the starting point, it is recommended to replace the compass.

If you have no experience working with a compass, it is recommended to conduct training in a well-familiar area. To consolidate skills in game form the object is searched by coordinates.
- Before entering the forest, you should tie the starting point to a wide coordinate location ( locality, highway, railway line). The corresponding notes are made in the travel notebook.
- From a given starting point, the traveler moves away 30-50 meters, turning to face it. Conventionally, an invisible perpendicular is drawn on the ground.
- The compass is placed on a hard, static surface. After the arrows reach equilibrium, the device begins to slowly rotate in the horizontal plane until the north-south guide beams coincide.
- Using a pencil/marker, draw a line through the center of the device towards the starting point. The resulting coordinates at the end of the line are recorded in a notepad. The received data is deciphered as follows: direction to coordinate plane– the road home, the beginning of the beam – the travel route.
- The route home is constructed by combining the drawn line and the arrow of the poles. The north direction of the arrow should coincide with the coordinate arrow.

Any deviations of the magnetic needle must be noted. If coordinates are available, the road home will turn into fun game search for objects.
Experts recommend building a driving route along noticeable objects: power lines, a cleared clearing, a country road. Large objects should be noted in a travel notebook, schematically constructing a kind of map of the area (local route).
Magnetic anomalous zones it is necessary to go around the side, marks should be made on the terrain in the form of broken sticks, notches on trees. Getting into a specific location promises big problems.
The compass is a unique invention of mankind. A simple navigation device will be an excellent assistant when going for mushrooms or hunting in forest areas.
Progress has provided us with all kinds of navigators that, via satellite, accurately determine their location and instantly plot the optimal route. However, they have a serious drawback, which can be fatal during a long stay in nature: they all need periodic recharging. The reliability of the compass is based on its simplicity. It consists of a circular scale (dial) and a magnetic needle with two ends, one of which (usually it is colored blue) indicates north magnetic pole. Compared to electronic devices, the compass has a number of advantages:
- does not require nutrition;
- works in any weather;
- does not get knocked down when dropped;
- not afraid of water;
- weighs very little;
- takes up minimal space.
The only thing that can affect its operation is the presence of nearby large quantity iron and live wires: deposits iron ore, rail roads, high-voltage power lines.
Attention! You should not store the compass next to things such as an axe, saw, knife, batteries, or other compasses: it will demagnetize.
Self-orientation using a compass: detailed instructions
The key concept for orienting with a compass is azimuth. This is the angle between the direction north and the direction of your chosen object. It is determined by the markings of the dial and is measured in degrees. When using a compass, you need to remember two important points:
- the arrow must rotate completely freely, and for this the device must be positioned strictly horizontally;
- The pointer is equipped with a brake (lock), and if it stands still when the device rotates, you need to release the brake.

It is worth thinking about a safe return from the forest even before entering it. The procedure should be as follows.
- Find a large, preferably extended object nearby. This could be a road, a river, a settlement. You will be heading towards this object on your return.
- Determine the azimuth of the selected landmark. To do this, stand facing it, release the brake and, placing the compass horizontally, wait until the arrow stops.
- Align the tip of the arrow with the letter “N” (or “C”) on the dial. To do this, carefully rotate the device around its axis. At the same time, remain motionless.
- Now mentally or using a stick, draw a line from the center of the arrow to the landmark. Notice the number on the dial through which the imaginary line passed. This is the return azimuth. You need to remember it, or better yet, write it down or mark it on a map. When the time comes to leave the forest, the compass will need to be held in your hand in exactly the same position and moved in accordance with the azimuth.
Attention! When walking through the forest, you will not walk in a straight line, so you are unlikely to come out to the very boulder or tree from which you started your journey. You will find yourself 100-200 m away from it. Therefore, the longer the initial landmark, the calmer it will be for a beginner in the forest.
What to do if you need to get an exact route
To plot an accurate route, it is better to purchase a compass with a sighting device, and also stock up on a pencil, a map of the area, or at least a notepad. Such measures will come in handy during a multi-day hike, especially if there are children on the team.
At the starting point, we determine the azimuth to a noticeable object: a particularly tall pine tree, a rock, a fallen tree. Mark it on the map or write it in a notepad. We move along this azimuth to the landmark. We select the next object, again determine and record the azimuth, and so on throughout the entire route.
To simplify reverse movement Each time we write down not only the value of the azimuth we have determined, but also the number opposite to it on the compass dial. When returning, we are guided by these opposite numbers.
What to do if the compass does break?
Don’t panic, because it’s easy to make a compass yourself from scrap materials. You will need a sewing needle, which is always in the tourist’s arsenal, the bottom plastic bottle, a piece of tree bark or cork (about 3x3 cm in size) and a battery or magnet.

We cut a groove for a needle in a piece of cork. We magnetize the needle itself in one of two ways:
- apply it to the magnet, and then demagnetize the other end by lightly heating it with a match;
- we take it with insulated wire and apply it to the poles of the battery; in this case, the tip that touched the negative pole will point north.
We place the needle in the groove, and the cork with the needle in the water in a plastic bowl. The improvised arrow will spin on the water and, stopping, point to the north.
When planning a serious trip to the forests or just, watch the video instructions for using the compass and remember: this device will never let you down.
How to use a compass: video
46 30 571 0
Nowadays, technological progress has gone far ahead, providing a person with all kinds of navigation devices that can help get out of almost any wilderness, even in distant Africa, eliminating the slightest possibility of getting lost. But all these devices have a significant drawback, which prevents the classical methods of spatial orientation from being left in the past forever, namely, they all require constant recharging or, at a minimum, changing batteries, which is quite problematic to do far from civilization. At the same time, a simple compass can completely replace all modern devices, since it does not need to be charged, it is relatively inexpensive, weighs little and takes up little space in your bag. The only caveat is the ability to use it, although here you don’t need much knowledge.
Compass structure
A compass is a device that facilitates orientation on the ground.
Researchers claim that the first compass was invented in China, and it helped to find the right direction when moving in the desert. In Europe, this device appeared in the 12th-13th centuries, but the basics of its structure have remained virtually unchanged to this day.
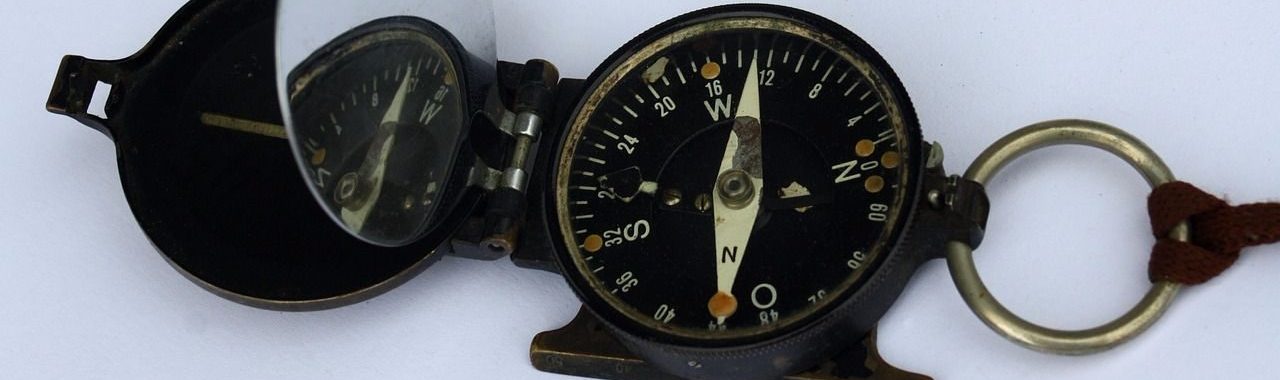
The most famous and easiest to use is the so-called Adrianov’s compass, consisting of a body and a needle in the center on which the arrow is attached. If the device works correctly, then the arrow (often colored blue) shows the direction exactly to the North. The structure of the compass also includes a brake, which holds the needle to avoid malfunctions, and a dial - a kind of scale that consists of internal and external digitization. Internal digitization contains divisions 0-360º, placed clockwise. The external one is placed counterclockwise and has 10 indicators.
Types of compasses
There are three sufficiently developed in the world different types compass:
- Magnetic;
- Electronic;
- Gyro-compass
The essence of the work magnetic compass consists in the relationship of the magnetic field of the compass itself with the magnetic field of the Earth, since the compass needle, which moves in a circle, can be placed on the power indicators of this field. In this regard, it constantly shows its orientation to the North.
Adrianov's compass is a striking example of a magnetic compass.
Gyrocompass – a mechanism that can also help find the correct course of movement across the terrain. The main difference between a gyrocompass and a magnetic one is the orientation of this device to the geographic North Pole, not magnetic.
Job electronic compass carried out by receiving signals from a satellite, which transmits the exact coordinates of the direction of movement of the object.
Checking the functionality of the device
Before leaving home, heading to an unknown area, you need to test the compass for functionality, since with a faulty device you may not only get lost, but also not find your way back.
To check if your compass is working correctly, there is no need to look for any specialist.
It can be checked quite easily at home.
To do this you need:
- Place the device horizontally on any surface and wait for the arrow to finally stop.

- Find something metallic, bring it closer to the compass and wait until the needle begins to move.
- Then very quickly pick up this item and, if the arrow has returned to its original place, the compass works correctly and can be safely used for orientation on the ground.
Using a compass in practice
How to use a compass while, for example, in the forest?
The first step is to make the so-called “binding” to the location.
In other words, identify a landmark - a certain object or area to which you will need to return.
It is desirable that the landmark be something fairly extended, such as a clearing, river, road or power line. Thanks to such a landmark, it is unlikely that you will miss the right place when returning.
Having chosen a landmark, experts recommend moving away from it, adhering to right angle(perpendicular) in any chosen direction.  So, having moved a little in the required direction, we stand facing the chosen landmark. We place the compass on the palm in the most horizontal position, release the arrow from the brake and turn it until it is positioned exactly on the North (N) indicator. Next, in our thoughts, we draw a line of the chosen path in the center of the compass - this is the line of return. Now we look at the scale, which is divided into degrees - this is the compass dial. The zero indicator corresponds to the contour pointing to the North. It is from this point that the degrees are counted in a clockwise direction. We remember what degree our mental line crosses. This is the cusp point - azimuth.
Azimuth is the angle between the line indicating the north direction and the direction towards the landmark we have chosen.
Then we mark the number located on the opposite edge of the compass and through which the represented line passes - this is the direction of our movement, which we should focus on when going deeper into the thicket. Be sure to remember or write down the meaning of both numbers and only then begin to go deeper into the forest.
When returning back you must:
- Again you need to put the compass in a horizontal position.
- We place the compass in such a way that our imaginary return line passes through the middle of the device and shows the direction forward.
- Gradually turn the compass until the needle points to zero.
- Now the goal has been achieved - we look towards the direction in which we should move in order to return to our landmark.

For some reason, society believes that fishermen, mushroom pickers, berry pickers and just amateurs long journeys only men become. What kind of inequality is this!? Are we ladies somehow worse or weaker? Or we don’t want to escape from all these pots and pans for at least a couple of days, washing machines and irons, and mother-in-law moralizing? That’s it, it’s decided, we’ll go camping on our next vacation. You just need to remember how to use a compass correctly, or learn it again, and off you go. Well, let's get to it!
Why do you need a compass, and what does it consist of?
Of course, in order not to get lost on a hike, we were told about this at school. If anyone has forgotten, our magnetic guide consists of a flask, a red and blue magnetic needle put on a pin and a brake - a lever that fixes the needle. The top of the flask is covered with glass, and along the very edge of the circle of the top wall of the flask there are numbers indicating the degree of deviation. It is also called azimuth.
The Russian letter “S”, or the English “n”, or the number zero on the compass, where the blue arrow points - this is north. And the place with the Russian letter “Yu”, the English “z”, or the number 180, where the red compass arrow points, is south. Accordingly, a line drawn perpendicularly will point west on the left and east on the right. That's the whole trick regarding the composition and direction of the compass arrows, now let's move on to the practical lesson, that is, to orienteering.
How to learn to use a compass correctly?
First of all, while still at home, you should check the compass for functionality. It's done like this. Place the device on a flat surface, wait until its hands stop oscillating, and note the fixation number. Then bring something metal to the side wall of the bulb to set the arrows in motion again. As soon as this happens, quickly remove the iron object and wait until the hands lock again. If the number pointed to by the arrows in both the first and second cases is the same, then you can go on a hike. If there is even the slightest discrepancy between the first and second fixation of the arrows, go to the store for a new compass.
Let's assume that our compass is working, and we go to a familiar forest park or grove. You should not choose an unfamiliar area for your first training, so as not to be disappointed and give up everything without starting. After all, you don’t want to get lost and live with a persistent aversion to hiking for the rest of your life?
So first of all, as they say experienced travelers, we need to “link” to the starting point. And this point should be very extensive and recognizable. For example, a freeway big river, power line, long clearing. This way you can always easily return back, even if you deviate slightly from the original route.
Let's assume that the selected anchor point is a highway. Move slightly, a few steps away from it in the direction you planned to go, and turn to face the highway. Moreover, stand so that the desired path and the highway are approximately perpendicular to each other. Now slowly turn the device until the direction of the compass needles coincides with the north-south direction. Attention, the compass should be held strictly horizontally so that the arrows do not cling to the bottom or glass of the bulb. To be sure, you can put it on a stump or directly on the ground.
Next, take a ruler, or a pencil, or a straight stick lying around and draw a straight line through the center of the compass in the direction of your return, that is, towards the highway, and remember the number that the end of the stick or ruler points to. This will be the direction in which you return home. And the number that the end of the stick opposite to the return one points to will be the route you follow  stick, going deeper into the forest. Don’t forget, the countdown starts from zero or the letter “c” clockwise. And where the red compass needle points is south and the number 180.
After walking through the forest and going back, take the compass so that the line drawn through the center of the device and the return number points straight ahead. Imagine that this direction starts from the center of your body, and hits the distance with an endless straight beam. Once you have found this position, slowly rotate around your axis until the blue arrow points to the number 0 or the letter “c”. As soon as this happens, know that you are facing the direction you need to go.
That’s all the wisdom on how to learn how to use a compass correctly, good luck to you and good impressions from your hike.
You can survive in the wilderness without a compass, but it’s very difficult. To avoid getting lost and lost, topographic map And a reliable compass is not enough - you also need to know how to use them. Anyone can learn to navigate with a compass, and this article will help.
How to use a compass - compass marks
Each compass has its own look and design, but they are all designed on the same principle. Each compass has a magnetic needle pointing to the poles of the planet. Let's look at what parts a compass consists of:
- A transparent plastic plate on which the compass is placed.
- An arrow that indicates direction.
- A transparent ring on which the compass (magnetic needle) is attached.
- A rotating arc around a compass.
- An arrow that rotates inside the compass.
- A non-magnetized arrow that indicates direction.
- Reference lines.
How to use a compass - how to hold it
The compass must be placed on the palm of your hand and brought to your chest. This is the correct position of the compass during any travel. If you just need to consult a map, place it on a flat surface and place a compass on top. This way you can navigate the terrain as accurately as possible.


How to use a compass - identifying directions
This is a quick and easy way to navigate the area. Look at the magnetic needle. Let's say you're going north.
- Rotate the division scale. This is done until the magnetic needle overlaps the direction arrow. Both arrows should point north. After this, determine the direction of your movement. You can do this by looking at the direction of movement arrow.
- Look where the graduation scale intersects with the direction of the movement arrow. Look at the graduation scale for precise definition its direction. If the intersection occurs near number 20, then you are moving 20 degrees northeast.


How to Use a Compass - Difference Between Magnetic/Geographic North Poles
Even taking into account the fact that they are both “Northern”, you will remember the difference very quickly, since it is very important for correct use compass.
The difference in readings may not be significant, but a difference of 1 degree will mean a deviation from a certain target of 100 meters with every kilometer. What happens if you need to walk 10 or even 20 kilometers? It is simply necessary to take into account the difference.


How to use a compass - calculate your direction
When moving through open areas or forests, you need to periodically determine your direction. Rotate the compass so that the direction arrow matches your direction (where you are going). The magnetic needle will coincide only if you are moving north.


How to Use a Compass - Keep Moving
Hold the compass correctly. Turn with it so that the magnetic arrow on the division panel points to the north. Move in the direction the direction arrow points to. You can check the compass all the way, just be careful not to move the division panel.


How to use a compass - use landmarks
When you follow the direction indicated by the arrow, select a landmark (post, stone or tree). Do not select objects that are too distant (mountain) - they will not allow you to navigate with the necessary accuracy. Having reached one landmark, look at the compass and choose the next one.

How to use a compass - transfer the course to the map
Place the map on a horizontal surface and place the compass on top. The direction line should point north. Now position the compass so that it passes through your position and the arrow points north. Draw a line along the compass that passes through your position on the map. Stick to this direction.

In order to quickly and correctly navigate unfamiliar terrain, be able to choose the shortest path and know your location, you need to regularly practice with a compass and map, train your powers of observation and visual memory. A compass is a tourist’s most reliable companion, provided that they know how to use it. In order not to find yourself in an absurd situation when you have a compass, but you are lost and don’t know where to go, study our article now, sitting with a cup of tea at your computer.
Related articles
 The best amulets against the evil eye and damage Amulet against the evil eye with hands for children
 How to read the Psalter correctly
 Delicious dishes with sausages
 A glimpse of Bella. Romantic chronicle. A glimpse of genius. Messerer about Akhmadulina Boris Messerer glimpse of Bella romantic chronicle
 I dreamed that I was sailing on a boat on the river
 How to cook beef entrecote in a frying pan
 About the company Foreign language courses at Moscow State University
 Which city and why became the main one in Ancient Mesopotamia?
 Why Bukhsoft Online is better than a regular accounting program!
 Which year is a leap year and how to calculate it