
Drill chucks for drills - dimensions. Keyless chuck Keyless chuck or key chuck which is better
Quick-release chuck for rotary hammers – a revolution in power tool equipment
In 1980, BOSCH introduced the new SDS quick-change chuck concept to power tool manufacturers. This abbreviation means Steck-Dreh-Sitzt (free translation into Russian - insert, turn, sit). And it sits really tight. Over the 25 years of its existence, there has been no need to improve the design of the cartridge.
The developer did not monopolize the design, but sold competitors the right to use the technology. Thanks to this, the design of the SDS quick-release chuck has received a unification recognized by all market participants. The most different manufacturers is equipped with such cartridges, and there are countless factories producing nozzles.
keyless chuck for hammer drill
There are hammer drills with other types of cartridges. For example, collet, cam, with rigid fixation of the tool. On modern market household power tools are rather exotic. Or such cartridges are used in professional tools. A home craftsman going to choose a rotary hammer needs to remember the abbreviation SDS.
To correctly select a hammer drill according to the type of cartridge, and subsequent purchase of tips (drill bits), let’s figure out what a chuck for a hammer drill is. and how it works.
The hammer drill chuck is constantly subjected to torsional and shock loads. This places high demands on manufacturing quality.
IMPORTANT! The instructions for any hammer drill instruct you to always lubricate the working tip before installing it in the chuck. If you do not do this, the part will quickly fail.
One thing saves - the cartridge can be serviced and replaced. At the same time, the whole trick of the design is that the locking mechanism itself does not experience stress loads. And the stop, to which all impacts are transmitted, is a monolithic unit that is motionless relative to the structure.
Therefore, the cartridges in the rotary hammer serve for a long time and trouble-free, subject to timely maintenance and lubrication.
What types of cartridges are there and what is the difference?
Since rotary hammers are produced in two main weight categories - “heavy” and “light”, the cartridges also have two main modifications. This is due to the ability to hold working tips of different diameters. There are several standards: SDS, SDS-plus, SDS-max, SDS-top and SDS-quick. We will consider the most common of them in more detail.

The diameter of the nozzle shank is 10 mm, the landing length is 40 mm. The working diameter ranges from 4 to 26 mm. The length of the nozzle (excluding seat) is no more than 1 meter. Impact load up to 5 J. Light and medium category hammer drills work with such cartridges. This power tool is held by human muscle power.

SDS-max cartridge disassembly sequence
As a rule, the diameter of the shank nozzle is 18 mm, the landing length is 90 mm. and the diameter of the working area can reach 60 mm. Installed on heavy-duty and professional rotary hammers with shock loads up to 30 J.
Given the size and weight of professional hammer drills, it is often possible to work with them only with the help of supports and guides.
The design and principle of operation of the cartridge are quite simple. Clamping technology can be understood by looking at the shank of a drill or chisel. Two open slots align with guide splines inside the chuck. Torque is transmitted through them during operation. The tip can move along these slots without fixation.

keyless chuck device
The closed slots are designed to mate with ball clamps, which prevent the tip from falling out, there is no load on the clamps. The impact load in perforation mode is transmitted to the working tip through its heel (end). The pneumatic or electric drive of the hammer drill moves the piston along the axis, and the so-called “hammer” is driven by compressed air, transmitting blows to the hammer drill cartridge.
By pulling the ring on the body, we release the ball clamps. The tip can be removed. When installing a new tip, release the ring - the balls in the grooves fix the tip, allowing it to move freely along the axis within the mounting length.
Variety of attachment applications

SDS shank clamp device
In addition to attachments in the classical sense - drills, augers, chisels, chisels, various adapters can be installed in the SDS type chuck, for example, a clamping chuck for a drill.
This significantly expands the capabilities of the hammer drill. Without buying a new main tool, you can perform different drilling and drilling jobs by simply changing the attachments. At the same time, using powerful drills, say for wood, you will not overload a portable electric drill when using a durable hammer drill.
It is impossible to drill a hole in a concrete wall for a new socket using a conventional drill. And the crown, installed in the SDS chuck of a small hammer drill, bites into the wall like butter.

adapter with SDS shank for clamping a conventional drill
When working with universal attachments, especially for drilling or tightening screws, you must remember that a hammer drill is not a precision tool. The principle of its operation provides for the presence of backlash and vibration. Therefore, it works well where brute force is needed.
You can install an adapter cartridge to a different bore diameter.
IMPORTANT! It is permissible to use SDS-plus tips on a hammer drill with an SDS-max chuck using an adapter, and not vice versa!
When installing a more powerful drill into a mid- or small-class hammer drill (and corresponding adapters can be found on construction markets), you expose the power tool to severe overloads, which shortens its service life.
If a powerful drill gets jammed in a hole, the hammer drill may rotate around the tip, which will inevitably lead to injury.
For drilling various materials, a drill of the required configuration is inserted into the hammer drill.

Options for various drills for a hammer drill
Drilling concrete or granite with a conventional drill is tedious and overloads the tool. After the invention of the hammer drill, this process became available to the home craftsman.
For each type of hole there is a personal drill or crown. And the SDS chuck allows you to change the type of drill in one motion. By developing the capabilities of rotary hammers with SDS cartridges, manufacturers are releasing more and more advanced working attachments.
There are types of work in which turning on and off the perforation mode during drilling is determined by technology.
For example, if you make a through hole in a thin plaster or concrete partition, then when the drill comes out from the back side, the hammer knocks out large pieces of material. Before reaching the through hole a few centimeters, you can turn off the hammer drill mode and finish the work with simple drilling.
Some drills or bits are not designed for perforation at all. For them, only the drilling mode is allowed. For example, drills and drills for ceramic tiles. In contrast, jackhammer attachments operate in perforation mode without rotating the chuck axis.
There is a misconception that SDS chucks only work in rotary punch mode. The applications of these quick-release fasteners are much wider. For example, powerful hammer drills with an SDS mechanism are used as mixers for stirring construction mixtures. They even sell SDS-plus attachments for stirring.
Or a jackhammer mode for knocking down old tiles. Rotating the cartridge is of no use here. Shock loads occur as normal; the main thing is to lubricate the tip well before installing it in the chuck.
A significant disadvantage of rotary hammers is dust formation and noise. For more comfortable work, various devices are available for removing dust from the work area. And the roar of the hammer drill became the talk of the town for the neighbors.
This video is about the difference in tool fastening in chucks of the SDS-plus, SDS-max and Spline Shank systems. The video is in English, but even without translation you can clearly see the difference.
Cartridges for rotary hammers: types, design, disassembly
When choosing a chuck for a hammer drill, the buyer must understand the design of such a clamping device. This will allow you to immediately resolve questions about which tool in the kit can be used with a hammer drill and what types of processing can be performed using such equipment. In addition, knowledge of the structure of the hammer drill chuck allows you not only to independently replace the clamping device, but also to carry out its simple repairs, if the need arises.

The hammer chuck designs have been specially designed to withstand the harsh operating conditions of the tool.
How do chucks for hammer drills work?
To effectively use different hammer drill bits, you need to ensure that they are securely attached. A special cartridge is used for this. Its first models began to be developed back in the 30s of the last century, when hammer drills appeared on the market, the mass production of which was mastered by the world famous company Bosch.
This handheld device, as a hammer drill, was almost immediately appreciated by consumers, since it can be used to combine drilling with pulse chiselling, which significantly increases the efficiency of the processing performed. The main drawback of the first models of rotary hammers was precisely due to the fact that the weakest link in their design was the cartridge, which quickly became unusable under the influence of shock loads.
As a result of long-term development, manufacturers of hammer drills and chucks have come to the following conclusion: the simpler the design of the clamping device, the more reliable it is in operation.

Externally, the hammer chuck is a completely closed clamping device
As a result, three main types of cartridges for rotary hammers were created, which in turn are divided into subtypes.
There are chucks in which the working attachment is fixed using a special key that activates cams that reliably clamp the shank of the tool being used. The most significant advantage of this type of chucks is that they provide reliable fastening of the tool used in conjunction with the hammer drill. Meanwhile, to replace the working tool in such a chuck for a hammer drill, you will need to spend significantly more time than when using other types of clamping devices.

Main types of hammer drill chucks
The working attachment of the hammer drill can also be fixed on it using a quick-release chuck (KLC), which is actuated only by force, created by hand operator. Depending on the design, cartridges of this type can be single- or double-clutch, the principles of operation of which also differ.
Single-socket chucks are easier to use, but they can only be used in conjunction with drills that have the ability to automatically lock the working shaft. To activate such a cartridge, the effort of one hand is sufficient. To use a double clutch clamp, you need to hold the rear clutch with one hand and rotate the front clutch with the other.
What is SDS
SDS (SDS) is an acronym made up of the first letters of the words Steck, Dreh, Sitzt, which translated from German mean “insert, turn, secured.” It is on this simple, but at the same time ingenious principle that the SDS cartridge, developed by Bosch engineers in the 80s of the last century, works. Today, 90% of all manufactured rotary hammers are equipped with these easy-to-use devices, which ensure high reliability of fixing the working tool.
SDS chucks are often called quick-release chucks, but they should not be confused with devices in which clamping is achieved by rotating the couplings. Unlike traditional quick-release chucks, the SDS clamp does not need to be rotated to secure the tool; you just need to hold it with your hand.
To understand the design of a hammer drill chuck of this type, as well as the principle of its operation, just look at the tool shank, which is designed to be fixed in such a device, or the SDS adapter. This shank has 4 grooves, two of which are open at the end of the shank, and the other two are closed. Open grooves act as guides; they ensure the correct position of the tool when it enters the chuck. The closed grooves, in turn, ensure the fixation of the shank in the hammer drill chuck.

Scheme of the impact mechanism of a rotary hammer
In the inner part of the SDS cartridge there are special balls that perform two functions simultaneously. At the moment when the tool is just inserted into the hammer drill, the balls along which the guide grooves move ensure its correct position. After the tool is inserted all the way, such balls fix it, for which it is necessary to turn it a little until the balls enter the closed grooves of the shank. To make using the SDS chuck even easier, it is recommended that the tool shank not only be thoroughly cleaned after each use, but also lubricated.
It should be borne in mind that due to the design features of SDS chucks, the tool that is fixed in them is subject to slight radial runout at idle, which does not in any way affect the accuracy of the processing performed. Meanwhile, the presence of a small play between the shank and the inner surface of the chuck protects the latter from the impact to which drills are exposed during the operation of the hammer drill.

To protect against contamination, all hammer drill chucks are equipped with rubber boots.
Types and scope of application of SDS cartridges
Depending on the diameter of the shank with which the tool or adapter is equipped for fixing it on the hammer drill, SDS chucks are divided into five main types: regular SDS chucks, models of the SDS-top, SDS-quick categories, as well as SDS-plus and SDS-chucks. max. The most popular are the SDS-plus category chucks, which are designed to hold tools with a shank diameter of 10 mm. The shank of the tool, adapted for fixing devices of the SDS-plus category, enters them to a depth of 40 mm. In this case, the diameter of the working part of the tool, which is fixed in SDS-plus chucks, can be in the range of 4–26 mm.
The maximum tool length that can be clamped in SDS-plus chucks is 1 meter, and its most common working diameters are in the range of 6–12 mm. Devices designed to hold SDS-plus shanks and corresponding adapters for rotary hammers in them are used to equip light and medium category equipment, the weight of which, excluding the weight of the tool, ranges from 3 to 5 kg. It is precisely these hammer drills, which are designed for impact loads of up to 5 J, that are most popular among home craftsmen and small repair teams.

Common types of SDS shanks
SDS-max chucks, with a bore diameter of 18 mm, are used to equip heavy professional rotary hammers, whose weight starts from 5 kg. Such hammer drills, which can be used in conjunction with tools with a working diameter of up to 6 mm, are able to create an impact load of up to 30 J. To ensure accurate and reliable fixation of the tool in such serious equipment, an additional guide groove is provided on shanks of the SDS-max category .
SDS-top and SDS-quick chucks are intermediate options equipment of rotary hammers and are used much less frequently than the models described above. Meanwhile, the design of SDS-quick devices, which were developed by Bosch engineers in 2008, is worth a closer look. The tool is inserted into the SDS-quick series chucks not using grooves, but through protrusions on the shank. The design features of SDS-quick chucks allow them to hold tools with a hexagonal shank and a quarter-inch size.

The SDS-quick system is used in Bosch UNEO cordless hammer drills
How to disassemble and assemble a cartridge yourself
To perform maintenance and repair of a hammer drill chuck with your own hands, it is important to properly remove and disassemble this device. Knowing how to disassemble a hammer drill chuck (or how to disassemble a drill chuck), you will be able to independently inspect, clean and even make minor repairs to its internal elements, which will allow you to always maintain your tool in good technical condition. The simple design of SDS cartridges allows them to be removed and disassembled even by people who are not comfortable with technology.
So, disassembling the classic SDS hammer drill chuck is performed in the following sequence. Step one
The plastic part is removed from the cartridge and the rubber seal is removed.

Removing the hammer drill chuck. Photo 1
Using a screwdriver, remove the retaining ring and then the retaining washer.

Removing the hammer drill chuck. Photo 2
When the locking washer is removed, you can see a second ring underneath it, which also needs to be removed using a screwdriver.

Removing the hammer drill chuck. Photo 3
After all the rings and washers have been removed, you can begin to disassemble the SDS mechanism, which consists of a washer, a ball and a spring. First of all, it is necessary to remove the ball from such a mechanism, then the washer and only then the spring.

Removing the hammer drill chuck. Photo 4
All parts of the cartridge mechanism, if you perform maintenance, must be cleaned of dirt and dust, lubricated, and then reassembled in the reverse order.
To get to know in even more detail the question of how to remove a chuck from a rotary hammer or drill, how to properly disassemble it, perform maintenance or minor repairs, you can study not only theoretical information, but also watch the corresponding video.
About attachments for rotary hammers
Theoretically, a tool with a shank for SDS-plus chucks and even a tool with an even smaller seat diameter can be installed on a hammer drill chuck of the SDS-max category. To solve this problem, a special attachment (adapter) is used, which today can be purchased on almost any construction market. Meanwhile, it is strictly not recommended to use such adapters for a rotary hammer, since using a tool of a smaller diameter on heavy-duty rotary hammers will quickly render it unusable.
As a rule, tools for rotary hammers are sold immediately in packages and cannot be restored after failure. However, it should not be confused with conventional drills, which differ from it in the shape of the sharpening and the structure of the spiral.
Keyless chuck [ 30 ]
A keyless chuck at an affordable price is the main advantage of our store, which sells only reliable and practical devices that are covered by a three-year quality guarantee.
Features and types of quick-release chucks
Modern electric or battery-powered equipment consists not only of a motor and a housing, but also of rotating elements that are designed to make holes or tighten screws. These parts consist of adapters, drills and chucks.
The latter come in varieties - key and quick-clamping. The first type is difficult to replace, but the second is fixed quickly and only one free hand will be enough for manipulation. That is why this spare part has gained such significant popularity among users percussion instruments. At the same time, in the BZP cartridge category, it is customary to distinguish models intended for:
According to the principle of operation of this kind of cartridges, there are one- and two-clutch cartridges. The first type is used without a key and is mostly intended for installing conventional drills. The second option has a slightly more complicated design, but in this case it is also possible to organize connection without a key, but you will need bits. To protect the device during transportation, it is packaged in special packaging. Therefore, there is no need to worry about the safety of the device or parcels transported next to it.
The secrets of our popularity
From us you can buy a keyless chuck at the best price in the country from a popular brand, also in the original, as well as other tools:
- Rechargeable;
- Pneumatic;
- Mechanical;
- Electric.
Your work needs to be simpler. And we are ready to provide this.
How to change the cartridge on a rotary hammer
For professionals in their field, replacing or repairing a hammer drill chuck is not difficult. However, what should those who are not involved in construction and renovation at a professional level do? Since any man has held a drill in his hands at least once in his life, he should be aware of the process of removing and replacing its chuck. In this case, the reasons can be very different, from slow operation of the toothed rim to a major breakdown. How to change the cartridge on a rotary hammer? Let's look at the replacement in more detail.
How to remove a chuck from a hammer drill
At the first stage, it is worth determining which cartridge is used directly in your hammer drill. They come in cam, SDS collet and quick-clamping types. The latter, in turn, come in single- and double-sleeve versions. In a jaw chuck, the drill is secured with a key, which cannot be said about SDS collet and quick-release chucks. In order to replace the drill in the SDS collet chuck, you just need to turn it.

Replacing a chuck on a hammer drill begins with examining the fasteners. It can be held in place by a screw rod or a spindle. In most cases, removing the cartridge is not difficult. However, sometimes there is a stronger fixation, which will require patience and additional tools. In a simplified version, a firmly fixed cartridge is removed using a hammer, wrench and screwdriver. The removal process is as follows:
Tap the head of the screw to loosen it;
Unscrew using a screwdriver;
Clamping the chuck in a wrench/vice and turning the spindle.
The device of the hammer drill cartridge
Almost any construction tool is universal, and hammer drills are no exception. There are many different attachments, adapters, and cartridges for them. The basis for any type of work is the cartridge. The hammer drill adapter is used to install a drill bit that has been removed from a conventional drill. Nozzles and drills have a huge variety and are selected in accordance with the tasks.

Always keep a replacement hammer drill chuck at home, as one can fail at any time. It is also worth noting that for each type of work it is preferable to use different cartridges. The main types of cartridges include:
Quick-release: suitable for those who frequently change attachments during work;
Key: designed for large drills.
Hobbyists often wonder why so many types of cartridges are needed. Let us remember that there are rotary hammers with higher and lower power. If the tool is powerful, then you need to think about securely attaching the drill and attachments. A cartridge such as the SDS-max is designed for a deep landing, which means that the likelihood that the drill will fly off during operation is minimized. The same is with less powerful hammer drills, which are designed for “jewelry”; work. In this case, more emphasis is placed not on fixation, but on accuracy.
In order to know how to repair a hammer drill cartridge, you need to study its structure. But how does the hammer drill chuck work?
At one time, the drill was attached using movable cams, but progress does not stand still. In SDS, drills are fixed by 2 guide wedges and 2 locking balls. SDS-plus and SDS-max differ only in the number of guide wedges (the latter has 1 more). Thus, the fastening is very reliable and fast.

Fixing the attachment itself has also been simplified: you just need to insert the selected attachment into the cartridge socket, press lightly and wait for a click. Thus, the nozzle is well fixed. Removing the drill is also not particularly difficult: press the movable cover and the drill is removed.
Additionally, the hammer drill may include:
Speed regulator;
Electronic reverse
Brush reverse;
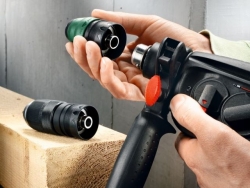
Quick replacement system (quick-change chuck for rotary hammer);
Indicators (show the degree of wear of parts);
Anti-vibration system;
Friction clutch (protection against jamming).
How to disassemble a hammer drill chuck
When disassembling the cartridge, it is necessary to take into account the manufacturer, because disassembling the hammer drill cartridge will differ significantly. Today the list of the most popular includes:
Bosch hammer drill chuck;
Chuck for makita hammer drill;
Interskol rotary hammer chuck.
Let's look at disassembly using the example of a cartridge for a Bosch hammer drill:
1. The plastic part is moved aside and the rubber seal is removed.
2. Using a screwdriver, carefully remove the fixing ring.
4. Behind the puck we will see the second ring. It should be turned and removed, also prying it off with a screwdriver.
5. Behind the plastic part we see an SDS clamp, consisting of a spring, a ball and a washer. The ball is removed first, then the washer and spring.
The cartridge is disassembled for various purposes: repair, replacement of individual parts, cleaning, lubrication, etc. The chuck for a hammer drill from Makita and other manufacturers is disassembled in approximately the same way, with the exception of isolated nuances that are taken into account based on the design of the chuck.
After disassembling and doing everything that was planned for working with the parts of the cartridge, a logical question arises: how to assemble the hammer drill cartridge? Just follow the disassembly instructions, starting from the last step and ending with the first (do everything exactly the other way around).
How to replace a cartridge on a hammer drill

We already wrote above that not every cartridge is suitable for every drill. We also looked at the process of removing and even disassembling the cartridge. To install a new cartridge, follow these steps:
Screwing the chuck onto the drill (twist until it stops);
Insert the screw into the socket;
Tighten the screw using a screwdriver (also until it stops).
Take your choice of hammer drill chuck seriously. They come in a wide range of prices, but don't waste your money buying a chuck that may not be suitable for your drill. The ideal option would be to take the tool with you if it’s a market, or ask for help from a consultant if it’s an online store.
Articles on the topic
Hammer chuck - do-it-yourself repair
It's no secret that tools have different powers. For hammer drills with high power, a chuck with reliable fastening of a drill or drill is required.
In construction, there are key and quick-release chucks. In key cases, the attachment (drill, drill, cutter) must be fixed using a special key that spreads the fingers. In quick-clamping ones, the attachments will be fixed manually.
How to remove them from the hammer drill and do the repairs yourself? Many people ask about this.
To remove a collet or quick-release clamp from a power tool, simply turn the drill. You must learn how to disassemble a hammer drill chuck with your own hands.
If the attachment is firmly fixed, then removing the clamp from the power tool is very difficult, and sometimes almost impossible. How to remove the cartridge from the hammer drill in this case?

This must be done using a hammer, wrench and screwdriver. The disassembly process will be carried out in the following order:
- Start by tapping the head of the screw to loosen it.
- Then gradually begin to unscrew the nozzle using a screwdriver.
- After unscrewing, clamp the cartridge in a vice and begin to turn the spindle.
If after removal you find that the cartridge has become unusable, then it must be replaced. To change the clamp on a hammer drill, perform the following manipulations:
- Screw the chuck onto the drill until it stops.
- Then insert the screw into the socket.
- After insertion, gradually tighten the screw using a screwdriver until it stops.

Do not forget to disassemble and clean the hammer drill from time to time. This will help you avoid significant problems in the future. Also, sometimes there is a need to make minor repairs to the cartridge yourself, for example, replace a spring.
Switching hammer drill modes
For normal use of the tool, you must understand that there are several modes of operation:
- The first of them is drilling. When working in this mode, you must:
- switch the toggle switch for selecting hammer drill modes opposite the drill mark;
- then insert the drill bit and turn on the power tool.
If you don't know how to insert a drill into a hammer drill, then we will explain to you.
To install a drill in a cam or collet device, simply push the drill into it. Then insert the key into the special hole on the outer part of the chuck and scroll until the drill is fully clamped.

During operation, you do not need to press hard on the nozzle.
Advice. When using the chuck in drilling mode, never switch the toggle switch to “counterclockwise rotation,” as this may damage the attachment.
To prevent impacts, rotary hammers have a locking function. It is usually used when drilling holes in wood or metal structures.
It is advisable to let the hammer idle for a couple of minutes before inserting the drill into the hammer drill. Be sure to check the gearbox. It should not make extraneous noise or knock. Otherwise, have it repaired.
- The next mode is called hammer drilling. How to operate a hammer drill in this mode? The answer is simple - with the drill and hammer toggle switch turned on.
During operation, carefully monitor the drill:
- it must not be distorted;
- During this mode, you should hold the hammer firmly, but not pressing too hard.

Remember that when drilling concrete you may stumble upon pieces of reinforcement, so take a comfortable position in advance so as not to lose control of the tool.
- The last variation is the impact mode. Typically, it is used for chiseling or chipping operations. Sometimes it is used for gating.
Before starting work, switch the hammer drill toggle switch to the mark with the image of a hammer. Remember that in this mode the tool must be held very firmly.
Advice. Before turning on the power tool, move it to the desired location for impact.
How to use a hammer drill correctly


Video about working with a hammer drill
To operate a power tool correctly, you must remember the following techniques:
- Be sure to use the funds personal protection. Namely: glasses, gloves, earplugs. Immediately before work, remove all foreign objects that could become entangled in the drill.
- Do not press too hard on the instrument, otherwise you may damage it.
- Don't forget how to use a hammer drill correctly. Do not “drive” it idle for more than 4-5 minutes. In this case, you expose the chuck mechanisms to a lot of wear.
- If you are working with porous or loose materials, it will be more reliable to work in hammerless drilling mode.
- If you are drilling with materials that have high hardness, use a special lubricant or machine oil.
- Don't forget about liquid cooling if you're working with hard materials. All kinds of emulsions or grease can be used as liquids.
- If you are working with long drills, in order to save money, start working with shorter drills of the same diameter.
- To prevent the tool from needing repair, be sure to lubricate the drill shanks with thick grease every 100-150 holes. But do not forget about pre-cleaning them from dust and dirt. Experts recommend using grease as a lubricant.
- Let the hammer cool down periodically. Sometimes dip the drills in water or oil.
- When working, pay attention Special attention whether the gearbox is overheating. If you notice heating, take a short break from work. However, you should not put the power tool in water - it will give you an electric shock.
- Don't forget how to use a hammer drill. Take care of your hammer drill before and after use. Remember that the life of the instrument depends on the quality of care. Clean construction dust from power tools using a vacuum cleaner. To protect the drill, you can put a special shield on it, which can even be made from plastic bottle. Be sure to follow the operating and rest schedule of the tool. It is advisable to take a 10 minute break after every half hour of work.
- Keep a close eye on the hammer drill vent.
- Once a month, disassemble the hammer drill and perform a preventive inspection of the gearbox.

We have addressed the main questions asked by readers. We hope our tips will help you understand how to repair a hammer drill yourself.
Attention, TODAY only!
Quick-release and keyed
Any master who has an electronic drill on his farm may encounter a situation where the drill’s chuck begins to peel (the center disappears) and the drill moves from side to side, as a result of which normal work will not work. Or the jaws on the chuck are simply worn out, which can happen over time.
In this case, the cartridge should be replaced with a new one. How to choose the right one?
There are a number of types of drill chucks. There are threaded ones, some are on a cone, which are simply pushed on and not screwed on. Let's look at them in more detail so as not to make a mistake when choosing.
Threaded cartridge. 
On thread
It is put on the drill by screwing it onto a threaded pin, which is placed on the drill.
There are two main types of threaded chuck. They differ in thread types.
They are marked (1.5-13 M12*1.25) and (1.5-13 1/2 - 20 UNF) 
Markings on cartridges
The numbers 1.5-13 indicate the largest and smallest diameter of the drill shank that can be clamped into the chuck. The small one is 1.5mm, the largest one is 13mm, it also goes up to 13.5mm, I inspected it personally. On some cartridges the small clamping diameter is 2mm.
M12 means that the hole at the bottom is 12mm.
1.25 or 1/2 - 20 UNF is different kinds threads, 1st metric, 2nd inch.
Choose correctly, the cartridges are not interchangeable, if there is a marking on the cartridge M12*1.25, then take that one. If M12*1/2 – 20 UNF – then only that. If the inscription is erased, you will have to remove the cartridge from the drill and take it with you to the store.
How to remove it?
To do this, twist the cartridge counterclockwise. From time to time, the cartridge is additionally secured with a screw, which is placed in the center, 
Left screw inside the chuck
this screw has a left-hand thread, i.e. unscrews clockwise, and not as usual - counterclockwise. First, unscrew the cartridge (spread the jaws), then tighten the screw with a regular Phillips screwdriver No. 2. After which you can twist the cartridge itself counterclockwise; its thread is standard. It happens that this is very difficult to do, because over time it has become very, very long. To remove, you can use a pipe wrench to grab it firmly, for example, take number 2. You can use the help of a friend: one holds the neck of the drill with one key, the second twists the cartridge itself with another key. Especially if the drill is ancient, it is difficult without an assistant.
Cartridge on a cone. 
Chucks on a cone, without thread
They are put on with a regular shackle. There are also several varieties: B10, B12, B16, B18. If there is a letter “B” in the marking on the cartridge, know that it is on a cone and there is no thread at the bottom.
The number in the cartridge marking means the diameter of the hole at the bottom. The larger it is, the bigger hole. In chucks B10, B12 you can clamp a drill with a maximum shank of 13mm. And B16, B18 allow you to clamp drills with a shank up to 16mm.
Such a cartridge should be removed by knocking it out of the drill, simply and simply using a hammer.
It is mounted on a special pin - a holder located on the drill. 
There are chucks with a key, and there are quick-release chucks (in the first photo).
The advantages of a fast clamp include the fact that it is convenient to quickly change drills and self-tapping attachments. The downside is that the drills can turn from time to time, especially if the shank is cylindrical (round) and not hexagonal, especially when the metal drill is of huge diameter. The load is large, but you can’t really tighten it by hand, which can’t be said about the “classic” cartridges, which are tightened with a key. In my opinion, this is much more reliable. The only negative is that you can lose the key; to do this, it is wise to screw it onto the drill cable with electrical tape so that it is always in its place.
There are chucks with a 1/4" hex shank that can clamp drills from 0.6mm.
Knowledgeable craftsmen use a tool such as a drill with the following types of chucks: key and quick-release chucks. A drill chuck is a mandatory device designed for fixing drills and other types of drill attachments. Torque from the tool's electric motor is transmitted through gears to the chuck shaft, which is driven into rotation. The product in question plays an important role, so it is important that the device is of proper quality.
For drill use the following types cartridges:
- Gear-crown or they are also called key. main feature This device consists of using a special clamping wrench to secure the nozzle.
- Quick-clamping. Clamping of the nozzle is carried out by manual rotation of the clamping sleeve. In turn, quick-release fasteners are divided into several types: double-clutch, single-clutch and with a special retaining ring.
Gear-crown types are found quite often on electric drills, since a significant advantage of such a product is the quality of the clamping of the fixing nozzle. Such drill chucks allow you to install attachments with a diameter ranging from 1 to 16 mm.

The quick-release version is the most convenient to use, as it allows you to replace the nozzle quickly and without the need to use a key. To replace, you only need to manually unscrew the cartridge sleeve, then install the nozzle, and then fix it in the same way. This option is most popular for use in cordless drills and screwdrivers.
A significant disadvantage of the BZP is the unreliable fixation of large-diameter drills, especially when the mechanism elements wear out.
Due to such a significant drawback, it is necessary to periodically replace such a cartridge. To avoid the need for frequent replacement, craftsmen prefer a key type of chuck. This type guarantees reliable fixation of the attachments, unlike the BZP.
The only disadvantage of key products is that you constantly need to use a special key, which is often lost. To prevent the drill key from getting lost, it is recommended to fix it to the power cable of the tool.

The characteristics of the drill's keyless chuck allow it to be used in low-power tools. BZPs come with both a partially plastic construction and a completely metal one. The latter option is more reliable, but it often causes difficulties when unscrewing it by hand.
There is no definite answer to the question of which cartridge is better, since everyone chooses for himself what is more convenient for him. If you do not have to use the tool often, then it is more convenient to use the key type. If the work is carried out daily, and you plan to use only thin drills, then in order to save time and effort, it is better to take a BZP.
Design features
The design of a classic drill chuck is based on the use of a collet or cam mechanism. This type of cartridge allows you to clamp attachments of various shapes in the jaws or petals of its mechanism: hexagonal, cylindrical and square. The main design elements of key cartridges are:
- A body that has the shape of a cylinder.
- The sleeve that rotates on the outside of the mechanism.
- The collet or cam mechanism, which is located in the inner part of the mechanism and consists of 3 clamping petals.

An important role in the collet mechanism is played by the petals, which are made from durable steel, and have exactly the same shape. When the sleeve rotates, all three petals simultaneously move closer together. This type of fixation allows you to securely fix round-shaped drills, preventing them from turning inside the chuck. The maximum drill shank diameter for key or cam work is 16mm. Of course, there are cartridges with a larger diameter and with a different type of fastening, but they are used on machine tools and are not used on drills.
How to replace a drill chuck with your own hands
Replacing and disassembling the chuck on a drill is not particularly difficult. Initially, you should find out what type of product is used on the tool: with a cone connection or a threaded one. The threaded connection is the most complex, so the technology for removing this type of product is as follows:
- The clamping blades move apart.
- In the inner part of the mechanism there is a screw for a Phillips screwdriver. If there is no screw, then the cartridge should simply be twisted off the shaft.
- Unscrew the screw, taking into account the fact that it has a left-hand thread.
- After unscrewing, you need to unscrew the product and replace it with a new one.
Large in design electric drill Key chucks with a conical connection are more often used. We will learn further how this type of replacement is performed.
- First, you can find out the labeling of the product you are using, and then purchase a similar one.
- The jaws move apart and the screw is unscrewed.
- Take a standard hammer and then apply light and sharp blows to the back of the clamping device, as shown in the photo below.
- After each blow, rotate the device in the direction shown by the arrow.
So in a simple way The product is being dismantled. Installation is much simpler, which requires inserting the product into the mounting part of the conical hole and securing it with a screw.
How to disassemble the cartridge can be seen in the video:
Possible problems when working with the cartridge
Drill chucks are an important part of the tool, so you should know the possible types of damage to this part. These include:
- Part falling out. The cases, although rare, are possible for conical types of cartridges. If the product has fallen off the cone of the tool, then the situation should be corrected as follows: heat the product in oil to 110 degrees, and then put it on the cone of the tool. If this procedure difficult to perform, the cartridge should be replaced.
- The clamping jaws are jammed. If the jaws jam, which happens quite often, you will need to remove the product, disassemble it, clean it, lubricate it, and then return it to its place. These steps are described in the video.
- Beating. If beating occurs, it is recommended to try to find the cause. If the cause cannot be determined, the device must be replaced.
The interval and need to replace the cartridge depends on various reasons. They are strongly influenced by: operating features, the quality of the cartridge itself, and the manner of working with the tool. If the problem cannot be detected or resolved, it is best to purchase a new product.
Among home craftsmen, the most common types of drill chucks are key (gear-toothed) and quick-clamping (BZP). We will try to analyze the operating features of these particular cartridges in this article and comprehensively cover all the main nuances and difficulties of working with them.
The most common for household drills and screwdrivers are ring-gear and quick-release chucks
Main types of drill chucks
According to their design, they are divided into two main types:
- toothed chuck, in which the tool shank is clamped using a special key;
- a quick-release chuck for a drill (KZP), in which the clamping sleeve is actuated by manual rotation.

Clamping jaw chucks installed on modern drills allow you to securely fix tools whose shank diameter is in the range of 1–25 mm. Devices of this type are practically free of disadvantages, the most significant of which is their fairly high cost.
The most popular type of clamping device installed on modern drill models is the quick-release chuck (KLC). It only takes a few seconds to lock a tool into a BZP chuck, and there is no need to use a special key. The tool shank is clamped by manual rotation of the adjusting sleeve, the outer surface of which is knurled to facilitate this procedure. To regulate the mechanical force created on the tool shank, this type of clamp is equipped with a special locking device.

The most significant disadvantages of the BZP include the fact that in cases where the elements of its mechanism wear out, it does not reliably fix the shanks of large-diameter drills. This leads to the tool turning during operation.
Compared to clamping devices of the BZP category, toothed chucks for equipping drills provide reliable fixation of the tool in any situation. Users who frequently work with electric drills prefer this type of chuck. The only significant drawback of such devices is that the key with which they are activated is quite easy to lose. Meanwhile, the occurrence of such a problem can be easily avoided if, immediately after purchasing a drill, you fix the key on the device’s wire using insulating tape or ordinary rope.

The mini-drill chuck, installed on compact drilling devices, is also very popular. The latter are actively used by jewelry craftsmen. The mini chuck belongs to the category of quick-release chucks for a screwdriver or light drill. This small chuck, made primarily of brass, is used to hold tools with a shank diameter in the range of 0.1–4.5 mm.
Design and features of the toothed chuck
The classic drill chuck is a collet or cam type clamping device. They can hold not only various tools with a round shank, but also cylindrical workpieces for further processing. The main design elements of jaw chucks are:
- cylindrical body;
- an adjusting ring or sleeve rotating on the outer surface of the housing;
- a cam mechanism or collet installed in the inside of the device body.

Design of a jaw (gear-ring) chuck with a key
In its turn collet mechanism, the elements of which are made of hardened steel, consists of three absolutely identical cams, which, when rotating the adjusting ring or sleeve, simultaneously approach each other, thereby ensuring reliable clamping of the tool shank. In the first models of chucks for mechanical drills, the collet jaws converged due to the rotation of the adjusting wheel; now an adjusting sleeve is used for this.
On one side, the drill chucks are installed on the shaft of the equipment used, and on the other, the tool with which the processing will be performed is inserted into them. Jaw chucks are primarily used to hold the following tools:
- drill;
- cutters;
- taps with small diameter shanks.

How to remove a cartridge with a threaded connection
The question of how to remove the chuck from a drill, which is fixed to it using a threaded connection, arises among home craftsmen quite often. Such a clamp must be removed taking into account the fact that it is installed using a non-standard left-hand thread.
The threaded element of the clamping device is located in its internal part, so you must first move the clamping jaws as far apart as possible, which will provide access to the fixing screw, which can be unscrewed using a regular Phillips screwdriver. In drills without such a screw, the chuck is simply twisted off the shaft without carrying out the above-described preparatory work.

The head of the fixing screw can be Phillips, slotted, hexagonal or even star-shaped.
The left-hand thread screw that secures the threaded chuck to the drill can wear out over time. To restore the reliability of such a connection, you can do the following:
- insert a Phillips screwdriver into the head of the chuck screw on the drill;
- Lightly tap the hammer to deepen the screw into the threaded hole.
Such actions will not harm the drill’s mounting unit, but will allow the clamping device to be fixed to it more accurately and reliably.
Replacing a threaded chuck on a drill can also be done using a 14mm wrench, which greatly simplifies this process. In order to avoid making mistakes when you decide to disassemble a cartridge of this type, you can first familiarize yourself with theoretical material on this topic and watch the corresponding video.
Replacing and disassembling the chuck on a drill
There is nothing complicated about the question of how to replace a worn-out cartridge in a drill. To do this, it is enough to purchase the appropriate clamping device, remove the old one from the drill and install a new one on it. It should be borne in mind that two types of chucks can be installed on both a regular and a mini drill:
- with cone connection;
- threaded.
The chucks, which are threaded for installation on a drill, are removed and fixed according to the scheme described above. When replacing such a device, it is not enough to know that it is threaded; it is also important to take into account the markings that are necessarily applied to it. Such chucks may be marked as follows:
- 1.5–13 M12x1.25;
- 1.5–13 1/2 – 20UNF.

The interval 1.5–13 present in the designation data indicates the minimum and maximum diameters of the cutting tool being installed. The rules for replacing a chuck on a drill suggest that the new clamping device must have a marking that is completely identical to the designation of the old one.
With the question of how to replace a conical chuck on a drill, everything is somewhat simpler. Devices of this type can also be marked with various markings, namely:

To replace a chuck of this type with a drill, you simply need to select a clamping device with the appropriate marking and insert its seat into the conical hole of the drilling equipment. It is quite simple to navigate this marking: the letter “B” means that this is a cone-type cartridge, and the number indicates the diameter of the lower part of the mounting hole.
Removing a cone-type chuck from a drill is as easy as installing it. In order to perform this procedure, you simply need to knock out the clamping device from the mounting hole of the drill, for which you use a regular hammer. With installation and removal details cone chuck You can also get acquainted with the electric drill by watching the corresponding video.

A keyless chuck at an affordable price is the main advantage of our store, which sells only reliable and practical devices that are covered by a three-year quality guarantee.
Features and types of quick-release chucks
Modern electric or battery-powered equipment consists not only of a motor and a housing, but also of rotating elements that are designed to make holes or tighten screws. These parts consist of adapters, drills and chucks.
The latter come in varieties - key and quick-clamping. The first type is difficult to replace, but the second is fixed quickly and only one free hand will be enough for manipulation. That is why this spare part has gained such significant popularity among users of percussion instruments. At the same time, in the BZP cartridge category, it is customary to distinguish models intended for:
- Drills;
- Hammer;
- Screwdriver.
According to the principle of operation of this kind of cartridges, there are one- and two-clutch cartridges. The first type is used without a key and is mostly intended for installing conventional drills. The second option has a slightly more complicated design, but in this case it is also possible to organize connection without a key, but you will need bits. To protect the device during transportation, it is packaged in special packaging. Therefore, there is no need to worry about the safety of the device or parcels transported next to it.
The secrets of our popularity
From us you can buy a keyless chuck at the best price in the country from a popular brand, also in the original, as well as other tools:
- Rechargeable;
- Pneumatic;
- Mechanical;
- Electric.
Your work needs to be simpler. And we are ready to provide this.
Similar articles
 The best amulets against the evil eye and damage Amulet against the evil eye with hands for children
 How to read the Psalter correctly
 Delicious dishes with sausages
 A glimpse of Bella. Romantic chronicle. A glimpse of genius. Messerer about Akhmadulina Boris Messerer glimpse of Bella romantic chronicle
 I dreamed that I was sailing on a boat on the river
 How to cook beef entrecote in a frying pan
 About the company Foreign language courses at Moscow State University
 Which city and why became the main one in Ancient Mesopotamia?
 Why Bukhsoft Online is better than a regular accounting program!
 Which year is a leap year and how to calculate it