
Consider ways to install light box switch sockets. Methods for installing sockets and switches on the surface of building structures
Installing sockets yourself is one of the most common household chores. It would seem nothing complicated. But let us remember Murphy's laws, which were not derived by a teapot. One of them reads: “If the device still doesn’t want to work, then finally take it and read the instructions!”
In order for an electrical outlet, this generally simple device, not to become a source of concern, or even danger, especially in modern highly loaded residential networks, you need to know quite a lot about it and how to install it. The rules for installing sockets are also relevant from the point of view of electromagnetic compatibility: if they are installed correctly and the wiring is properly carried out, the need for expensive interference filters and additional protective devices, as a rule, does not arise.
Important: The socket is an electrical distribution device and, as such, requires compliance with all safety measures in accordance with safety regulations during operation. In particular, the presence at the place of work of an assistant (according to PTB - “observing work”) trained to provide first aid in case of electric shock.
Important to important
When installing electrical fittings yourself, you must follow the following rules:
- Electrical installation work should be carried out in a de-energized apartment.
That is, first you need to perform all the auxiliary operations: knock out the grooves, drill holes and holes, lay the cable without connecting, and connect the wires last.
- First of all, check each next connected wire with a phase indicator.
One of the general provisions of the PTB states: “When working on electrical installations, it should be remembered that voltage on de-energized live parts may suddenly appear at any moment.”
- Install the socket or switch without allowing exposed conductors to come into contact with the body.
The basic working methods that allow you to install household electrical fittings “without touching the copper” are described below.
- In case of electric shock, remember that the main thing in this case is the speed of reaction of the observer.
Exposure to an electric current of 10 mA for 0.2 s (the reaction speed of a dexterous, quick-witted person without special training) causes involuntary unflattering statements. The same, within 1 s – chills, trembling, painful sensations, which during the day may intensify to a degree requiring hospitalization. The same, for 10 seconds or more - fainting and fibrillation of the heart muscle, requiring urgent medical attention within 15 minutes, otherwise it will be too late.
That is, if the master is “grabbed”, you need to pull him by the clothes and crash together on the floor, and not run into the hallway to turn off the machine. It is better to lie together with bruises or fractures than to lie alone in the ground, and the other under investigation.
Socket device
Here and further in the diagrams, phase contacts and wires (linear, L) are conventionally indicated in red; zero (neutral, N) is blue, and protective (grounding, P) is yellow with a green stripe.
The electrical outlet consists of a contact block assembly, a decorative cover with a captive screw(s) and a socket box. The block is equipped with:
- Fastening tabs, solid cast, fixed (in the figure on the left) or movable, supported by screws, in fig. in the center and to the right.
- Contacts, phase and neutral, identical in design, and grounding, located separately.
- Terminals for connecting wires to contacts.

Notes:
- Blocks with movable legs on screws are somewhat more difficult to install in a socket box (see below), but this design allows you to adjust the position of the block in height and inclination exactly along the wall. You just need to make sure when purchasing that the paws have two teeth. The block with single-toothed legs will soon become loose, see fig. in the center.
- The terminals can either be attached to the contacts with screws or be made integral with the contacts. The latter are more reliable. Before installing the socket, the first ones must be sorted out, lubricated the mating parts with conductive paste (cold solder) and tightened tightly with screws.
- The terminals on the wire side can be either screw or “brush brushes” into which the bare ends of the wires are simply inserted. The latter are very reliable, but do not allow for overhauling: the wire has to be pulled out with force, and the brush breaks. Screw terminals are lubricated with cold solder before inserting wires.
Types of sockets
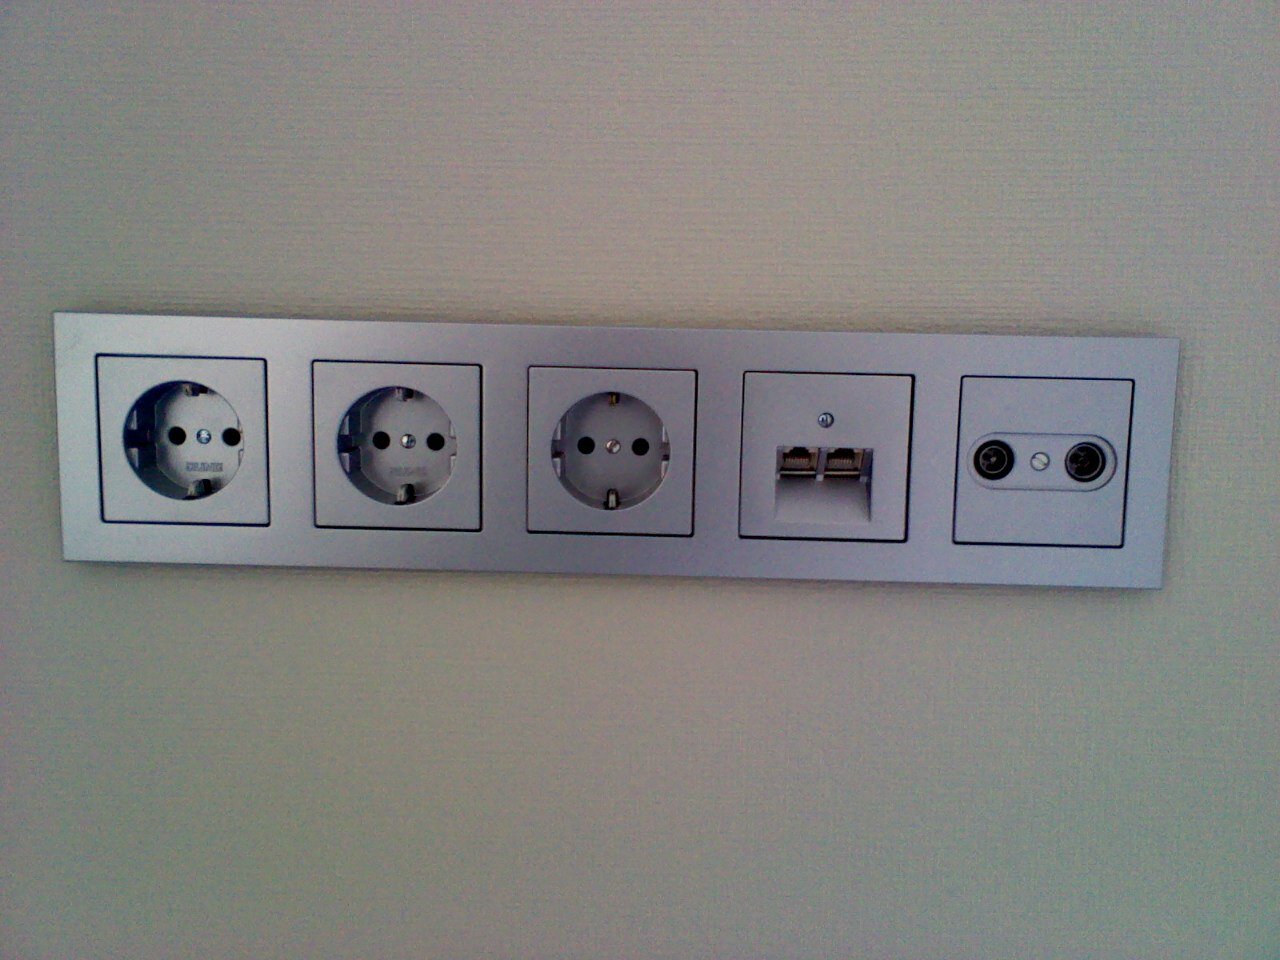
Sockets with switches can be either single or combined into one structure with a common cover and socket box, see fig. left. The last one is the socket module. Several sockets installed on the wall in a row are called a socket group, in Fig. in the center. The switch, either as part of a module or as a separate one, is installed in a regular socket box.

The socket module may also include signal sockets (telephone, television, Internet), a timer, “foolproof” that turns off the socket when touching the phase contact, etc. Complex socket modules are most often included in electrical wiring boxes, in Fig. right.
Special mention should be made about the boxes. According to PTB, PUE and electromagnetic compatibility requirements, power and signal wires should not touch or cross each other, therefore electrical boxes are sectioned, and each section goes to its own terminals. When laying cables in a box, you need to follow the symbols in the sections so that you don’t rearrange everything later.
Lifesaver socket

A simple but very useful invention is a modern overhead socket, see fig. It allows:
- Replace the socket when the socket box is “completely dead” without disturbing the decorative covering of the wall: the cover completely covers the mounting plate.
- Replace old sockets with Euro sockets without changing the socket box or touching the walls.
- Place sockets on the wall sheathing along the sheathing, without checking the distance to the base wall.
- Complete with a special socket box, see below, install sockets in plasterboard sheathing with increased strength and reliability.
- With it, you can install fireproof sockets in wooden walls - even if an arc occurs, it first closes through the metal clip, without spreading further along the wires. The protection is triggered, or the wires burn out in the terminals before the fire reaches the tree.
Dangerous curiosity

In terms of consumer qualities, the exact opposite of the overhead socket is the retractable socket, which is steadily gaining popularity in Europe, see fig. They justify it by design: they say that the “blade” of a pushed-in socket does not spoil the interior. But, excuse me, an outlet into which nothing is ever plugged in is not needed at all, and a module pulled out from the wall or floor (yes, yes, they do that too!) creates an injury, electrical and fire hazard. There are more than enough reports of incidents caused by retractable sockets, but marketers, relying on consumer psychology, still successfully promote this “achievement” on the market.
Rules and regulations

Modern standards for the installation of household electrical fittings are quite liberal: the installation height of the switch is 160 cm from the floor, and sockets of 80 cm are no longer required, but only recommended. It is widespread to install socket modules 30 cm from the floor, see fig. Unofficially, the minimum height is considered to be 25 cm; with less, the likelihood of an accident during wet cleaning increases sharply. Reducing the installation height of sockets does not raise objections from electricians if the apartment has. The number of outlets in the apartment is not limited in any way.
In a nursery, on the contrary, it is recommended to install socket modules with light switches and touch protection at 150-170 cm from the floor. In this case, the little ones will not be able to reach them, and those who are older and already know how to handle electricity will be less tempted to click or poke to no avail - to pull their hand high.
However, some rules for terminating wires in sockets should still be followed. They greatly reduce the likelihood of an accident and make troubleshooting easier.
Firstly, it is customary for electricians to have the phase contact located closer to the window. If the position of the socket relative to the window is ambiguous, the phase should be on the left when facing the socket.

Secondly, it is impossible to insert wires of a minimum length directly into the terminals: due to thermal deformations of the wall and cable, the contacts are broken over time, and it will be very difficult to reliably reconnect short ends into a new socket. The socket must be connected by passing the cable under the terminal block (there is always a gap there specifically for this purpose), as shown in the figure. If the cable is round and too thick, you need to remove a piece of its sheath and run the wires in a row.
Thirdly, when wiring the block, the zero and protection must be on one side, and the phase on the opposite side. This is also shown in the figure.
Fourthly, two wires can be inserted into each terminal, but this is done only for the electrical connection of sockets in groups and modules. In no case should you power stationary lamps, remote groups and modules, not to mention “snot-powered” consumers, through sockets, see next. rice.

Here the question arises: how much will such wiring cost if a separate branch is pulled from the meter to each group? Just a socket module with a built-in terminal block, one per room or less. Such modules are also called modules with mini-shields. When wiring around the room from a mini-panel, statistics do not show an increase in accident rates. The bottom line is that power should be consumed at the point of connection, and not go far through the outlet terminal.

Finally, about such an operation as installing a switch. Technically, the switch is installed in the same socket box using the same methods as the socket, see below. But when installing a single-pole switch, it must be connected to the PHASE wire; Including a zero in the gap is unacceptable! Phase and neutral in a two-pole switch must be located uniformly with the sockets (phase is on the left).
In any case, you need to run a cable loop to the switch, and leave the zero and protection uncut, in Fig. left. In order to save cables, it is unacceptable to connect random wires to the switch, and leave the cut phase of the cable in the distribution box (dose) under the ceiling, as was done before, in Fig. right.
Tools and materials
To work with electrical fittings in an apartment, you will need the following tools and materials:
- Phase indicator (phase indicator).
- Screwdrivers 4-6 mm, straight and Phillips.
- Pliers with insulating handles.
- Side cutters No. 1 or No. 2.
- Assembly knife.
- Vinyl and cotton insulating tape.
- To transfer sockets - C-type insulating caps (not for signal connectors, see the figure below in the center) and conductive paste (cold solder).
- Silicone sealant in the smallest packaging; consumption - grams.
- To install new or move sockets, use an electric drill.
- To install sockets on drywall, use a 67 mm core drill or a 32 mm spade drill, depending on the installation method, see below.
- For installation on concrete - a concrete crown with a diameter of 70-75 mm and a height of 45 mm.
- Small drills, dowels for flea screws.
- For beginners - an insulation stripper.
Note: with the operating methods described below, electrical tape may be needed as a damper, for winding cable sections passing through holes, and not as insulation.
We need to talk specifically about removing insulation and other work operations.
Working methods
Removing insulation
Professionals remove insulation from wires this way: using side cutters, holding them with the back of the jaws towards the end of the wire, bite the insulation without bringing the blade of the jaws to the copper, and pull. The main thing here is to become skilled enough to become automatic. The author of these lines, while still a young cable technician of the IV category, once, as a bet, stripped a five hundred telephone cable (500 pairs, 1000 wires) in this way. Examination by opponents under a microscope did not reveal a single bite of solid copper wires of 0.32 mm. The worst thing happened to everyone afterwards: they bet on a box of vodka.
However, for a beginner, bites from side cutters are the rule rather than the exception. The bite becomes a source of corrosion, local heating at maximum load and often leads to malfunctions. Therefore, to begin with, it is better to get an insulation stripper, especially since it allows you to remove the cable sheath without bending it or cutting it with a knife.

There are many types of insulation strippers, manual and automatic. For manual work, pullers-tongs (in the figure on the left) and pullers-pincers (on the right in the figure) are most often used. The pliers need to be adjusted to fit the wire, which slows down the work, but for a beginner they are preferable:
- The diameter of the current-carrying conductor and the thickness of the insulation of the wires, even from leading manufacturers, differ somewhat: today's pros use pliers to actually work like side cutters, without cutting to ensure guarantee. Precise adjustment with a screw allows you to 100% avoid snags on a wire from one coil.
- The tongs need to be pulled with a longitudinal, rather than lateral, movement like pliers, which is much more convenient without skill, especially if the ends are short.
- Using pliers, turning the adjusting screw all the way out, you can cut the cable.
- Tongs are cheaper than pliers.
Wire splicing
When moving sockets (see below), you will most likely have to extend the cable. Modern methods strongly do not recommend making splices of wires, but do not rip off the cladding or ditch the wall for the sake of one socket!
Electrical wires are twisted together in this way:
- Remove 4-5 cm of insulation from the ends of the wires.
- Both wires are taken, without pinching too much, with duckbills, holding them in the left hand, by insulated areas.
- The wires should be parallel, close to each other.
- The insulation cuts must match.
- Using pliers in the right hand, twist the veins clockwise.
- The twist is again passed through with sliding pliers under light pressure.
- Using the end of a flathead screwdriver, apply cold solder to the twist.
- Quickly, while the paste has not set, put on the insulating cap, also turning clockwise.
- After the solder has hardened, silicone is squeezed into the socket of the cap.
We work with fittings
Replacing a burnt one
In this case, the best option is to install a surface-mounted socket in an old socket box, especially since the socket blocks are not sold separately, and the old socket box may have become damaged by time.
Transfer

Moving sockets to a new location during the process of wall covering comes down to extending the cable to the required length and laying it in the sheathing before the actual covering begins. Splicing of wires is carried out as described above. The cable is run parallel to the floor at the height of the old outlet, secured to the wall with clamps. The new outlet is mounted either on the sheathing or on the base wall, see below. It is important to leave a fairly long cable tail, at least 15 cm, in the new location; this will simplify the installation of the socket.
If the walls are finished, and the socket needs to be “pulled out” from behind the cabinet, and even sockets need to be added, then the best option is a corner modular block, see fig. It can be installed on standard mounts in a corner, under a window sill or in any suitable place. The unit is simply plugged into the old socket permanently.
But before blocking the old socket, it is necessary to go through: completely disassemble it, clean all internal contacts (say, contact lamellas with a terminal) and reassemble it using cold solder. Before inserting wires into them, also lubricate the terminals with solder. Immediately before turning on the unit, remove the socket cover, lubricate the contact lamellas with solder, put on the cover, turn on the unit and do not touch it again. If you follow these rules, the old socket will never remind you of itself.
Installation on concrete
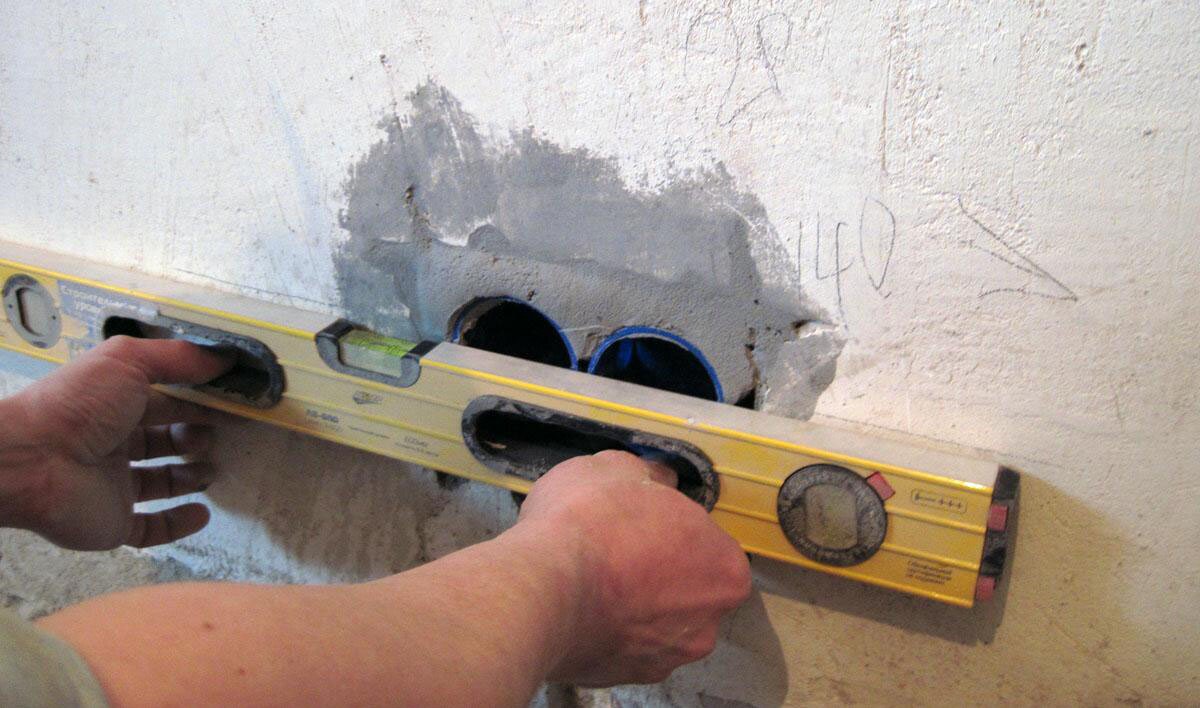
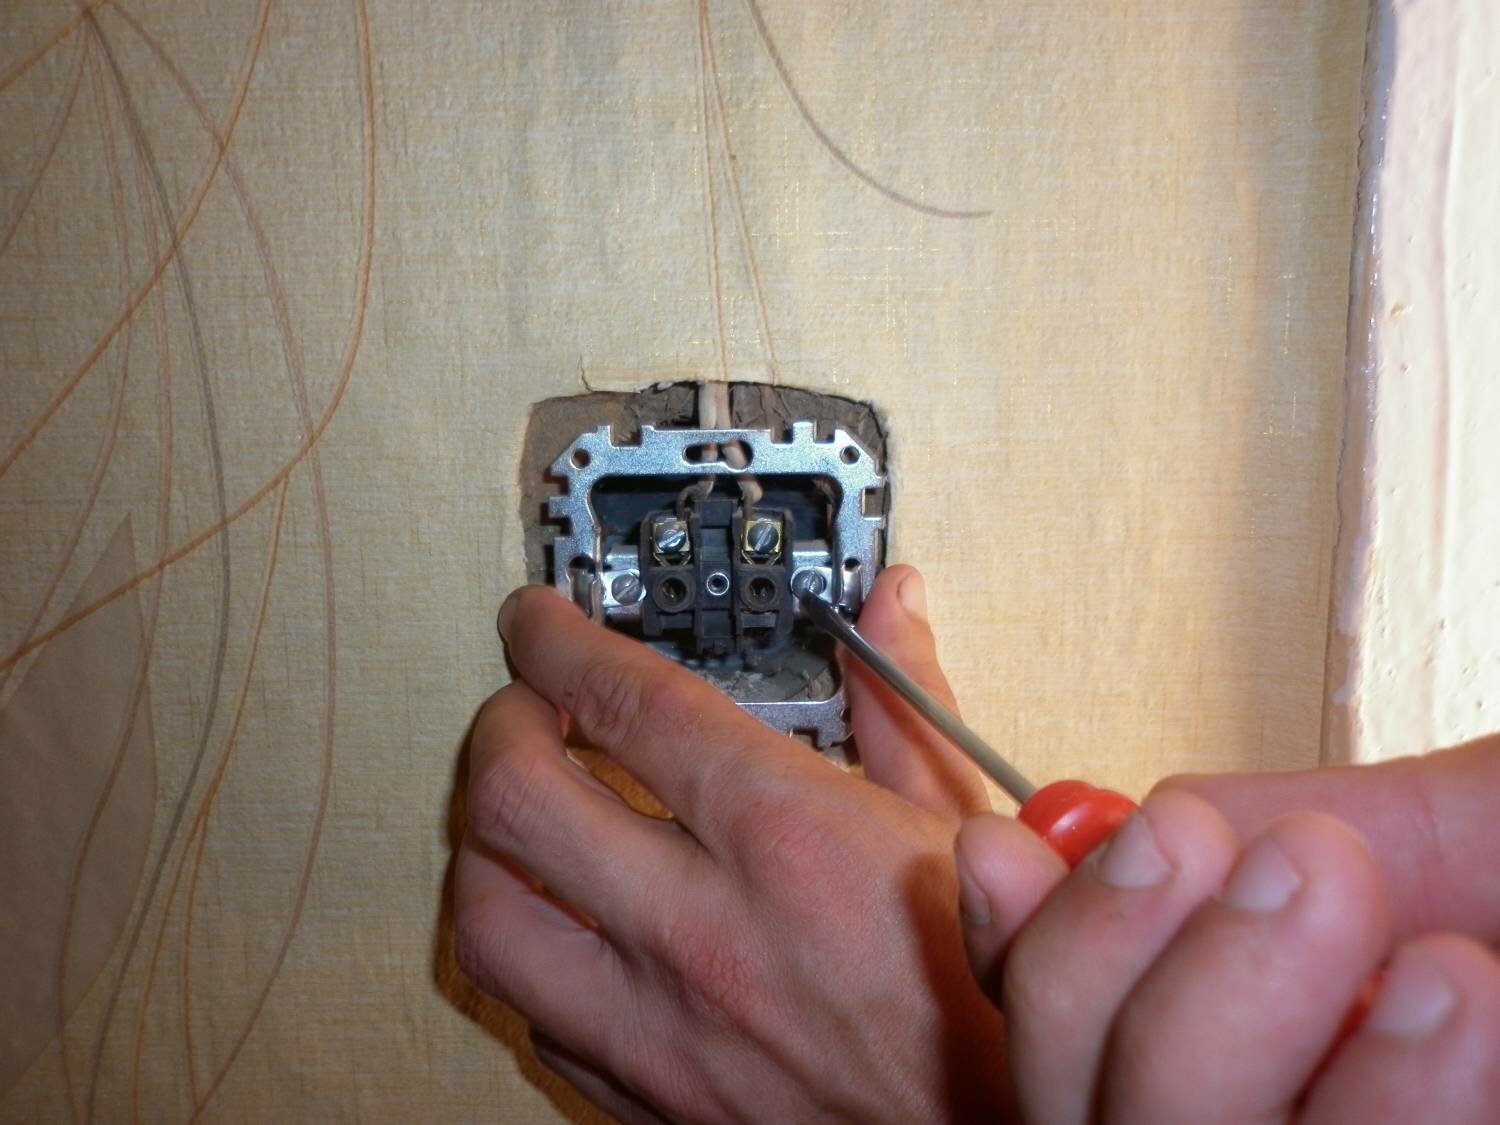
To install a socket in a concrete wall, it is important to know the thickness of the future finish: the edge of the socket should be flush with the wall, plus or minus 1.5 mm. The standard height of the socket box is 40 or 44 mm. For a “puffy” finish, you may need a plywood cushion, on the left in Fig. It is advisable to secure the socket box with self-tapping screws and dowels. If it does not have mounting holes, you can drill them yourself, but the line of mounting holes should be perpendicular to the line of contacts, in Fig. – on the right!

If the wall is already finished, or the finish will be thinner, you need to use a crown to select a hole with a reserve in diameter and depth for the socket box. Before installing the socket box, the hole is filled with alabaster or gypsum mortar. Then they quickly level the socket box and, until the solution has set, wrap a couple of “fleas” in it for reliability, see fig. in the center.
It is convenient to align the socket box using a template made of plywood or boards as thick as the finishing height, with a hole along the diameter of the socket box. But the most important thing is that before installing the socket box, do not forget to thread the cable into it! Murphy's laws, you know.
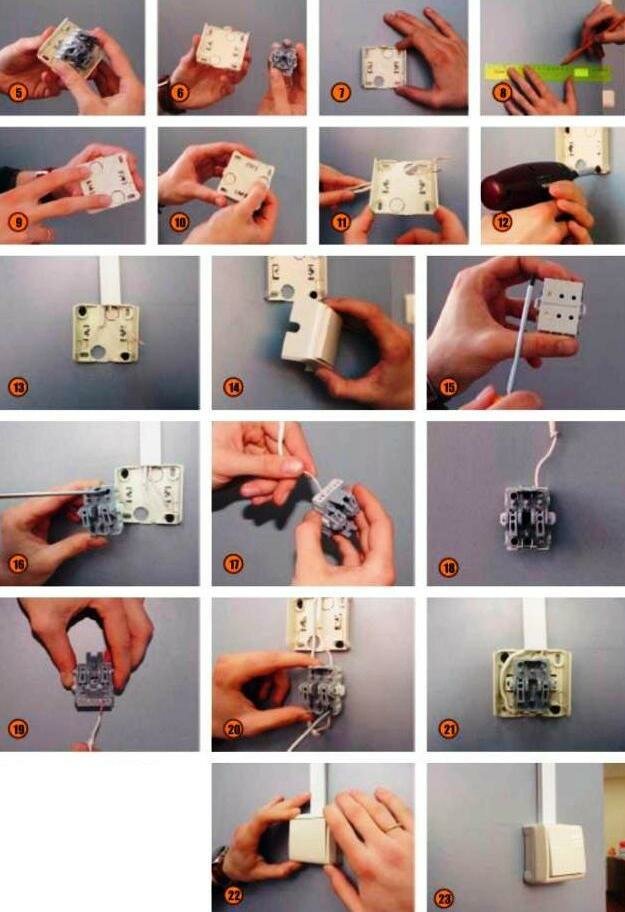
Installation in drywall
Installation of the socket in drywall is done using special sockets for drywall with sliding (on the left in the figure) or rotating (in the center there) fixing stops.

The technology is elementary:
- A hole of 67 mm is drilled using a crown.
- They bring the cable into it and pull it into the socket box.
- Put the socket box in place.
- If the stops are sliding, pull the retaining tape as far as it will go and bite off the excess.
- If the stops are rotary, screw in the screws pulling them until they stop; The paws will turn themselves as they should.
- They strip the wires, insert them into the terminals, place the block in the socket box until it stops and, turning one by one, tighten the screws of the block's legs.
- Place the cover and check the fit to the wall; If necessary, loosen the screws of the pad legs and adjust it.

If the sheet of drywall is not yet on the wall, there are overhead sockets and a socket box with swivel legs, you can secure the sockets more securely (see figure on the right):
- Use a pen and a jigsaw to select a hole for the metal socket clip.
- Drill holes for the self-tapping screws of the socket box legs.
- Pull the clip with the socket box into a bag; The socket box stops are not needed.
- Install the socket block and cover.
With the described method of installing sockets in drywall, a large space is created under the holder of the block, which makes it easier to terminate the cable and its possible extension in the future.
With an abundance of household appliances and a variety of lighting fixtures, the need to increase the number of sockets and switches in a house or apartment has increased sharply. In the current apartment of 100 sq. m there are on average a hundred electrical points. The question of their rational location and installation is far from idle and requires knowledge of regulatory documentation. When starting transformations in a house or apartment, it is useful to familiarize yourself with the provisions of the laws and technical regulations for the installation of electrical appliances.
Technical requirements for installing sockets and switches
Placements inside and outside residential premises are selected based on 3 main criteria:
- safety;
- functional convenience;
- aesthetic appeal.
Security includes 3 points:
- Natural gas. Poorly tightened contacts lead to burnout of the terminals. The principle of operation of the switch is such that when the lamp (or other consumer) is turned on, the power circuit is closed. This happens due to the movement of the contact pair. At this moment, a micro spark jumps between the contacts, capable of igniting the gas. If there is a leak in the gas supply, the switch may cause a fire or explosion. The same thing happens if the switch or socket is faulty. Poor connection of wires supplying voltage to the device, loose contacts, etc., lead to sparking at the terminals. It is for this reason that in apartments with gas stoves and water heaters, the light switch is placed outside the kitchen. Usually it is installed in a corridor separated from the kitchen by doors. With regard to sockets, a different logic applies. The gas is lighter than air and therefore primarily accumulates in the upper part of the room. Therefore, it is better to place the outlet in the kitchen closer to the floor, in which case the likelihood of a gas ignition from a spark is lower.
- Water.
 Water and electricity are not compatible. Any liquid is an excellent conductor of current. If water gets between opposite contacts, a short circuit occurs between them. But that's not the worst thing. In the event of a short circuit, the circuit breakers will trip and the electricity will be cut off. It is much worse if one of the contacts is wet - voltage is transmitted through the water in all “wet” directions. If a person (or animal) touches the moisture, he will receive an electric shock. In the event of a leak from water supply (or water heating) systems, puddles formed on the floor become a potential risk area. Electric shock is fraught with danger to human health - there are known cases of cardiac arrest and the occurrence of a number of other neurological diseases. Therefore, the location of sockets is planned taking into account the possibility of flooding. Placing them at a safe distance from the floor, as well as other sources of water in the house, has a reasonable argument.
 - Mechanical damage.
 Switch falling out due to mechanical damage The vast majority of sockets and switches are made of plastic. Plastic is an excellent dielectric and reliably protects a person from contact with current. Its only weak point is fragility. A strong blow can damage the body of the device with all the ensuing troubles - failure, exposure of contacts, etc. Therefore, their placement is planned in such a way as to minimize the threat of mechanical damage. You need to be especially careful about this when wiring externally, when the housing of the socket and switch are completely outside the wall.
The ease of use factor cannot be overestimated. A person uses both switches and sockets many times a day. If discomfort is experienced, the device must be reinstalled without shelving it. It is also important to remember that switches and sockets must be easily accessible in extreme situations. They should not be cluttered with furniture or installed in hard-to-reach places.
Video: inconvenient location of sockets and switches
Any interior is arranged according to the taste and aesthetic preferences of the inhabitants of the home. Sockets and switches are also part of the interior. Therefore, their “artistic” design has the right to exist. You can always choose the color, size and shape. Modern industry offers a wide and varied range of power supply and lighting control devices. With the help of imagination and fantasy, you can create unusual design solutions. But not at the expense of safety and ease of use!
 Decorative design of the switch
 It has been noticed that dogs avoid outlets and try to stay away from them. At the same time, cats, on the contrary, are favorable to electric fields and often rest on refrigerators, televisions and computers.
Safety precautions for DIY installation
During installation work, safety precautions must be observed.
On a home renovation scale, it consists of three basic rules:

Preparation for installation, proper design
Installation and reinstallation begins with a detailed plan. It reflects the exact location of each device, dimensions and quantity. When developing a project, the location of power supply lines and distribution boxes should be taken into account. Select the correct height from the floor level. The more detailed the plan and the better it is tied to the “terrain”, the less costs will be required for its implementation. Practice has shown that a well-thought-out project saves up to 20% of money and up to 30% of time.
Video: sockets in the kitchen
In order for the project to fully correspond to the real picture, it must reflect:
- Door and window openings.
- Location of furniture, household appliances and computer network.
- High-risk areas: water supply and gas pipelines.
It is very important to choose the correct cross-section of current-carrying cables. The total power of consumers should not exceed the throughput of the conductor. Sockets and switches are selected factory-made and with nominal characteristics corresponding to the network parameters. (230 V and 6 A).
In children's rooms, it is advisable to install sockets with automatic closing curtains. In the bathrooms there are devices with an IP 66 index (an indicator of maximum moisture resistance). Outside the house, it is recommended to use sockets equipped with a cover.
 Sockets equipped with additional protective equipment are installed
 You should also follow simple rules:
- The distance between switches and utility systems is at least 0.5 m.
- The distance from the kitchen sink is at least 0.8 m.
- The gap between the switch and the door (window) frame is from 0.1 m.
- For stationary electrical appliances (TV, washing machine, dishwasher, computer), separate sockets are installed, located in close proximity to them.
For outdoor location
External wiring has a number of undeniable advantages. First of all, this is the accessibility of the entire power line and the relative ease of installation. For this type of wiring, there is no need to ditch the walls and install socket boxes at each point. In case of reformatting of the wiring, all lines can be quickly and easily dismantled without disturbing the appearance. Also easy to reassemble. The use of cable channels allows you to mobilely add new lines if necessary.
 Installation of external wiring using cable channels
 Cable routing in the form of twisted pairs on insulators gives the interior an originality in a “retro” style.
 Laying cables in the form of twisted pairs
 However, some characteristics unfavorably distinguish external wiring from hidden wiring. This is a greater risk of mechanical damage and contact with conductive (or flammable) wall surfaces. Therefore, additional protective measures are provided during installation. For example, each point must be equipped with a substrate made of dielectric material. And the distance of the wire from the wall should not be less than 10 mm. When choosing switches and sockets, you should give preference to those devices that are made of high-quality plastic and have a thick-walled body.
For hidden location
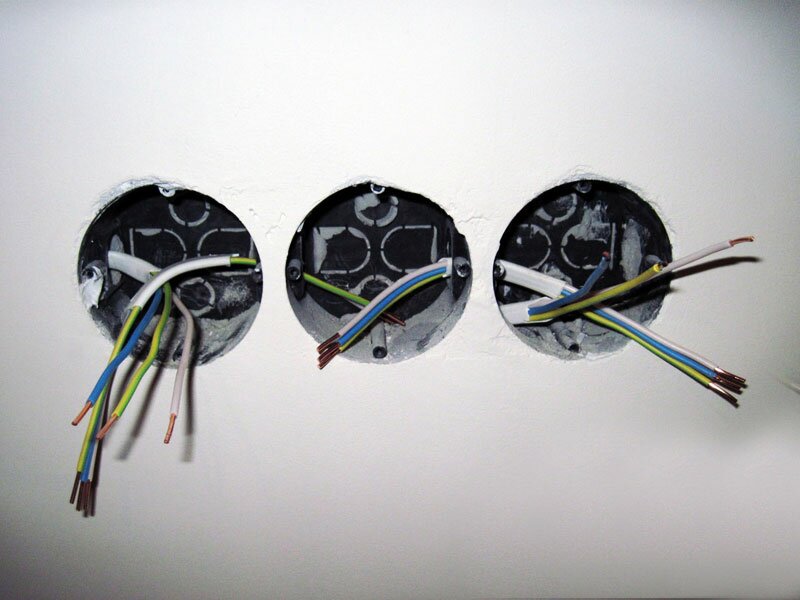
When installing hidden wiring, the risks of mechanical damage are much lower. The mechanisms are installed inside the wall, the cables are “hidden” in specially prepared channels - grooves. Such work, of course, is more expensive and time-consuming, but it more than pays off in reliability and compact appearance. A prerequisite for installing a modern switch or socket is a socket box, which is a round or rectangular plastic box.
 Fixing the socket box with gypsum mortar
 The socket box is fixed into the thickness of the wall using cement or gypsum mortar. When installing, you should pay attention to the correct fit of the box; the edges of the socket box should not rise above the plane of the wall. To prevent the solution from getting into the interior of the socket box during installation, it is recommended to seal the holes with tape.
Established standards for location
At what level from the floor should sockets and switches be installed? There are significant disagreements among non-professionals on this matter, but the dispute is easily resolved by referring to regulatory documents.
Installation height according to PUE
Rules for installing electrical appliances are the main document for guidance when installing a home network.
 Excerpt from the Rules for Installing Electrical Appliances
 Requirements for placement according to GOST and SP
GOST R50571.11–96 focuses on installing switches and sockets in the bathroom at a distance of at least 60 cm from the shower door.
 Location of sockets in bathrooms
 In the Code of Rules (SP) 31–110–2003. The following information is provided.
 Quote from Code of Practice 31–110–2003
 Thus, it becomes clear that the installation height of sockets and switches in a residential area is not limited by strict rules.
Height according to “European standard”
Strictly speaking, the term "Eurostandard" is not a real standard. Rather, it denotes a certain type of design in which electrical equipment is placed in a certain way. Moreover, in fact, this type of installation is of North American origin. But since today the lion’s share of household appliances in our homes are imported, convenience for the sake of sockets is placed precisely according to the rules of the “European standard”.
 Parameters for placing electrical devices according to the “European standard”
 This is also due to the fact that Western manufacturers produce their products with short power cords. For example, most refrigerators cannot be connected to an outlet located 1 m above the floor. And using an extension cord comes with additional costs and safety risks. By American standards, it is more convenient to place switches at a level of 90 cm from the floor. This allows you to control the lighting without raising your hands. Sockets are installed at a height of 30–40 cm from the floor. In addition, a horizontal distance between sockets of 180 cm is provided.
Nuances of requirements in various institutions.
Some organizations engaged in specific activities are prescribed individual rules for the placement of switches and sockets.
- In nurseries, kindergartens, schools and summer camps, the height of switches is determined at 1.8 m. The same level is determined for sockets.
- In public catering and retail establishments, sockets are installed at a height of 1.3 m. Automatic switches are installed at a height of 1.3 - 1.6 m.
- It is prohibited to install light switches in buildings that are potentially explosive (including in kitchens with gas stoves or water heaters).
DIY installation height of switches and sockets in an apartment
Wiring in the kitchen

Sockets and switches in the living room and bedroom
- In the living room there is an outlet for powering the TV at a height of 1.3 m from the floor. At the same level it is customary to install an outlet for connecting a router. Low-current cables for the computer network and television antenna are also brought here.
 Location of the socket block at a height of 1.3 m from the floor level
 - Several sockets are placed near the desk. One block, consisting of 2 or 3 sockets, is located at a level of 30 cm from the floor. And the second block is at a height of 15 cm from the tabletop level, for connecting a table lamp or charging a laptop (phone, tablet).
 The socket block is installed on an open wall space
 - The main chandelier or spotlights on the ceiling are controlled by a switch located at the entrance to the living room. As a rule, a switch with several keys is installed here - this allows you to vary the lighting intensity.
- The bedroom is equipped with one general switch at the entrance and two switches on both sides of the double bed. They also install an outlet there so that you can charge your phone, connect an electronic alarm clock, etc. without getting out of bed. Convenient height - 0.7 m from the floor.
 Sockets are installed at a height of 0.7 m from the floor
Electrical power points in the bathroom
Due to high humidity and possible splashing, it is recommended to connect all sockets in the bathroom through an RCD. The distance from the washbasin and bathtub (shower stall) to the socket of less than 60 cm is prohibited.
- washing machine - 1 m.;
- water heating boiler - 1.8 m;
- additional power point for a razor or hair dryer - 1.1 m.
 In the bathroom it is recommended to install sockets with index IP 66
 Light switches are installed outside, at the entrance to the bathroom.
Video: sockets in the kitchen
Carrying out work on replacing and moving electrical points independently involves direct contact with high voltage currents. Even weak electric shocks sometimes lead to cardiac arrest or cause nervous disorders. Before starting work, you need to turn off the power supply to the apartment.
In this article we will talk to you about junction boxes, whether they are needed, whether they are so important in wiring and whether it is possible to do without them altogether. We use distribution boxes to provide connections and branches in the lines. But access to them must be ensured. What should we do if we don’t want to spoil the interior with the covers of junction boxes? There is always a way out of the situation. We will continue our topic about him.
First of all, let's remember from the previous article what they are and what function they perform in the installation of electrical wiring. It's very simple. In the distribution box we carry out cable switching. Most connections and branches are made in junction boxes, at least in 95% of cases this is done in them. Let's say there are several outlets in our room: for a TV, for a desktop and a household outlet for a vacuum cleaner. In order to distribute electrical wiring to these sockets located in different parts of the room, we need to make branches from the power cable coming from the switchboard. Coming from the switchboard, it can go into a TV socket, then into a desktop socket, and then from there into a household socket for a vacuum cleaner. You can do it in different ways. But in any case, we need to make a connection in order to supply power to each of the outlets.
What should we do in this case? First, let's figure out schematically how we can do all this. The most obvious and simplest option is when we run our own cable in the distribution box for each outlet.

What is good about this method? We have one distribution box, we made all the connections in it, we need to make access to only one distribution box. But in this case the largest amount of cable will be needed.
You can do the following

In this case, if the sockets are spaced far enough from each other and we feel sorry for the cable, we make two junction boxes. But access must already be provided to each of them. We now have two places with switching, and it is advisable to make them as small as possible.
Both of the above methods have the right to life and are practiced all the time for various reasons. Everyone justifies their work in their own way. If it is high quality, you can do it using any of the methods described above.  The main thing is not to forget that according to the rules, any distribution box must be accessible at any time. It doesn’t matter whether it’s behind a closet or just in plain sight – there should always be access. What if you have 10 of them per room, and you have 5 rooms? Cute little circles all over the apartment. Of course, you can draw emoticons on them and enjoy life, but this is not the best possible solution. Especially on top of expensive and beautiful Venetian plaster, no matter how you style them, you can still see that someone hid something in the wall.
And we only touched on the socket groups, but we also have lighting, which also cannot be dealt with without switching. We need to connect the chandelier, the spots, and the LED strip, all from one place, with a few keys. And the lighting group rarely ends in one room, which means the power cable will move further, to the next room.

It turns out that even in lighting you can’t do without switching wires, and where to do them if not in a distribution box designed for this purpose.
In the socket group, we can do it simpler and run all our electrical wiring in a loop through all the sockets, but again, the standards will allow us to do this with some deviations. All connections must be made efficiently and in accordance with the requirements, and here we again come up against the junction box. Where else if not there we can correctly connect all this?
When doing projects for electrical installation in apartments, I try to build the electrical network in such a way that there is a minimum possible switching. The best option was and remains one in which there are none at all, but it is rarely achievable in our time. A growing number of consumers are dictating their own rules. Even near a coffee table near the bed, many people want to see at least two sockets, and this is only on one side of the bed. I'm not even talking about computer tables and the kitchen work surface, where the number of sockets in one group often exceeds 8-10 pieces. In such conditions, it is almost impossible to do without desoldering. The best option would be when the cable came out of the panel and ended with a socket, but this can be done in most cases only in groups that power, for example, an air conditioner. Everything is simple here - the cable came out of the shield, came into the air conditioner terminal block and that’s it. There are no additional connections. Perfect, what can I say. But we will not lay our own cable from the shield to each socket. Then our shield will claim a serious role in the interior. But such consumers as underfloor heating, air conditioning, washing machine, oven, stove, boiler deserve an individual cable and a circuit breaker in the switchboard. But what to do with everything else? Let's figure it out. After all, we can’t do without switching.
 So the sockets. We can send them out in a trail. What is this type of switching? Everything is very simple, the power cable goes into the first socket, disconnects in it, then into the next one, and so on until there are no more sockets in the group. It is worth noting, however, that the fewer of them in the group, the better. When designing an electrical network, these points must be taken into account and a happy medium must be found in the number of groups. With experience, this process is no longer difficult. So the train.
Everything seems to be simple, but at the same time there are subtleties and rules. Most sockets have two groups of contacts: phase input, phase output, N input, N output and PE input, PE output. It would seem that everything is simple and we can safely disconnect our sockets using the existing contacts. But! According to clause 1.7.144 of the electrical installation rules for PE (grounding conductor), we must make a separate branch. This means that we cannot simply stick a PE (ground conductor) into the input and output. The PE core must be unbroken throughout the entire length of our cable. If it is switched, it is either in a non-dismountable way, or in such a way that it can only be disassembled with a special tool. Why such precautions? PE is a protective conductor; it protects us from damage by dangerous voltage, which in the event of a malfunction may appear on the body of the device (socket, switchboard, etc.). Each PE conductor must and must be connected strictly individually. Each conductor has a separate bolt or clamp. If the PE conductor is not connected well, it may break and the whole meaning of this conductor will be lost. Devices connected after the broken PE conductor are no longer protected by the RCD and can give you an electric shock. That is why the connection of the PE conductor must be done most carefully.
In the vastness of our Internet, you can find a large number of disputes about how to make such connections. There are theorists, there are practitioners, there are those who are simply silent, silent because there is nothing to say or what is said can greatly demote them in rank... To be honest, many electricians turn a blind eye to such moments and carry out the installation as necessary. But that's on their conscience.
What is the right thing to do? Until a certain point, I believed that if we connect high-quality electrical installation products, including sockets, then we can kind of use the terminal block of the sockets themselves and not bother with additional connections. Why did you think that? The terminal group is made at the factory, the manufacturer is well-known, the quality of the products is high, which means the socket itself is designed for this type of connection. But not every customer purchased sockets, the quality of which left no shadow of doubt. Therefore, we had to look for different ways to carry out installation with maximum quality. On the one hand, there are a lot of options, especially if you look at how your colleagues in the shop are perverted. They come up with everything they can to make PE inseparable, no matter how hard they try. As a result, the process becomes more like dancing with a tambourine rather than electrical installation. I looked at all this shamanism and thought that the best way would be to simply adopt the proven method of wiring in junction boxes. Ultimately, one goal was pursued - to get rid of junction boxes. So we just move them to the socket boxes and voila. Customers are satisfied and your soul is at peace for quality electrical installations. Recently, we hardly use distribution boxes in apartments.
What a connection method that smoothly transferred even to seemingly high-quality sockets. After all, it was possible to turn it off like that. But let everything be the same, equally reliable. Ultimately, the manufacturer is responsible for the product, and the electrician is responsible for the quality of the work performed. The areas of responsibility are divided and we go our own way.
So the sockets. We decided that we could turn them off directly in the socket boxes. And even in this we have options and a small flight of imagination, where would we be without it within the framework of the PUE. There are several options for such a connection. First, I’ll focus on the one I prefer to turn off myself.

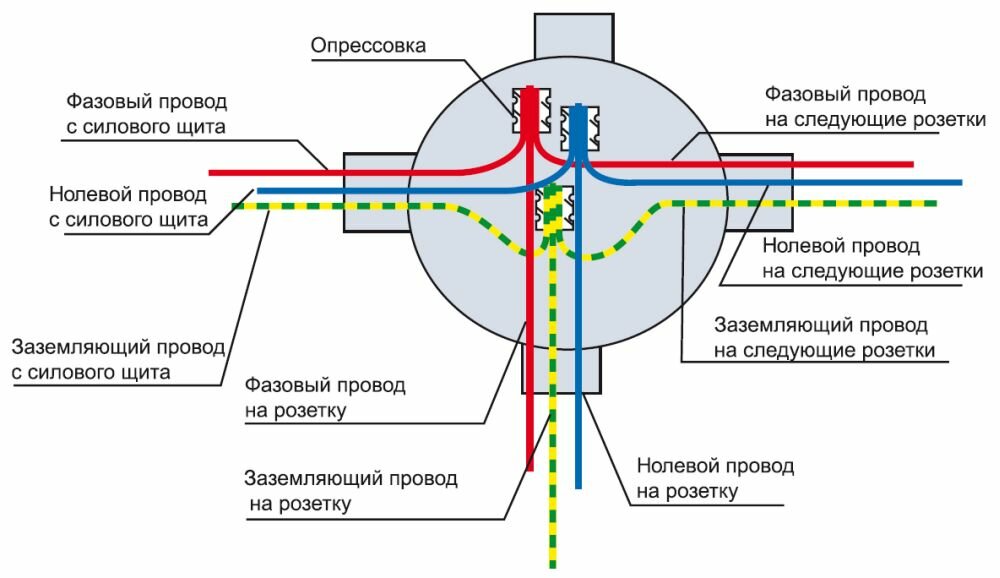
We have three socket boxes. Let’s imagine that they are installed in the wall, we have our imagination, and it’s more convenient for me at the table to show you how it all happens. We prefer to lay the routes so that the incoming and outgoing power cables come into the middle socket box. This has been the case for a long time, and the assistants are too lazy to retrain, but it is very difficult to make a mistake in this option. So, the incoming and outgoing cables go into the middle socket box. At the time of installation, we leave a good margin, and during the disconnection process we cut off the excess and leave 10 - 12. This is usually enough for me for comfortable disconnection and laying them down afterwards is not a problem. We take the middle socket box with increased depth, because almost all walls in thickness allow it to be installed without problems. Someone will say that digging such depth into concrete is not sugar. I agree, but otherwise, in addition to the socket box, you will have to chisel the concrete at a height under the junction box, so don’t whine, we’ll install a recessed one. We need it in order to connect 5 cables together: incoming power, outgoing power, right socket, left socket, middle socket. It sounds scary, but as always, only for the first time. Then it’s easier, just take it and do it.

 We connect everything as expected. In distribution boxes for sockets, everything couldn’t be simpler - like your daughter’s toys, phase to phase, PE to PE, N to N. It looks like a fairly massive structure, but after making two or three such socket boxes, you will learn how to carefully place everything at the bottom of the socket box without problems. We make all connections using GML sleeves. Depending on the number of cores that need to be connected, we select the size of the sleeves. We compress it with a hydraulic hand press. We wanted to buy a manual press from the same KVT, but we’re not looking for any good – the existing one presses simply wonderfully.
A small footnote. When using high-quality fittings (sockets), you don’t have to worry so much and don’t dilute the phase, N and PE, for each socket by crimping them with sleeves. It is quite enough to test and connect PE to each socket. We basically do it as shown in the photo. That’s how it happened, that’s how it grew together. Do it anyway, so why do it not well, but very well?
If there is a group of 4 sockets, then in the outer one, in one of the socket boxes, we repeat the procedure, that is, we press the one that came from the middle one, the one that goes into the fourth socket box and do not forget to add for the socket box in which we make the connection.

Heat shrinkage is everything. Those who are not too lazy can use duct tape. And as a result, we have a socket box in which the ends are completely soldered into three sockets. Everything fit perfectly on the bottom and there was space left as in a standard socket box. Next, we simply install the sockets.
My beloved Schneider was not in the warehouse and the question “Who will follow Schneider” quietly hung in the air. Our friendly company unanimously pretended to be silent and after 5 minutes something of quite acceptable quality was placed on my table. True, the terminal block is not screw-mounted, but ala VAGO. I don’t really like them, God only knows what the customer will plug into the socket, although it says 16 A on them. Well, for the sake of an example it doesn’t matter, let’s unplug them.


So, in general, three of our wonderful sockets have been removed, the cable fits well, there is quite a decent amount of space left - we could put in something else, but we won’t. Sockets vary in depth.

I would categorically not recommend making such connections on VAGO. I have nothing against VAGOs themselves specifically; I just think it would be more correct to use them for lighting groups. Although they hold the declared 20A, there are, firstly, a lot of fakes on the market, and secondly, I recommend installing 16A and no more on the socket group. Their operating current is more than 20A, it seems that everything is nearby and maybe you’ll be lucky, but it’s better not to take risks. As many argue on the Internet, you can’t add anything to such a wiring and it’s superfluous. Add it without any problems - we crown the hole for the socket box next to it, install it and connect it in the same order. There are no problems, but there is peace and healthy sleep.
Lighting is even easier, the cable is thinner, it’s easier to switch, it’s a fairy tale, not life. Let's look at the example of my favorite Schneider switch. I found only a two-key one. This means that in the proposed lighting group we will have two consumers, each with a key. Then everything is simple. Our ground is not switched and we put it under pressure, the same with the N conductor. We switch phases depending on which key will turn on what. The switch, as they say, is made for people. Everything is simple, competent, high quality. I mentioned earlier that in lighting groups we can use VAGO, and I myself use sleeves and sleeves. Yes, everything is for cartridges. But this is my IMHO, I like to sleep peacefully.


As you can see, there is more than enough space left. Believe me, all connection options fit and there is still room for a couple.

Well, we can sum up the results.
The switching option in socket boxes is more suitable for residential premises, where for many reasons distribution boxes are not relevant:
- Access to distribution boxes is necessary, but we cannot always ensure that the covers of the distribution boxes do not interfere with the appearance of the walls.
- again, due to the need for access, it is much more profitable for us to make the connection in the socket box. To access this switching, you just need to remove the socket.
- There are quite serious savings in the cable, because it goes from one group of sockets to another, and not in a star from one distribution box, and the cable route becomes more obvious.
- It’s not a problem to add sockets, reconnect the switch, inspect the connection (in case someone has trouble sleeping even with such wiring)
Wiring in socket boxes can be done using socket boxes of standard depth, as well as socket boxes of increased depth, which have recently become very popular in the market of installation products. We prefer to combine both standard and deep ones as needed. Sometimes situations arise when the wiring turns out to be quite large and even in a deep socket box there is no room left for an outlet. There is a very simple way out of this situation. We use the entire recessed socket box, subsequently simply inserting a plug into the frame. It turns out that the wiring was done and the design was not screwed up.
And then we live! For those who can’t wait, we unscrew the sockets and see how our sleeves or vags fare, and how others do. Because there is nothing else to do but use a high-quality electrical network without circles from junction boxes. That's all for today.
Electrical work is usually carried out during the construction of a new house and during major renovations. To correctly connect custom electrical fittings, it is necessary to clearly determine the installation height of switches and sockets. There are many official rules and unofficial advice on this matter.
Norms and standards for installing household electrical fittings
There are no uniform exact standards regulating the permissible height of placement of sockets and switches from the floor. Previously, the rules prescribed that switches and sockets should be located at a height of 1.6 and 0.8 meters from the floor, respectively.
Modern designers prefer European standards:
- socket modules – 0.3 meters from the floor;
- switches - 0.9 meters from the floor.
Some people find the old standards more convenient. The switch is in plain sight and is not blocked by furniture. Highly located sockets are safe for small children. And it’s more convenient to plug electrical appliances into such sockets - you don’t have to constantly bend over.

Switches installed according to the European standard are more convenient to use - you do not need to raise your hand high. And low-mounted sockets are suitable for devices that are constantly connected to the network. This will hide the wires.
The lower limit of the permissible height for placing an outlet is 25 centimeters from the floor. This is the minimum height to ensure safety during wet cleaning. The apartment can have an unlimited number of sockets.
To properly design and install sockets and switches, you can use simple rules:
- first you need to draw up a layout diagram of furniture and electrical appliances;
- All sockets should be marked on the diagram, leaving a reserve of several units;
- It is better to connect stationary equipment to sockets that are freely accessible, but it is advisable to hide them behind the devices themselves;
- on open areas of the walls it is necessary to place several sockets closer to the floor - this will help to use the vacuum cleaner in all rooms;
- the distance from the surface of the desk or bedside table to the socket should be about 20 centimeters;
- For the correct location of the switch, you need to decide in which direction the door will open: a convenient location of the device is near the doorway on the side of the door handle.
How to avoid installation difficulties
Many people associate installation of household electrical fittings with problems and a large number of nuances. Especially for those who have to deal with this issue for the first time.
Installation of devices in standard walls
Making mounting holes in ordinary walls is not easy. To do this, you need to use a hammer drill (impact drill) and a bit with carbide tips. The diameter of the hole should not exceed 5 centimeters. Otherwise, difficulties may arise with securing the plastic socket box.
The groove connects the distribution box and the mounting hole. To fix the electrical cable in it, a special adhesive substance is used - alabaster. The cross-section of wires for sockets is 2.5 squares and more, for switches - from 1.5 squares.
In order to connect wires made of different metals, you will need terminals. Twisting will lead to rapid oxidation of the metal, as a result of which current will stop passing through the wires.
The socket box should be securely fastened, all voids between the wall and the socket box should be eliminated.
Installation of household electrical fittings is carried out after finishing work.
How to install sockets in plasterboard ceilings
The processes for installing outlets in drywall and solid walls are similar. The only difference is in the sockets.
The socket boxes for drywall are equipped with special claws. They allow you to wedge the socket box in the prepared hole.
The recess for the socket box must clearly correspond to the size of the box. Otherwise, the structure will not hold well and will quickly fall out of the wall.
Installing sockets outside
This installation method is used along with hidden installation. Such electrical fittings have a slightly different design: there are places for fastenings on the body or inside it, and dowels or screws are used for fixing on the wall.
In all other respects, the connection process is similar to the internal installation process.
The final stage of installation of household electrical fittings
To install household electrical fittings, special clamps are used, which are available in all devices. An alternative option is to use the self-tapping screws included with the socket box.
Both of these methods are equally practical and convenient.
When connecting wires, the main thing is to prevent a short circuit. This problem can occur due to cable entanglement, and especially when installing electrical fittings in a block manner.
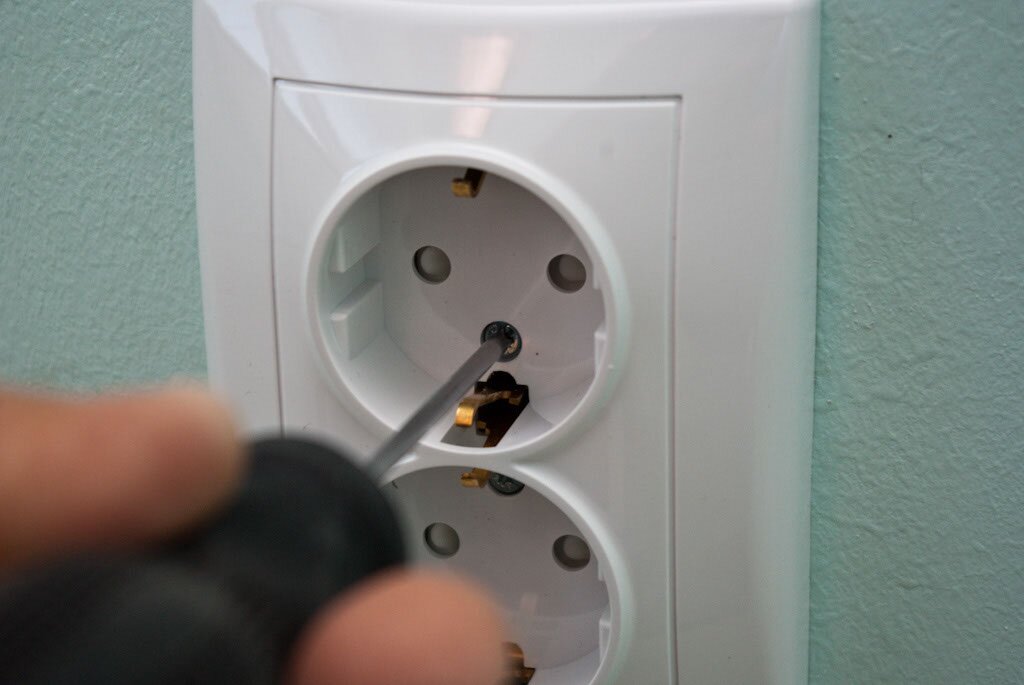
Before connecting the wires, their ends should be thoroughly cleaned. For soldering, acid with tin or rosin is used. The prepared wires must be inserted into the terminals of the socket (switch) and tightly clamped with a screw.
Often, instead of soldering, special crimps are used. They are put on the cable and then clamped with pliers.
Installing switches is no different from installing sockets. The main thing is to install the block correctly. Turning on must be done by pressing the top of the key.
Features of installation in different rooms
The optimal height of sockets and switches depends on the specifics of each room.
Kitchen
This room is characterized by a high degree of humidity, an abundance of evaporation and condensation. A modern kitchen contains many household electrical appliances, some of which are used simultaneously. Therefore, the total load on the network here is quite large.
Connecting sockets and switches, as well as their location in the kitchen, requires special care, especially since the use of tees in such a room is unacceptable.
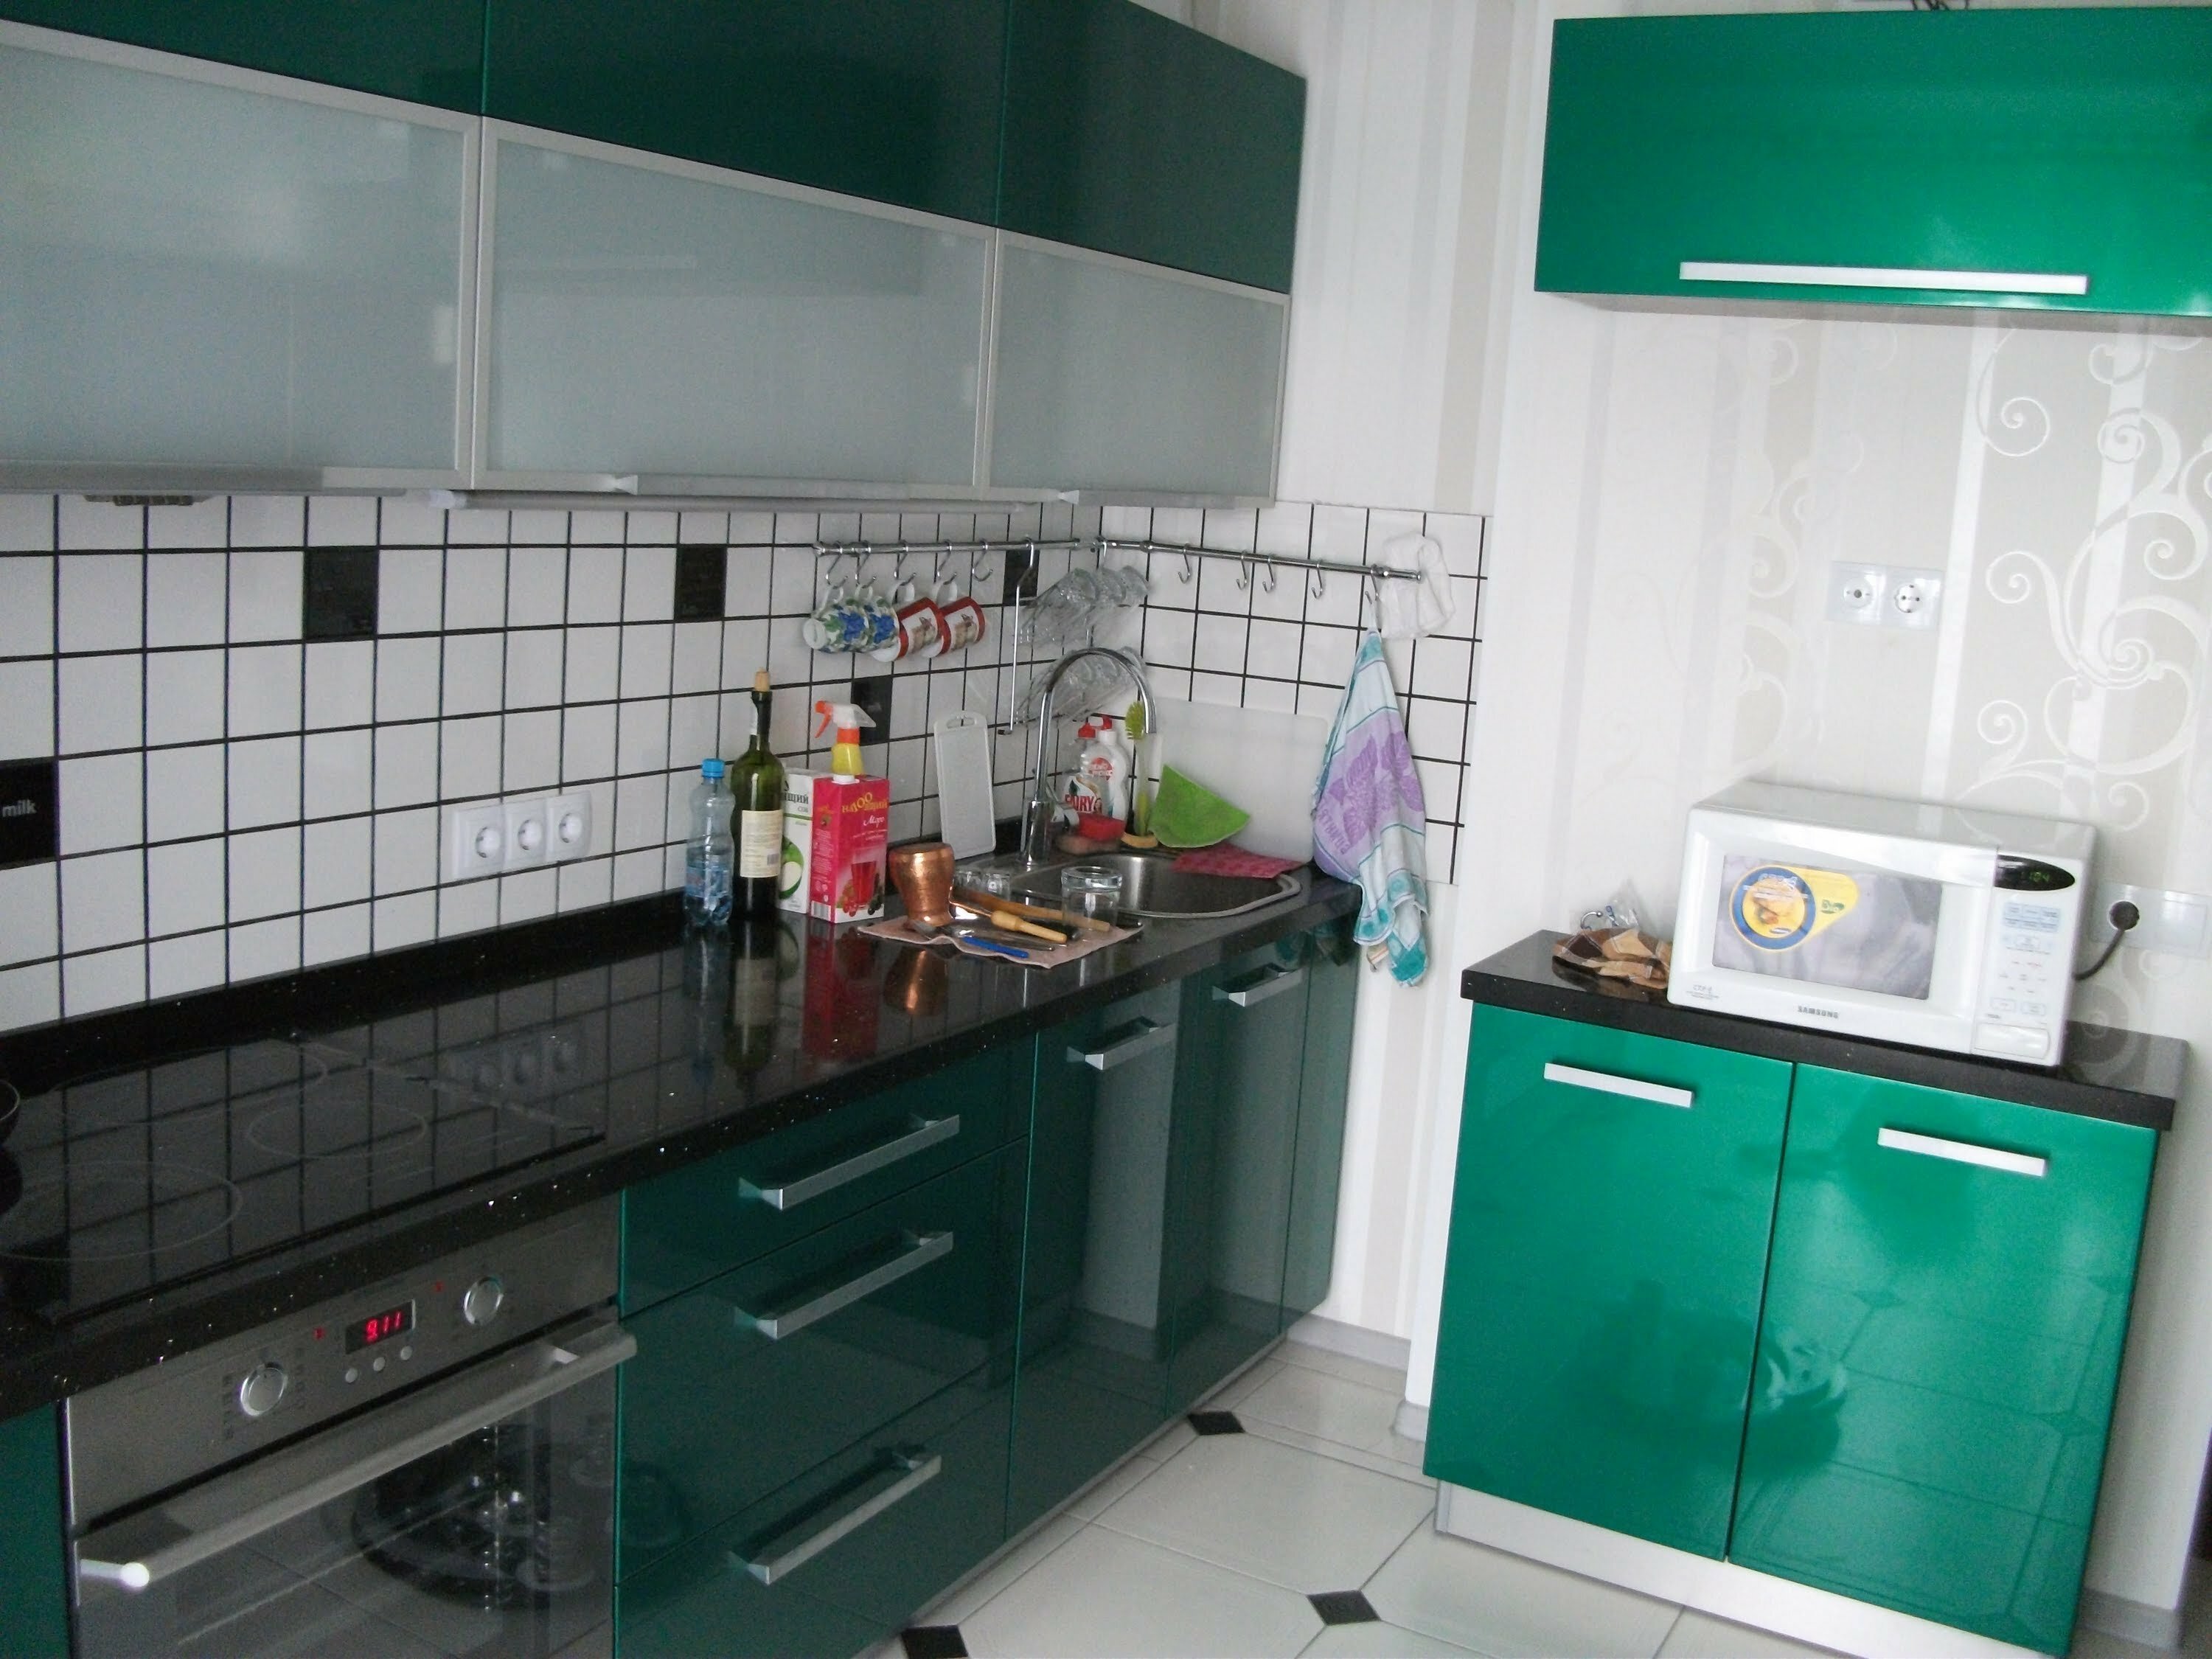
The height of kitchen outlets does not really matter. The main thing is convenience, ease of access and maximum protection from water ingress. Therefore, it is prohibited to place sockets near the sink and hob.
The distance from the outlets to the gas and water pipes and batteries should be at least half a meter.

Bathroom
Ordinary sockets cannot be installed in this room. Devices must be moisture resistant, well protected outside and inside.
To protect the device from moisture, a rubber cap is used. There is a special cover on the outside that prevents water from entering the plug holes.
To connect the moisture-proof socket with its other parts, it is better to use rubber or silicone gaskets.
It is better to install several sockets in the bathroom:
- for a hair dryer and electric razor - near a mirror at a height of about one meter from the floor;
- for a washing machine or towel dryers - at a height of 0.5-0.6 meters from the floor.
Children's
In a children's bedroom, a high location of household electrical fittings (1.5-1.7 meters) is preferable. In this case, the devices will be inaccessible to inquisitive children, and older children will not click and turn on the plugs unnecessarily - reaching high and inconveniently.
Long corridor and stairs
Here switches must be installed at the beginning and at the end. One socket in the corner near the baseboard will be enough - it can be used to connect a shoe dryer or guests’ phones.
Bedroom, living room
Switches should be located at the entrance and near the sofa or bed. In recreation areas, sockets are often installed under the switch - this will allow you to change the bright overhead lighting to dim light from a floor lamp at any time.
In the living room you will need sockets to connect a TV and TV tuner. The height is determined taking into account the location of the equipment. The TV screen should completely hide the cord.
Two European sockets must be installed in each wall. They are used for floor lamps and small household appliances.
In the bedroom, sockets are installed on both sides of the bed and near the dressing table.
Additional sockets
Near the workplace with a computer you will need at least 5 sockets.
The socket for connecting the air conditioner is located at a distance of 0.3 meters from the ceiling.
If you decide to replace the wiring in your apartment with your own hands, then the question: how to properly install sockets and switches will be very relevant for you. After all, these two types of installation devices are the main ones in the electrical network of an apartment or residential building. Therefore, their correct installation guarantees you the durability and reliability of almost all electrical appliances in the house.
Before proceeding directly to installation, we need to decide on a number of parameters. First of all, this is the number of sockets and switches, and their location. To do this, you need to know the standards for this type of electrical equipment.
Standards for installing sockets
One of the main standards for installing sockets is the ease of their maintenance. It is this factor that you should be guided by first. In addition, when using hidden wiring, recessed sockets should be used and, accordingly, vice versa when using open wiring.

So:
- According to clause 6.1.24 of the PUE(Electrical Installation Rules), all sockets must have a grounding contact. It must be supplied with a separate flexible wire and must not, under normal conditions, serve as a current conductor.
- According to paragraph 12.30 of VSN 59 – 88, sockets should not be placed under or above sinks, in kitchen cabinets and other places that are inconvenient for use.
- In addition, according to clause 7.2 of VSN 59 – 88, sockets in the kitchen and living areas must be powered from different groups. If a separate socket group for the kitchen is not planned, then the instructions allow you to connect the sockets to the lighting network.
- Clause 7.1.37 PUE prohibits the installation of sockets in bathhouses, bathtubs and restrooms. But for residential premises an exception has been made with the possibility of installing such electrical appliances when they are connected through an RCD (Residual Current Device) machine.
- According to clause 7.1.37 of the PUE, sockets should be placed as far as possible from grounded parts. These include various pipelines, sinks and similar utility networks. But this is only a recommendation, which is not mandatory in residential premises.
Standards for installing switches
The standards for installing switches are also not very strict and quite logical. Therefore, these requirements should not cause you any special problems.

So:
- First of all, it should be remembered that all switches, according to clause 6.5.27 of the PUE, must be installed in phase wire circuits. Installation of switches in zero circuits is strictly prohibited.
- Clause 7.1.38 of the PUE prohibits the installation of switches in bathrooms, toilets, steam rooms and washing rooms. In addition, installing switches in attics is prohibited. Switches for such premises should be located in front of the entrance.
- Clause 7.1.40 of the PUE requires installing switches at a height of 1.5 meters above floor level or using switches controlled by a cord. In this case, the switches should be located at the entrance to the room from the side of the door handle.
- According to clause 6.3.4 of the PUE, external lighting switches can be used when no more than 20 lamps are turned on simultaneously. If a larger number of lamps are switched, then it is necessary to install an automatic switch.
- Switch sockets for external installation must have the appropriate design. Usually IP44 is sufficient for this, but in some cases it is necessary to install switching devices with IP. First of all, this applies to rooms in which gas or liquid fuel boilers are installed.
Installation of switches and sockets
After selecting the number and location of switches and sockets, you should select the nominal parameters of the wire and the necessary switching equipment.
We have already described this process more than once in other articles on our site, so we will not dwell on it. We’d better take a closer look at the installation of switches and sockets.
- As you know, there are two ways to install wiring - open and hidden. With the open installation method, we don’t need to cut anything, and the switch and socket boxes are mounted directly on the wall. But in apartments and brick houses hidden wiring is often used, the installation features of which we will try to understand.
- The process of gating walls and installing recesses for embedded boxes of switches and sockets is a dusty, time-consuming and labor-intensive process. Of course, modern technologies make it possible to do it quite quickly and without any problems. But not everyone has a wall cutter and other special equipment, the price of which does not allow purchasing it for personal use.

- Based on this, we advise you to purchase a special attachment for a hammer drill, which will make it much easier for you to make grooves. Although, frankly speaking, this attachment will not make the work much easier when chipping hard concrete walls. In this case, you often have to first mark the path with a drill, and only then use the attachment.
- But for mounting recesses under embedded boxes of switches and sockets, there is a fairly good option for a special attachment. It copes with not very dense concrete walls and brickwork just like a charm. With dense concrete you will have to tinker, usually by first going through the entire circumference with a drill.
- But if you are installing sockets or switches in drywall, then there is no need to rush. Of course, the version of the hammer drill attachment for concrete surfaces will easily cope with this task. But the edges will be torn and the surface may be damaged. Therefore, before installing sockets and switches in drywall, inquire about special drill attachments. They usually come in sets of circles with different diameters. Such a thing will always come in handy on the farm.
- But switches and sockets for outdoor installation in most cases have an open design. This is due to the fact that with a hidden installation method it is quite difficult to ensure their moisture and dust resistance.
Connection diagrams for switches and sockets
After completing all the preparatory activities, at the very last stage of installation, you can begin the process of connecting our electrical points. In our article we will look at various options for connecting and combining connections for sockets and switches.
Connecting the socket
The simplest connection is to install a socket. There is practically no specific knowledge required here. The main thing is to follow our advice and not be a hero.
Pay attention! Here and below, all connections are made only after the voltage has been removed. To do this, you can turn off the supply circuit breaker of the group in which you are to work, and those adjacent to it in the distribution boxes. But to be safe, it is better to turn off the power to the entire apartment or house.
- To connect the socket we should use a three-core wire. In which one core (yellow-green) is intended to perform protective grounding. One wire (blue) is intended for connecting the neutral contact and the last (any color) is for connecting the phase contact.
- To connect the socket, we install a phase and neutral wire to its power terminals. We connect the protective conductor to the corresponding contact, which is usually located separately or can be identified visually.
Pay attention! In conventional sockets, the location of the phase and neutral wires does not matter. Although usually the left contact is used as a phase contact, and the right one as a neutral contact. But in sockets for connecting an electric stove and other powerful or critical electrical equipment, this can be fundamental. You can learn about the connection principles in this case in other articles on our website.
- Now we perform the same actions in . We connect the corresponding wire going to the socket to the phase group wire. We do the same with the neutral and protective wires. This completes the connection of the outlet to the electrical network.

Connecting multiple outlets
The installation diagram of sockets and switches often involves the placement of several devices side by side. In this case, to save effort on gating and wires, it is easier to connect one from the other.
In this case, such a connection diagram must be taken into account when calculating the wire cross-section.
- In order to make such a joint connection of two or three sockets, we connect the first socket in the same way as stated in our instructions above.
- After this, we just need to make jumpers from the power contacts of the second socket to the power contacts of the first socket.
- We do the same with the protective wire.
- If you plan to connect a third, fourth, and so on socket, then we perform a similar operation with all of them.
Pay attention! When connecting three or more outlets, it is advisable to connect the central one from the distribution box. This will allow a minimum number of sockets to be damaged in the event of a wire burnout.
Switch connection
Connecting a switch is not much more complicated, and the video on the pages of our website is a clear confirmation of this. To connect it, we need only two wires, because the protective wire is usually not connected to switches. It connects directly to the lamp.

- To make the connection, we need to decide on the phase and neutral wires in the junction box. This is easy to do if you adhered to the PUE standards when installing the group wire.
- From the neutral wire in the junction box we connect one of the terminals of the lamp.
- We connect the input of our switch from the phase wire in the distribution box. It is usually located at the top. If it is a two- or three-pole switch, then there is one, and on the opposite side there are two or three terminals, respectively.
- Then we connect the wire to the switch terminal and connect it to the lamp. Here we connect it to the second terminal of the lamp. If we have a two- or three-pole switch, then we perform the same operations for other lamps. If we have one chandelier powered from a two-pole switch, then it should have three terminals. We connect the lead from the switch to the third contact of the chandelier.
Pay attention! When connecting a chandelier with two operating modes, it is important to correctly identify one neutral terminal and two phase terminals. Usually the zero pin is visually separated and has an appropriate marking or color. If you connect the phase wire to this wire, and the zero wire to any other, then your chandelier will shine in only one mode.
Connecting the socket and switch
There is also a diagram for installing a socket and switch. It allows you to place two of these installation devices side by side with . This allows you to save wire and relieve the distribution box from a large number of connections.

- To make such a connection, in the first stage we connect the socket using the principles described above.
- Now we connect the supply wire to the phase contact of the socket, to the switch input.
- And we lay the wire from the switch terminal and connect it to one of the lamp terminals.
- If the lamp that turns on the switch is located near the installation site of the switch, then the neutral and protective terminals from the socket can be connected directly to the lamp. If it is sufficiently remote, then we connect the neutral and protective wires from the distribution box, as in the conventional connection of a switch.
Pay attention! There is no reverse installation diagram for the socket switch. This is due to the fact that the neutral and protective wires are not connected to the switch. In this regard, it is impossible to connect the socket from the switch.
Conclusion
So, we have considered all possible connection diagrams for switches and sockets. And the given diagrams should help you in your work.
It is worth noting that outdoor sockets and switches have the same connection diagram. Their only difference is the degree of protection from moisture and dust.
Related articles
 The best amulets against the evil eye and damage Amulet against the evil eye with hands for children
 How to read the Psalter correctly
 Delicious dishes with sausages
 A glimpse of Bella. Romantic chronicle. A glimpse of genius. Messerer about Akhmadulina Boris Messerer glimpse of Bella romantic chronicle
 I dreamed that I was sailing on a boat on the river
 How to cook beef entrecote in a frying pan
 About the company Foreign language courses at Moscow State University
 Which city and why became the main one in Ancient Mesopotamia?
 Why Bukhsoft Online is better than a regular accounting program!
 Which year is a leap year and how to calculate it